
If you are shopping for a new garage door, replacing broken springs, or simply trying to understand how your garage door system works, you have probably asked yourself, what is the difference between torsion and extension springs? While both types of springs perform the same essential job—helping lift and lower a heavy garage door—they operate in very different ways. Those differences affect everything from durability and safety to maintenance, repair costs, and overall performance.
Many homeowners don’t think about garage door springs until something goes wrong. A noisy door, uneven movement, or a door that suddenly refuses to open are all warning signs that should never be ignored. Understanding which type of spring your garage door uses makes troubleshooting easier and helps you decide whether a DIY repair is realistic or if professional repair is the safer option.
In this repair guide, you’ll learn how torsion and extension springs work, the most common warning signs of spring problems, why failures occur, important safety tips before troubleshooting, the tools used during inspection, and a logical step-by-step diagnosis process that helps identify the source of the problem without creating unnecessary safety risks.
Common Signs and Symptoms
Garage door spring problems often develop gradually before complete failure occurs. Recognizing the early warning signs allows homeowners to schedule maintenance or replacement before the door becomes unsafe or stops working entirely. Although torsion and extension springs fail differently, many symptoms overlap.
Common signs include:
- Garage door feels unusually heavy when lifted manually.
- Door opens only partway before stopping.
- Garage door closes too quickly.
- Opener struggles or reverses unexpectedly.
- Loud bang from the garage, often caused by a spring breaking.
- Crooked or uneven door movement.
- Visible gaps in a torsion spring.
- Hanging or stretched extension springs.
- Excessive vibration during operation.
- Squeaking, grinding, or popping noises.
- Garage door opener works, but the door barely moves.
- Frayed safety cables near extension springs.
Practical example:
A homeowner notices the garage door opener humming normally, but the door rises only a few inches before stopping. During inspection, they discover a two-inch gap in the torsion spring mounted above the door. This gap indicates the spring has broken and can no longer counterbalance the weight of the door.
Another common situation involves extension springs. One side of the garage door rises faster than the other, causing the door to tilt. Inspection may reveal one extension spring has stretched beyond its normal length, reducing lifting force on that side.
These symptoms should never be ignored because garage doors typically weigh between 130 and 400 pounds, depending on their size and construction. The spring system is what makes that weight manageable.
How the Garage Door Spring System Normally Works
Understanding normal operation makes it much easier to diagnose problems accurately. Although torsion and extension springs use different mechanical principles, both are designed to store energy and release it gradually to offset the weight of the garage door.
A garage door is far heavier than most people realize. Without springs, lifting it manually would require significant effort, and most electric openers would be unable to move it.
A torsion spring works by twisting.
When the garage door closes:
- The spring winds tighter.
- Mechanical energy is stored as torque.
- The shaft rotates under controlled tension.
When the garage door opens:
- The spring slowly unwinds.
- Stored energy rotates the shaft.
- Cable drums pull lifting cables.
- The garage door rises smoothly.
An extension spring works differently.
Instead of twisting, it stretches along the horizontal tracks.
When the door closes:
- The spring extends.
- Energy is stored through stretching.
When the door opens:
- The spring contracts.
- Pulleys transfer force to lifting cables.
- The door is pulled upward.
Both systems are carefully matched to the weight of the garage door. A spring that is too strong or too weak creates balance problems that affect door movement and shorten the life of the opener.
Modern garage doors increasingly use torsion springs because they provide:
- Smoother operation
- Better balance
- Longer service life
- Improved safety
- Reduced maintenance
Extension springs are still common on older homes and smaller garage doors because they generally cost less to install.
Most Common Reasons This Problem Happens
Garage door springs are wear items. Like tires on a vehicle, they eventually wear out through normal use. However, several factors influence how quickly they fail and whether troubleshooting leads to a simple adjustment or complete replacement.
Normal Wear and Cycle Fatigue
The most common reason garage door springs fail is simple use over time. Every complete opening and closing counts as one operating cycle.
Most standard springs are rated for:
- Around 10,000 cycles
- Premium models may exceed 20,000 to 50,000 cycles
A family that uses the garage door six to eight times daily can reach the end of a standard spring’s life in only several years.
Typical symptoms:
- Door becomes heavier
- Slower movement
- Sudden spring breakage
- Loud snapping sound
Inspection tip:
Look for a visible separation in a torsion spring or permanent stretching in an extension spring.
Rust and Corrosion
Moisture causes rust, especially in humid climates or garages without climate control.
Rust increases friction between the spring coils and weakens the steel over time.
Common warning signs include:
- Orange discoloration
- Squeaking
- Rough movement
- Reduced flexibility
Regular lubrication helps reduce corrosion and extends spring life.
Poor Maintenance
Many homeowners maintain their garage door opener but overlook the spring system.
Lack of preventive maintenance allows dirt, corrosion, and worn hardware to accumulate.
Signs include:
- Dry coils
- Noisy operation
- Increased opener strain
- Jerky movement
Routine visual inspection every few months helps identify problems before they become expensive repairs.
Incorrect Spring Size
A replacement spring must match the weight and dimensions of the garage door.
Using the wrong spring causes:
- Improper balance
- Uneven lifting
- Premature spring wear
- Opener overload
Diagnosis involves checking whether the door stays balanced when disconnected from the opener. If the door drifts quickly upward or downward, the spring may not be correctly matched.
Damaged Cables or Pulleys
Although the spring often receives the blame, worn cables and pulleys may produce similar symptoms.
Extension spring systems rely heavily on pulleys.
Problems include:
- Frayed lifting cables
- Bent pulleys
- Misaligned rollers
- Cable slipping
These issues reduce lifting efficiency and place extra stress on the springs.
Improper Installation
Incorrect installation creates uneven spring tension and unnecessary stress throughout the garage door system.
Possible symptoms include:
- Door opens crooked
- Excessive vibration
- Premature spring failure
- Loose hardware
This problem frequently appears after DIY installations where spring tension was not adjusted correctly.
Safety Precautions Before Troubleshooting
Garage door springs store tremendous mechanical energy. Whether you are dealing with torsion or extension springs, safety must always come first. Many serious injuries occur because homeowners underestimate the force stored inside these components.
Before beginning any inspection:
- Disconnect electrical power to the garage door opener.
- Pull the emergency release only when the door is fully closed whenever possible.
- Keep children and pets away from the work area.
- Wear safety glasses and durable work gloves.
- Use a stable ladder placed on level ground.
- Never stand directly beneath a partially supported garage door.
- Do not loosen torsion spring set screws without proper winding bars and training.
- Never remove extension springs unless the door is fully supported.
- Inspect safety cables before touching extension springs.
- Replace damaged components with matching parts rather than improvised substitutes.
DIY inspection is generally safe, but DIY spring replacement is not recommended for most homeowners, especially with torsion springs. Improper handling can release stored energy suddenly, causing severe injury or property damage.
If the spring is visibly broken, resist the temptation to operate the opener repeatedly. Doing so can damage the motor, bend door panels, or snap lifting cables.
Tools Required
Before troubleshooting, gather the proper tools. Most diagnostic work involves visual inspection rather than disassembly.
| Tool | Purpose |
|---|---|
| Flashlight | Inspect springs, cables, and hardware in dim lighting |
| Safety glasses | Protect eyes from debris or broken metal |
| Work gloves | Improve grip and reduce minor injuries |
| Step ladder | Safely reach overhead components |
| Tape measure | Measure spring length and door movement |
| Marker | Mark reference positions during inspection |
| Adjustable wrench | Check accessible hardware for looseness |
| Garage door lubricant | Reduce friction during maintenance inspection |
| Smartphone camera | Photograph damaged parts for comparison or professional evaluation |
Step-by-Step Troubleshooting Guide
A systematic diagnosis helps separate spring problems from opener issues, cable failures, or track alignment problems. Work through each step in order before assuming the springs need replacement.
1. Observe Door Movement
Watch the garage door complete one opening and closing cycle.
Why it matters:
Movement patterns often reveal whether the issue involves balance, cables, tracks, or springs.
Expected result:
The door should move smoothly without jerking or tilting.
What to do next:
If movement is uneven, continue with a visual spring inspection.
2. Inspect Both Springs
Examine every visible coil carefully.
Why it matters:
Broken torsion springs usually show a noticeable gap, while extension springs may appear permanently stretched or deformed.
Expected result:
Springs should appear uniform without breaks, distortion, or excessive rust.
What to do next:
If damage is visible, avoid further operation and arrange replacement.
3. Check the Lift Cables
Inspect both lifting cables from top to bottom.
Why it matters:
Damaged cables can mimic spring failure.
Expected result:
Cables remain tight, straight, and free of fraying.
What to do next:
If cables are damaged, discontinue operation until repairs are completed.
4. Test Door Balance
Disconnect the opener using the emergency release and carefully lift the door halfway.
Why it matters:
Proper spring tension keeps the door balanced.
Expected result:
The door should remain nearly stationary.
What to do next:
If the door falls rapidly or rises on its own, spring adjustment or replacement is likely needed.
5. Listen for Unusual Noises
Operate the door manually if it is safe to do so.
Why it matters:
Grinding, popping, or squealing often indicate worn springs, pulleys, or bearings.
Expected result:
Movement should be relatively quiet.
What to do next:
Lubricate approved moving parts if dry. Persistent noises require closer inspection.
6. Examine the Opener
Verify that the opener is not causing the issue.
Why it matters:
A weak opener may appear to have spring problems when the motor itself is failing.
Expected result:
The opener should operate smoothly when the door is properly balanced.
What to do next:
If the opener struggles even with a balanced door, investigate the opener separately.
Quick Diagnosis Table
| Symptom | Possible Cause | Recommended Solution |
|---|---|---|
| Door feels unusually heavy | Broken or worn spring | Inspect springs and replace if damaged |
| Loud bang from garage | Broken torsion spring | Stop using the door and schedule replacement |
| Door rises unevenly | Weak extension spring or cable issue | Inspect springs, pulleys, and lift cables |
| Door closes too fast | Loss of spring tension | Replace worn or broken springs |
| Opener strains during lifting | Weak spring or incorrect spring size | Test door balance and inspect spring condition |
| Visible gap in spring | Broken torsion spring | Professional spring replacement is recommended |
| Stretched spring with uneven coils | Worn extension spring | Replace the spring and inspect safety cables |
| Squeaking during operation | Dry or lightly corroded springs | Lubricate approved moving components and inspect for wear |
How to Fix Each Common Cause
Now that you’ve identified the likely cause of the problem, the next step is choosing the correct repair. Some garage door cable issues are safe for homeowners to address, while others involve high-tension springs that require specialized tools and experience. Always prioritize safety over convenience.
Replace Worn or Frayed Cables
Frayed cables should always be replaced before they break. Even a few broken strands significantly reduce the cable’s strength.
How to fix it:
- Purchase replacement cables that exactly match your garage door’s specifications.
- Replace both lift cables at the same time, even if only one shows damage.
- Verify the replacement cables match the original diameter, length, and end fittings.
- Test the door balance after installation.
DIY or professional?
- Extension spring systems: Sometimes suitable for experienced DIYers.
- Torsion spring systems: Professional repair is strongly recommended because the springs remain under extreme tension.
Replace Rusted or Corroded Cables
Surface rust eventually weakens the steel and increases friction during operation.
Repair steps:
- Inspect both cables for corrosion.
- Replace cables showing heavy rust or pitting.
- Clean nearby hardware before installing new cables.
- Reduce moisture inside the garage by improving ventilation if condensation is common.
Replacing rusted cables early prevents unexpected failure during daily use.
Correct Cable Drum Problems
A cable that repeatedly slips off the drum usually indicates another issue rather than a defective cable.
Common causes include:
- Loose drum set screws
- Crooked torsion shaft
- Uneven spring tension
- Incorrect cable routing
Because correcting drum alignment requires releasing spring tension, this repair is generally best left to a professional technician.
Repair or Replace Broken Springs
If a spring has broken, installing new cables alone will not restore proper operation.
Signs of a broken spring include:
- A visible gap in the torsion spring
- Extremely heavy garage door
- Loud bang before failure
- Loose cables on one or both sides
Spring replacement should always include checking:
- Cable condition
- Cable drums
- Bearings
- Bottom brackets
- Door balance
Many technicians recommend replacing aging cables whenever new springs are installed because both components experience similar wear.
Repair Track and Roller Problems
If the door binds during operation, inspect the rollers and tracks before replacing cables.
Possible repairs include:
- Tightening loose track brackets
- Cleaning debris from tracks
- Replacing cracked rollers
- Lubricating metal rollers and bearings with garage door lubricant
Never lubricate the cables themselves unless recommended by the manufacturer, as excess lubricant can attract dirt.
Buy the Correct Garage Door Cables
One of the most common homeowner mistakes is ordering replacement cables based only on length.
Instead, verify:
- Door height
- Door weight
- Spring system (torsion or extension)
- Cable diameter
- Cable construction
- Loop or stop-end design
- Manufacturer recommendations
When in doubt, use the existing cable’s specifications or consult the garage door manufacturer’s parts list instead of guessing.
Advanced Troubleshooting
If replacing worn components doesn’t solve the problem, a less common issue may be affecting the garage door system. These problems often develop gradually and are easy to overlook during a basic inspection.
Check for the following:
Bent Torsion Shaft
A slightly bent shaft can cause uneven cable winding.
Symptoms include:
- One cable repeatedly loosens
- Uneven lifting
- Cable jumping grooves
Inspect the shaft while slowly operating the door manually. Excessive wobble usually indicates damage.
Worn Bearings
Center and end bearings support the torsion shaft.
Signs of worn bearings:
- Grinding noises
- Shaft vibration
- Uneven cable tension
- Rough door movement
Replacing worn bearings often restores smooth operation and reduces stress on the cables.
Incorrect Spring Size
Sometimes previous repairs included installing the wrong springs.
Warning signs include:
- Door won’t stay halfway open
- Opener struggles
- Frequent cable problems
- Premature spring wear
Proper spring sizing requires matching the spring to the door’s weight.
Bottom Bracket Damage
The bottom brackets anchor the lift cables.
Inspect for:
- Bent brackets
- Rust
- Loose fasteners
- Cracks around mounting holes
Never remove bottom brackets while springs are under tension.
Garage Door Opener Problems
Although the opener doesn’t lift the door directly, repeated opener strain can reveal balance problems.
Inspect for:
- Force settings that are too high
- Travel limits set incorrectly
- Worn drive gear
- Chain or belt issues
A properly balanced door should move smoothly even with the opener disconnected.
When Repair Is Not Worth It
In some situations, replacing a cable alone is not the most cost-effective solution. If several major components are worn at the same time, investing in a larger repair—or even a new garage door system—may provide better long-term value.
Replacement often makes more sense when:
- The door is more than 20 years old.
- Springs, cables, rollers, and bearings all show significant wear.
- Replacement parts are no longer available.
- The door has structural damage from impact or corrosion.
- Repairs have become frequent over the past few years.
- The opener is undersized for the door.
If the garage door itself remains in good condition, replacing all moving hardware as a complete system is often more reliable than repairing one worn part at a time.
Preventive Maintenance Tips
Garage door cables usually last much longer when the entire system receives regular maintenance. A simple inspection every few months can help you catch small problems before they become expensive repairs.
Good preventive maintenance includes:
- Visually inspect cables every three to six months.
- Look for broken strands or rust.
- Keep tracks clean and free of debris.
- Lubricate rollers, hinges, and bearings with garage door lubricant.
- Test door balance twice each year.
- Tighten loose hardware.
- Replace worn rollers promptly.
- Keep moisture away from exposed steel components.
- Listen for new noises during operation.
- Schedule professional inspections every few years for heavily used doors.
These simple habits reduce wear on cables and improve the lifespan of the entire lifting system.
Common Mistakes to Avoid
Many garage door cable failures become worse because of avoidable mistakes. Understanding these errors can save time, money, and reduce the risk of injury.
Common mistakes include:
- Buying cables based only on length.
- Replacing only one cable instead of both.
- Ignoring early signs of fraying.
- Continuing to use the opener after a cable comes off the drum.
- Attempting torsion spring repairs without proper tools.
- Using general-purpose rope or wire as a temporary replacement.
- Forgetting to inspect springs when replacing cables.
- Overlooking damaged rollers or tracks.
- Skipping door balance testing after repairs.
- Delaying repairs until the cable breaks completely.
Avoiding these mistakes helps maintain safe and reliable garage door operation.
When to Call a Professional
Some garage door maintenance tasks are well within the abilities of careful homeowners. However, repairs involving high-tension components should not be treated as DIY projects.
Call a professional if:
- A torsion spring is broken.
- The cable has come completely off the drum.
- The door is crooked or stuck halfway open.
- Bottom brackets require removal.
- The torsion shaft needs adjustment.
- The door weighs too much to move safely.
- Multiple components have failed simultaneously.
- You cannot identify the correct replacement cable.
Professional technicians have specialized winding bars, measuring equipment, and experience that significantly reduce the risk of injury during complex repairs.
Estimated Repair Costs
The following estimates represent typical residential garage door repair costs. Actual prices vary depending on your location, door size, parts, and labor rates.
| Repair | Estimated Cost | DIY or Professional |
|---|---|---|
| Replace lift cables | $100–$250 | Professional recommended |
| Extension spring cable replacement | $40–$120 | Experienced DIY or Professional |
| Torsion spring replacement | $180–$450 | Professional |
| Replace cable drum | $120–$300 | Professional |
| Roller replacement | $80–$220 | DIY (basic) or Professional |
| Track alignment | $125–$300 | Professional |
| Bearing replacement | $120–$250 | Professional |
| Complete garage door tune-up | $80–$200 | Professional |
Frequently Asked Questions
1. Which garage door cables should you buy?
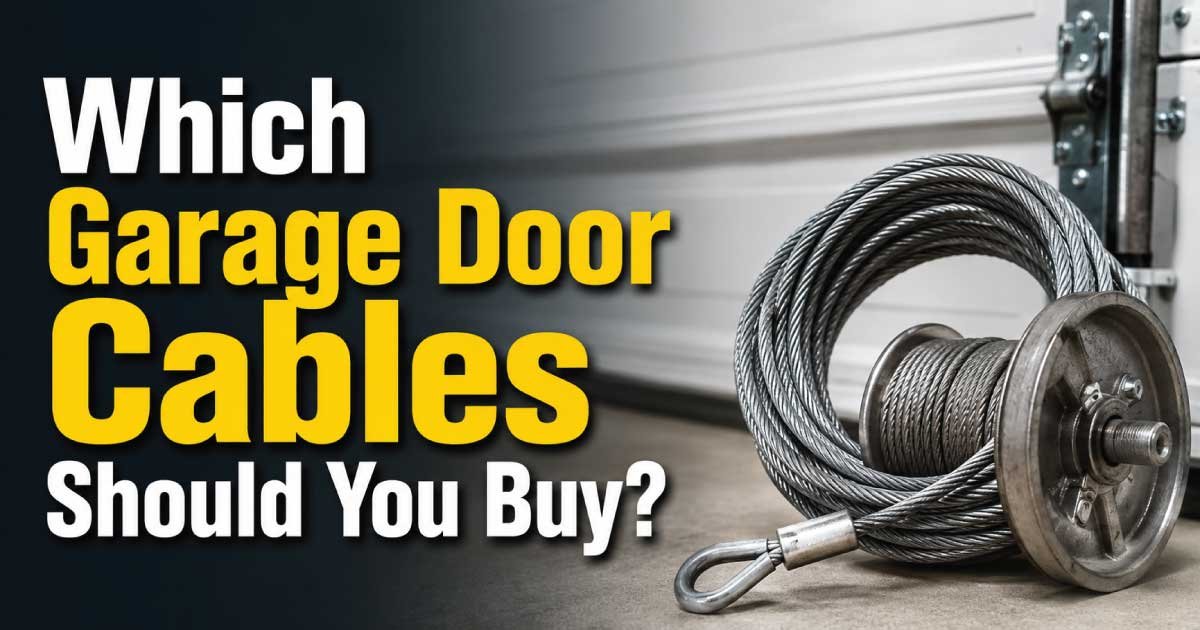
You should buy garage door cables that exactly match your door’s height, weight, spring system, cable diameter, and end fittings. Using the manufacturer’s specifications is the safest approach because even small differences in cable size or construction can affect balance and performance.
2. Can I replace only one garage door cable?
Replacing only one cable is not recommended. Both cables experience similar wear over time, so installing a new cable beside an old one can create uneven lifting and shorten the life of the remaining cable. Replacing both together provides better balance and reliability.
3. Are all garage door cables the same?
No, garage door cables are not universal. They differ in length, diameter, construction, end fittings, and weight capacity. Selecting the wrong cable can cause poor operation, increased wear, or unsafe conditions, making it important to match the original specifications.
4. How long do garage door cables usually last?
Garage door cables typically last between 8 and 15 years, depending on usage, maintenance, humidity, and door weight. Homes that use the garage as the primary entrance may wear out cables faster because the door completes more opening and closing cycles each day.
5. Can I operate my garage door with a broken cable?
No, you should not operate a garage door with a broken cable. Continuing to use the opener can damage the springs, tracks, rollers, and opener itself while also creating a serious safety hazard if the door becomes unbalanced or falls unexpectedly.
6. How do I know if my garage door cable is the wrong size?
A cable that is the wrong size may cause uneven lifting, excessive slack, improper drum winding, or difficulty balancing the door. Comparing the replacement cable to the manufacturer’s specifications is the most reliable way to confirm proper sizing.
7. Should garage door cables be lubricated?
Garage door cables usually do not require lubrication. Most manufacturers recommend lubricating rollers, hinges, bearings, and springs instead. Applying lubricant directly to cables can attract dirt and debris, which may accelerate wear over time.
8. What causes garage door cables to snap?
Garage door cables most commonly snap because of normal wear, corrosion, excessive friction, damaged springs, or incorrect cable installation. Regular inspections help identify fraying and rust before complete failure occurs, reducing the chance of sudden breakdowns.
9. Is it safe to replace torsion spring cables myself?
Replacing torsion spring cables is generally not considered safe for beginners. The springs store a significant amount of energy, and improper handling can cause severe injuries. Unless you have the proper tools and training, professional service is the safest option.
10. How can I make garage door cables last longer?
You can extend cable life by inspecting them regularly, replacing worn rollers, keeping tracks clean, maintaining proper door balance, reducing moisture exposure, and scheduling periodic professional maintenance. Caring for the entire garage door system reduces unnecessary stress on the cables.
Final Thoughts
Choosing which garage door cables should you buy is about much more than finding a cable that looks similar to the old one. The correct replacement must match your garage door’s size, weight, spring system, and manufacturer specifications to ensure safe, reliable operation. Taking the time to inspect the entire lifting system—including springs, drums, rollers, and tracks—can also reveal underlying issues that would otherwise shorten the life of new cables.
For homeowners, regular inspections and preventive maintenance are the best ways to avoid unexpected cable failures. Replacing frayed or corroded cables early, keeping the door properly balanced, and addressing worn components promptly can save money and reduce the risk of more serious repairs. While basic inspections and maintenance are often suitable as DIY tasks, repairs involving torsion springs or high-tension cables should be handled by a qualified professional. By choosing the right parts and following safe repair practices, you can keep your garage door operating smoothly, extend the lifespan of its components, and maintain a safer home for years to come.

Engineer Ali Usman is a professional garage door expert and author at FixFasty, with over 10 years of hands-on experience in garage door systems and mechanical maintenance. He writes clear, step-by-step guides on garage door repairs, parts, and safety practices, helping homeowners fix problems correctly and maintain smooth, secure, and long-lasting garage door performance.