
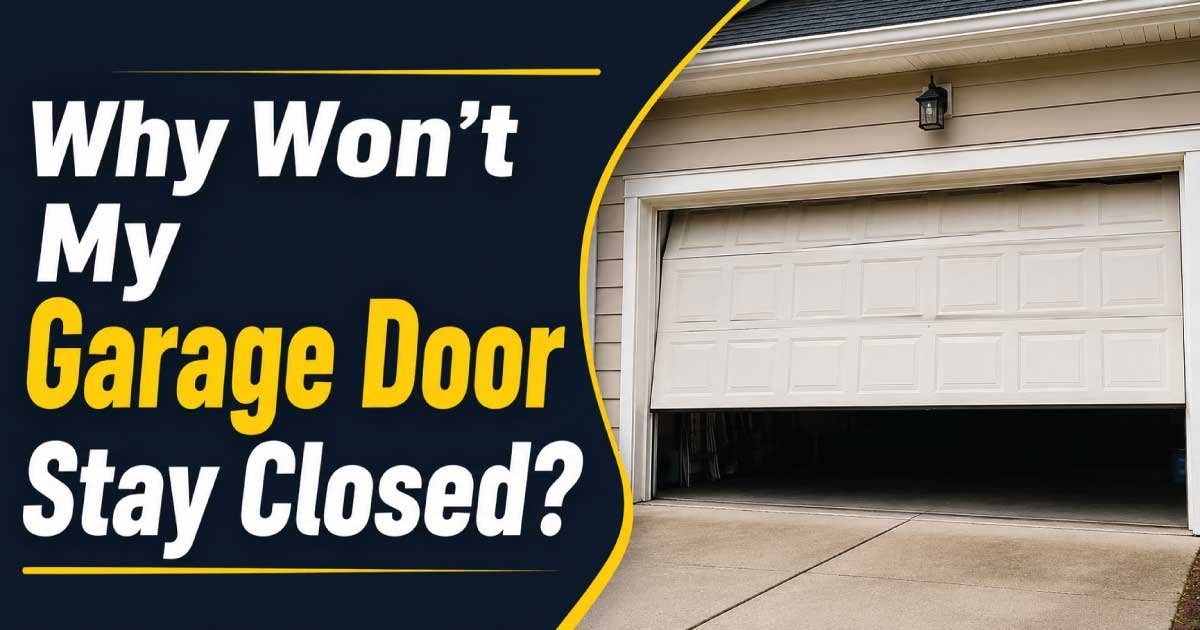
A garage door that refuses to stay closed is more than a daily inconvenience. It can leave your home vulnerable to theft, pests, bad weather, and unnecessary energy loss. In many cases, the door starts closing normally, reaches the floor, and then immediately reverses. Other times, it won’t close at all unless you keep holding the wall button. While these symptoms can seem alarming, they are often caused by a handful of common issues that homeowners can identify with careful troubleshooting.
The good news is that many garage door problems can be diagnosed without specialized equipment. Understanding how the system works makes it much easier to pinpoint the cause and decide whether a DIY repair is safe or if professional repair is the better choice. In this guide, you’ll learn the most common reasons why a garage door won’t stay closed, how to inspect each component safely, what tools you’ll need, and a logical troubleshooting process that helps eliminate guesswork. By the end, you’ll have a clear path toward restoring reliable operation while avoiding unnecessary repairs and protecting both your garage door system and your family’s safety.
Common Signs and Symptoms
When a garage door develops closing problems, the symptoms can vary depending on the underlying fault. Paying attention to exactly what the door does is one of the fastest ways to narrow down the possible cause. Small differences in behavior often point directly to a specific component that needs inspection.
Common symptoms include:
- The garage door closes completely, then immediately opens again.
- The door stops halfway while closing.
- The opener motor runs, but the door does not remain closed.
- The door only closes when the wall button is held continuously.
- The remote control closes the door inconsistently.
- The opener lights flash after the door reverses.
- The garage door closes unevenly or appears crooked.
- The door feels unusually heavy during manual operation.
- Grinding, squeaking, or clicking noises occur during closing.
- The opener struggles or slows noticeably near the floor.
- The door reverses before touching the ground.
- The door bounces back after making contact with the floor.
These symptoms provide valuable clues during diagnosis. For example, a door that only closes while holding the wall switch often indicates a safety sensor problem, while a door that reverses after fully closing may suggest incorrect travel settings or excessive resistance.
How the Appliance or System Normally Works
Before troubleshooting a faulty garage door, it helps to understand how a properly functioning system operates. Knowing the normal sequence makes it easier to recognize where the closing cycle is failing and why the opener is responding the way it does.
A typical automatic garage door system includes several parts working together:
- Garage door opener motor
- Drive system (chain, belt, or screw drive)
- Torsion or extension springs
- Rollers and tracks
- Hinges
- Safety photo-eye sensors
- Limit switches
- Travel adjustment settings
- Force adjustment settings
- Emergency release mechanism
- Remote controls and wall switch
Here’s what normally happens when you press the remote:
- The opener receives the signal.
- The motor begins pulling or pushing the door.
- Springs help counterbalance the door’s weight.
- Rollers move smoothly inside the tracks.
- Safety sensors monitor for obstructions near the floor.
- The opener stops when the programmed closed limit is reached.
- The motor locks the door in its fully closed position.
Modern garage door openers constantly monitor resistance. If they detect something that resembles an obstacle, they immediately reverse direction to prevent injury or property damage. This important safety feature explains why even a minor mechanical problem can prevent the door from staying closed.
Most Common Reasons This Problem Happens
Garage doors rarely fail without giving warning signs. Most closing problems develop gradually as parts wear, become dirty, lose adjustment, or suffer damage. Understanding the most common causes allows homeowners to inspect the right areas first instead of replacing parts unnecessarily.
Misaligned Safety Sensors
The safety sensors are one of the most common reasons a garage door refuses to stay closed.
Why it happens
The photo-eye sensors must face each other perfectly. Even slight movement from vibration, accidental bumps, or loose mounting brackets can break the invisible safety beam.
Symptoms
- Door starts closing then reverses.
- Flashing opener lights.
- Door closes only when holding the wall button.
How to identify it
- Check whether both sensor lights are illuminated.
- Look for loose brackets.
- Verify the lenses are pointing directly at one another.
- Remove dirt, spider webs, or leaves blocking the beam.
Dirty Sensor Lenses
The sensors may be properly aligned but still unable to communicate because dirt blocks the infrared beam.
Why it happens
Dust, pollen, cobwebs, moisture, or grease gradually accumulate on the lenses.
Symptoms
- Random reversing.
- Inconsistent operation.
- Problem appears worse after storms or windy weather.
How to identify it
Carefully wipe both lenses with a clean microfiber cloth and test the door again.
Incorrect Travel Limits
Garage door openers use travel limits to determine where the fully closed position is located.
Why it happens
Over time, vibration or previous adjustments may cause the limits to shift.
Symptoms
- Door reaches the floor and immediately reverses.
- Door stops before fully closing.
- Door pushes excessively against the floor.
How to identify it
Observe whether the opener continues pushing after the door reaches the ground or reverses immediately upon contact.
Incorrect Force Settings
The opener also measures how much force it takes to move the door.
Why it happens
Improper force adjustment may cause the opener to mistake normal resistance for an obstruction.
Symptoms
- Door reverses randomly.
- Closing speed changes.
- Opener strains before reversing.
How to identify it
Watch whether the motor appears to struggle despite no visible obstruction.
Obstructions in the Door’s Path
Sometimes the problem is exactly what the opener is designed to detect.
Why it happens
Small objects can block the door without being immediately noticeable.
Examples include:
- Garden tools
- Children’s toys
- Gravel
- Ice buildup
- Snow accumulation
- Fallen branches
Symptoms
- Door reverses at the same location every time.
- Visible object beneath the door.
How to identify it
Inspect the entire floor area and both tracks before continuing.
Damaged or Bent Tracks
Tracks guide the rollers smoothly throughout the opening and closing cycle.
Why it happens
Vehicle impacts, loose mounting hardware, or years of wear can bend the tracks.
Symptoms
- Jerky movement.
- Loud scraping noises.
- Door binds at one location.
How to identify it
Visually inspect both vertical tracks for bends, gaps, or loose brackets.
Worn Rollers
Rollers naturally wear after thousands of opening cycles.
Why it happens
Bearings wear out, wheels crack, or lubrication dries up.
Symptoms
- Excessive vibration.
- Grinding noises.
- Uneven movement.
How to identify it
Look for cracked rollers, excessive side-to-side movement, or rollers that no longer rotate freely.
Broken or Weak Springs
Garage door springs carry most of the door’s weight.
Why it happens
Metal fatigue develops after years of repeated use.
Symptoms
- Heavy manual operation.
- Door won’t stay balanced.
- Loud bang heard before the problem started.
How to identify it
Disconnect the opener using the emergency release and carefully lift the door halfway. A balanced door should remain nearly in place.
Safety Precautions Before Troubleshooting
Garage door systems contain heavy moving parts, tightly wound springs, and electrical components. Taking a few minutes to prepare safely reduces the risk of injury and prevents accidental damage during inspection and DIY repair. Never rush into adjustments without understanding which parts can safely be handled by a homeowner.
Follow these safety precautions before beginning:
- Disconnect power to the garage door opener whenever inspecting electrical components.
- Keep children and pets away from the work area.
- Wear safety glasses and work gloves.
- Never place fingers between door sections or rollers.
- Avoid standing directly beneath the door during testing.
- Use a sturdy ladder placed on level ground.
- Do not loosen or remove torsion springs or related hardware.
- Never adjust spring tension without proper training and specialized tools.
- Reconnect power only after all inspections are complete.
- Test the safety reversal system after any adjustment.
Important: Torsion springs store enough energy to cause severe injury. If your troubleshooting points toward a spring problem, stop the repair guide at that stage and contact a qualified garage door technician.
Tools Required
Having the right tools makes troubleshooting faster and helps prevent accidental damage. Most inspections require only basic household tools, while more advanced repairs should be left to trained professionals.
| Tool | Purpose |
|---|---|
| Flashlight | Inspect tracks, rollers, and hardware |
| Microfiber cloth | Clean safety sensor lenses |
| Tape measure | Check sensor height and alignment |
| Step ladder | Reach opener and upper hardware safely |
| Screwdriver set | Tighten brackets and covers |
| Adjustable wrench | Tighten loose bolts and nuts |
| Socket set | Inspect mounting hardware |
| Level | Verify sensor alignment and track position |
| Garage door lubricant | Lubricate rollers and hinges after inspection |
| Safety glasses | Protect eyes during inspection |
| Work gloves | Improve grip and prevent minor injuries |
Step-by-Step Troubleshooting Guide
A systematic approach prevents unnecessary part replacement and makes it easier to isolate the actual fault. Complete each step in order before moving to the next one. Many garage door problems are solved during the first few inspections without requiring major repairs.
1. Observe the Door’s Behavior
Watch one complete closing cycle without interfering.
Why it matters
The point where the door stops or reverses often identifies the affected component.
Expected result
You should know exactly when the problem occurs.
What to do next
Move to the area associated with that symptom.
2. Inspect the Safety Sensors
Examine both photo-eye sensors near the floor.
Why it matters
Sensor problems are among the most common causes of reversing doors.
Expected result
Both indicator lights should remain steady.
What to do next
Clean or realign the sensors if needed.
3. Check for Obstructions
Inspect the floor, tracks, and doorway carefully.
Why it matters
Even small objects can activate the safety reversal system.
Expected result
The entire travel path should be clear.
What to do next
Remove debris and retest the door.
4. Examine the Tracks
Look for bends, dents, or loose mounting brackets.
Why it matters
Damaged tracks increase resistance and affect smooth movement.
Expected result
Tracks should appear straight and securely fastened.
What to do next
Tighten loose hardware or schedule professional repair for damaged tracks.
5. Test Manual Door Movement
Disconnect the opener using the emergency release and lift the door manually.
Why it matters
This separates opener problems from mechanical issues.
Expected result
The door should move smoothly with moderate effort.
What to do next
If the door is heavy or binds, inspect the springs and rollers rather than the opener.
6. Listen During Operation
Operate the opener again while listening closely.
Why it matters
Unusual sounds often reveal worn components before visible damage appears.
Expected result
The opener should run smoothly without grinding or loud popping noises.
What to do next
Investigate any abnormal sounds before making further adjustments.
Quick Diagnosis Table
This quick reference helps match common symptoms with their most likely causes. While it doesn’t replace a complete inspection, it provides a useful starting point for identifying the issue and choosing the next troubleshooting step.
| Symptom | Possible Cause | Recommended Solution |
|---|---|---|
| Door closes then immediately opens | Incorrect travel limit | Adjust travel settings |
| Door only closes while holding wall button | Misaligned or dirty safety sensors | Clean and realign sensors |
| Door stops halfway | Track obstruction or damaged rollers | Inspect tracks and rollers |
| Door feels unusually heavy | Broken or weak spring | Stop using the door and arrange professional repair |
| Flashing opener lights | Safety sensor fault | Check alignment and clean lenses |
| Door reverses before reaching the floor | Obstruction or force setting issue | Remove obstruction and inspect opener settings |
| Loud grinding noises | Worn rollers or damaged hardware | Inspect moving parts and replace worn components |
| Door closes unevenly | Track or roller problem | Inspect alignment and hardware before further operation |
How to Fix Each Common Cause
Now that you’ve narrowed down the likely cause, it’s time to consider the appropriate repair. Some problems are safe for homeowners to handle with basic tools, while others involve heavy components under extreme tension and should always be left to trained technicians. Always disconnect power to the opener before performing any maintenance, and reconnect it only when you’re ready to test the door.
Fix Misaligned Safety Sensors
Safety sensors are designed to stop the door if something is in its path. Even a slight misalignment can interrupt the invisible beam.
DIY Repair Steps
- Turn off power to the garage door opener.
- Loosen the sensor mounting brackets slightly.
- Adjust each sensor until both indicator lights remain solid.
- Tighten the brackets carefully without moving the sensors.
- Clean both lenses with a soft microfiber cloth.
- Restore power and test the door.
If the sensor lights continue blinking after alignment, inspect the wiring for damage or loose connections. Replace damaged sensors if necessary.
Clean Dirty Sensor Lenses
Dirty lenses are one of the easiest problems to fix.
DIY Repair Steps
- Use a dry microfiber cloth to remove dust.
- For stubborn dirt, lightly dampen the cloth with water.
- Never use abrasive cleaners or solvents.
- Dry the lenses completely before testing.
Test the door several times to confirm the issue is resolved.
Adjust Travel Limits
If the opener thinks the floor is higher or lower than it actually is, it may reverse after closing.
DIY Repair Steps
- Locate the travel adjustment controls on the opener.
- Refer to the manufacturer’s instructions for your model.
- Make very small adjustments.
- Test after each adjustment.
- Repeat until the door closes fully without reversing.
Avoid making large adjustments, as this can create new operating problems.
Correct Force Settings
The closing force should be high enough to move the door smoothly but low enough for the safety reversal system to function properly.
DIY Repair Steps
- Locate the force adjustment controls.
- Increase or decrease the force slightly.
- Test the door after each change.
- Verify that the door reverses when a suitable test object is placed beneath it, following the manufacturer’s safety testing procedure.
If repeated adjustments are required, there may be an underlying mechanical issue increasing resistance.
Remove Obstructions
Sometimes the simplest solution is the correct one.
Inspect for:
- Rocks
- Dirt buildup
- Ice
- Leaves
- Snow
- Loose hardware
- Fallen tools
Also inspect inside the tracks for accumulated debris that may interfere with roller movement.
Replace Worn Rollers
Worn rollers create resistance that can trigger the opener’s safety system.
DIY or Professional?
Replacing standard nylon rollers is often manageable for experienced homeowners, but replacing rollers near bottom brackets can be dangerous because those brackets are connected to spring tension.
Signs replacement is needed include:
- Cracked wheels
- Flat spots
- Excessive wobbling
- Seized bearings
Lubricate metal rollers according to the manufacturer’s recommendations. Many nylon rollers with sealed bearings require little or no lubrication.
Repair Bent Tracks
Minor track alignment issues can sometimes be corrected.
If the track is only slightly out of position:
- Loosen the mounting bolts slightly.
- Realign the track using a level.
- Tighten all fasteners securely.
- Test door movement manually.
If the track is severely bent, cracked, or twisted, replacement is the safest solution.
Replace Broken Springs
Do not attempt this repair yourself.
Garage door springs are under tremendous tension and require specialized tools and training.
Common warning signs include:
- Visible gap in a torsion spring
- Door suddenly becomes very heavy
- Opener struggles to lift the door
- Loud bang heard inside the garage
A professional technician should replace both springs if they are installed as a matched pair, since the second spring is often close to the end of its service life.
Advanced Troubleshooting
If the common causes have been ruled out, the problem may involve less obvious mechanical or electrical faults. These issues usually require more careful diagnosis and, in some cases, specialized testing equipment.
Inspect the Garage Door Opener Logic Board
Modern openers rely on an electronic control board.
Possible symptoms include:
- Random operation
- Inconsistent reversing
- Unresponsive remote controls
- Flashing error codes
Check whether your opener displays diagnostic codes and consult the owner’s manual for their meaning.
Check Remote Control Programming
Sometimes the problem isn’t mechanical.
Look for:
- Weak remote batteries
- Lost programming
- Signal interference
- Damaged transmitters
Test the wall button separately from the remote to isolate the issue.
Inspect Wiring Connections
Loose wiring can interrupt communication between sensors and the opener.
Safely inspect:
- Sensor wires
- Wall switch wiring
- Power connections
- Terminal screws
Replace damaged wire sections rather than attempting temporary repairs with tape alone.
Examine the Door Balance
Disconnect the opener and manually lift the door halfway.
A properly balanced door should:
- Stay nearly in position.
- Move smoothly.
- Require only moderate effort.
If it rapidly falls or rises on its own, the spring system likely needs professional adjustment.
Look for Damaged Hinges
Loose or cracked hinges can cause the door sections to shift during operation.
Inspect for:
- Missing screws
- Bent hinges
- Cracks
- Excessive movement
Replace damaged hinges before they affect other components.
Inspect the Bottom Seal
A damaged bottom seal can occasionally create uneven contact with the floor.
Look for:
- Torn rubber
- Debris trapped underneath
- Ice accumulation
- Uneven wear
Although not a common cause by itself, it can contribute to closing problems in combination with incorrect travel settings.
When Repair Is Not Worth It
Not every garage door is worth repairing. As systems age, multiple worn components can make repeated repairs more expensive than replacing the entire system.
Replacement may be the smarter choice when:
- The door has major structural damage.
- Multiple panels are bent or cracked.
- The opener is more than 15–20 years old and replacement parts are difficult to find.
- Springs, rollers, tracks, and cables all require replacement.
- Repair costs approach half the price of a new system.
- The door lacks modern safety features.
- Frequent breakdowns continue despite previous repairs.
Modern garage door systems are generally quieter, more energy-efficient, and equipped with improved safety technology, making replacement a worthwhile long-term investment in many cases.
Preventive Maintenance Tips
Regular maintenance significantly reduces the chances of your garage door developing closing problems. A few simple inspections throughout the year can extend the life of both the opener and the door.
Good preventive maintenance includes:
- Clean the safety sensors every few months.
- Inspect tracks for dirt and debris.
- Tighten loose nuts and bolts.
- Lubricate rollers, hinges, and bearings as recommended by the manufacturer.
- Test the safety reversal system monthly.
- Check the emergency release handle for proper operation.
- Inspect weather seals for damage.
- Listen for new noises during operation.
- Watch for uneven movement.
- Schedule a professional inspection every few years, especially for older systems.
Avoid applying grease to the tracks unless the manufacturer specifically recommends it. In most cases, tracks should remain clean and dry to allow the rollers to move freely.
Common Mistakes to Avoid
Many garage door problems become worse because homeowners unintentionally create additional issues during troubleshooting.
Avoid these common mistakes:
- Ignoring flashing opener lights.
- Adjusting spring tension without training.
- Replacing parts before diagnosing the actual problem.
- Using excessive force adjustments to compensate for mechanical resistance.
- Forgetting to disconnect power before inspection.
- Lubricating sensor lenses.
- Continuing to operate a door with broken springs.
- Overtightening sensor brackets, causing misalignment.
- Neglecting regular maintenance.
- Ignoring unusual sounds until major damage occurs.
A careful diagnosis almost always saves time and money compared with replacing parts based on guesswork.
When to Call a Professional
Many maintenance tasks are homeowner-friendly, but some repairs involve significant safety risks or require specialized equipment. Calling a qualified technician is the safest choice when the repair goes beyond routine cleaning, inspection, or minor adjustments.
Contact a professional if:
- A torsion or extension spring has broken.
- Lift cables are frayed or have come off the drum.
- The door has fallen off its tracks.
- Structural panels are cracked or severely bent.
- The opener motor emits smoke or has a burning smell.
- Electrical wiring inside the opener appears damaged.
- The door remains unbalanced after basic troubleshooting.
- You suspect a faulty logic board.
- The door weighs too much to move safely by hand.
- Troubleshooting has not resolved the issue.
A trained technician can also verify that the entire system meets current safety standards after repairs are completed.
Estimated Repair Costs
The following estimates represent typical price ranges. Actual costs vary depending on your location, garage door type, and labor rates.
| Repair | Estimated Cost | DIY or Professional |
|---|---|---|
| Clean and align safety sensors | $0–$25 | DIY |
| Replace safety sensors | $75–$200 | DIY or Professional |
| Adjust travel or force settings | $0–$100 | DIY |
| Lubrication and preventive maintenance | $10–$40 | DIY |
| Replace rollers | $100–$250 | DIY (experienced) or Professional |
| Track alignment | $125–$300 | Professional |
| Replace garage door springs | $200–$450 | Professional |
| Replace lift cables | $150–$350 | Professional |
| Repair opener logic board | $150–$400 | Professional |
| Replace garage door opener | $300–$800+ | Professional |
Frequently Asked Questions
1. Why won’t my garage door stay closed after touching the ground?
A garage door that closes completely and immediately reopens usually has incorrect travel limit settings, excessive closing force, or resistance near the bottom of the door’s travel. It may also indicate that the opener believes it has struck an obstacle. Inspect the sensors, tracks, and opener settings before replacing any parts.
2. Why does my garage door only close when I hold the wall button?
This usually indicates a problem with the safety sensor system. Holding the wall button overrides the normal sensor operation on many openers, allowing the door to close. Check for dirty lenses, misaligned sensors, damaged wiring, or loose mounting brackets before considering sensor replacement.
3. Can dirty sensors really stop a garage door from closing?
Yes. Even a thin layer of dust, cobwebs, or moisture can interrupt the infrared beam between the safety sensors. Because the opener interprets this as an obstruction, it reverses the door to prevent injury or damage. Cleaning the lenses is often one of the quickest and easiest fixes.
4. Is it safe to adjust my garage door opener settings myself?
Yes, basic travel and force adjustments are generally safe if you follow the manufacturer’s instructions and make only small changes. However, you should never adjust torsion springs or other high-tension components, as they can cause serious injury without the proper tools and experience.
5. Why is my garage door getting heavier?
A heavier-than-normal garage door often indicates worn or broken springs. Since the springs support most of the door’s weight, the opener must work much harder when they fail. Stop using the door if possible and arrange for professional spring replacement to avoid damaging the opener.
6. How often should I inspect my garage door?
Inspect your garage door at least twice a year and test the safety reversal system monthly. Regular maintenance allows you to identify worn rollers, loose hardware, sensor problems, and lubrication needs before they develop into more expensive repairs or safety hazards.
7. Should I continue using a garage door that reverses unexpectedly?
No. An unexpectedly reversing garage door may have a safety system malfunction or mechanical problem that could worsen with continued use. Diagnose the issue promptly, and avoid forcing the opener to operate until you’ve identified and corrected the underlying cause.
8. How long does a typical garage door opener last?
Most quality garage door openers last around 10 to 15 years with proper maintenance. Factors such as frequency of use, maintenance habits, environmental conditions, and component quality all affect service life. Replacing an aging opener may also provide quieter operation and updated safety features.
9. Can cold weather cause a garage door to reverse?
Yes. Cold weather can stiffen lubricants, shrink metal components slightly, freeze the bottom seal to the floor, or create ice that increases resistance. These conditions may cause the opener’s safety system to reverse the door. Clearing ice and performing seasonal maintenance often resolves the issue.
10. How do I know if I need a professional instead of a DIY repair?
You should call a professional whenever the repair involves springs, lift cables, structural damage, electrical faults inside the opener, or persistent problems that remain after basic troubleshooting. If you’re unsure about the cause or feel unsafe performing a repair, professional service is the best option.
Final Thoughts
If you’re asking, “Why won’t my garage door stay closed?”, the answer is usually found through a careful inspection rather than an expensive replacement. Most problems stem from safety sensors, travel settings, worn rollers, damaged tracks, or spring issues. By following a logical troubleshooting process, you can often identify the root cause quickly and determine whether a simple DIY repair is appropriate or if professional assistance is needed.
Always put safety first, especially when working around heavy doors, electrical components, and high-tension springs. Cleaning sensors, checking for obstructions, and performing routine preventive maintenance are simple habits that can prevent many common garage door failures. At the same time, recognizing the warning signs of serious mechanical problems helps you avoid costly damage and reduces the risk of injury.
A well-maintained garage door should open and close smoothly, operate quietly, and respond consistently every time. With regular inspections, timely repairs, and proper maintenance, you can keep your garage door reliable, secure, and safe for years to come.

Engineer Ali Usman is a professional garage door expert and author at FixFasty, with over 10 years of hands-on experience in garage door systems and mechanical maintenance. He writes clear, step-by-step guides on garage door repairs, parts, and safety practices, helping homeowners fix problems correctly and maintain smooth, secure, and long-lasting garage door performance.