
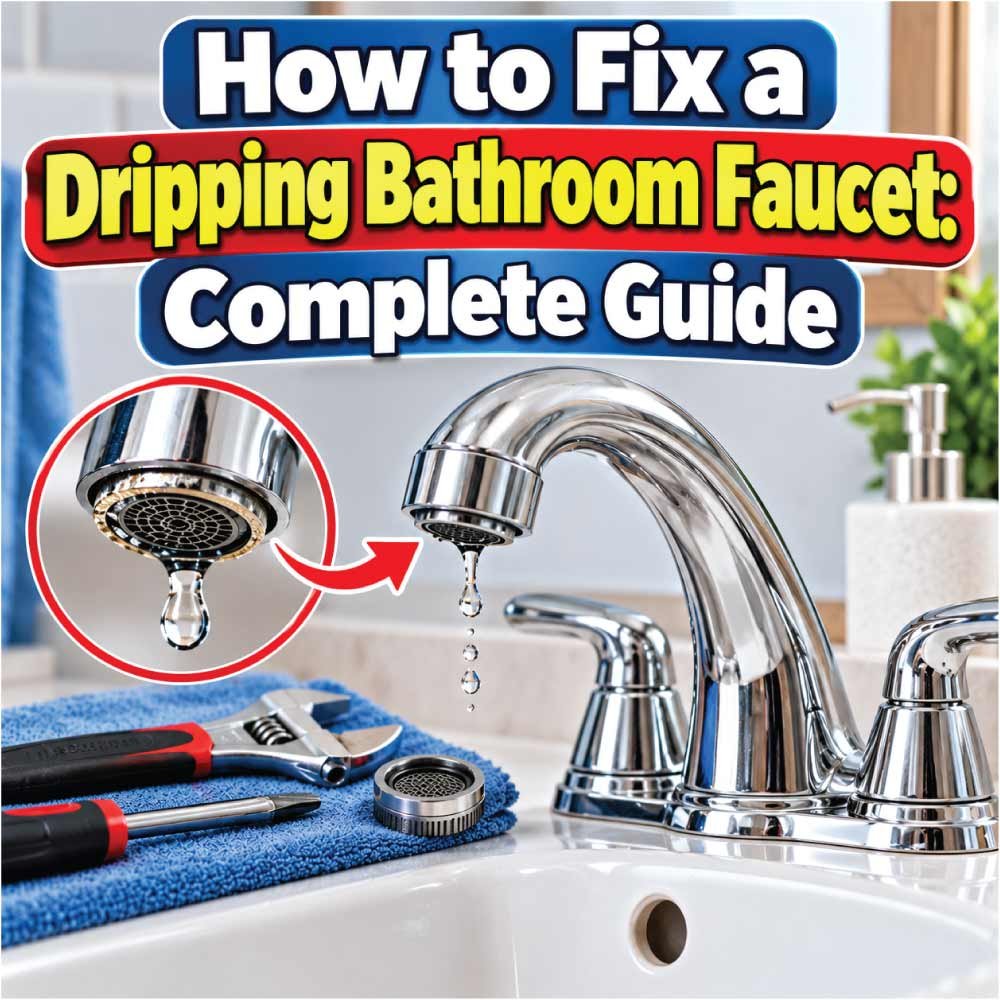
A dripping bathroom faucet can waste water, create annoying sounds, and leave mineral stains around the sink. The good news is that many faucet leaks can be fixed by replacing a worn washer, O-ring, cartridge, or valve component. The correct repair depends on the faucet design and where the water is escaping.
This guide explains how to fix a dripping bathroom faucet, identify the likely cause, choose the right replacement parts, and complete the repair safely. Whether you have a single-handle faucet or a traditional two-handle model, you can start with a few simple checks before deciding whether to repair it yourself or call a plumber.
Quick Answer: How Do You Stop a Dripping Bathroom Faucet?
To stop a dripping bathroom faucet, first determine whether water is coming from the spout or leaking around the handle or faucet base. If the spout continues dripping after the faucet is fully closed, a worn cartridge, valve seal, or washer may be responsible.
Follow these initial steps:
Turn off the hot and cold water supply valves beneath the sink.
Open the faucet to release remaining pressure.
Identify the faucet type and obtain the correct replacement component.
Remove the handle and access the cartridge, valve stem, or washer as appropriate.
Replace the damaged component and reassemble the faucet.
Restore the water supply slowly and check for leaks.
Important: A dripping faucet does not always need a complete replacement. Start by identifying the faulty component so you can avoid unnecessary repairs.
Common Causes of a Dripping Bathroom Faucet
Several problems can cause a bathroom faucet to drip. Understanding the symptoms can help you narrow down the likely cause before taking anything apart.
1. Worn Rubber Washer
Traditional compression faucets use rubber washers to create a watertight seal when the handle is turned off. Over time, these washers can become brittle, flattened, cracked, or worn.
Common signs include:
- Water dripping continuously from the spout.
- A handle that requires extra force to shut off the water.
- A leak that gradually becomes more noticeable.
Replacing the worn washer may solve the problem if the valve seat and other components remain in good condition.
2. Damaged Faucet Cartridge
Many modern bathroom faucets use a cartridge to control water flow and temperature. Internal seals can wear out, or mineral deposits can interfere with the cartridge’s operation.
Possible symptoms include:
- Dripping from the spout when the faucet is off.
- Difficulty controlling water temperature.
- A handle that feels unusually stiff or loose.
- Water that continues flowing despite closing the handle.
A faulty cartridge usually needs to be replaced with a compatible part.
3. Worn O-Rings or Seals
O-rings are small rubber rings that help prevent water from escaping around moving faucet components. When they deteriorate, water may leak around the handle, stem, or faucet body.
Look for moisture around the handle or water collecting on top of the sink while the faucet is running.
Replacing the appropriate O-ring can resolve some leaks, provided the surrounding components are not damaged.
4. Mineral Buildup
Hard water can leave mineral deposits inside a faucet, particularly around the valve and cartridge. These deposits may interfere with smooth operation or prevent a sealing surface from closing properly.
Signs include:
- A stiff or difficult-to-turn handle.
- Reduced water flow.
- Visible white or chalky deposits around the aerator.
- Persistent dripping accompanied by irregular faucet operation.
Cleaning removable, manufacturer-approved components may help. However, mineral buildup should not automatically be assumed to be the cause of a leak.
5. Damaged Valve Seat or Internal Components
In some compression faucets, the valve seat can become rough, corroded, or worn. A new washer may not seal correctly against a damaged seat.
If a faucet continues dripping after the washer has been replaced, inspect the seat and other internal components according to the manufacturer’s instructions. Significant corrosion or damage may require professional repair or faucet replacement.
6. Loose Connections or Damaged Supply Lines
If water appears beneath the sink rather than from the spout, the problem may involve a supply line, connection, shutoff valve, or faucet mounting seal.
These leaks are different from a dripping spout and require inspection of the affected area.
Tools and Materials You May Need
Gather the appropriate tools before starting the repair. The exact requirements depend on the faucet model and the component being replaced.
- Adjustable wrench.
- Phillips or flathead screwdriver.
- Hex key or Allen wrench, if required.
- Replacement cartridge, washer, O-ring, or other compatible part.
- Soft cloth or small towel.
- Small container for screws and other components.
- Flashlight for inspecting the area beneath the sink.
- Manufacturer-approved faucet lubricant, if specified.
- Mild cleaning solution or an approved descaling product, when needed.
Keep a small towel and container beneath the faucet to catch residual water. Use a cloth between metal tools and decorative faucet finishes to reduce the risk of scratches.
Safety Precautions Before Repairing the Faucet
Although a dripping bathroom faucet is usually a manageable DIY problem, careless disassembly can cause water damage or damage the fixture.
Before beginning:
Shut off both hot and cold water supplies. The shutoff valves are usually located beneath the sink.
Verify that the water is off. Open the faucet and confirm that the flow stops before removing any components.
Protect the drain. Cover it with a cloth or drain stopper so small screws cannot fall inside.
Avoid excessive force. Corroded or seized components can break when twisted too aggressively.
Protect the finish. Use appropriately sized tools and avoid gripping polished surfaces directly.
Be cautious around hot water. Allow hot water and nearby components to cool before handling them.
If a shutoff valve will not close, begins leaking, or appears severely corroded, stop and seek professional help rather than forcing it. If your home has an unusual plumbing arrangement, confirm the correct isolation procedure before proceeding.
Step-by-Step: How to Fix a Dripping Bathroom Faucet
The following steps provide a general repair process. Your faucet’s manufacturer instructions should take priority because handle removal, cartridge retention, and internal components vary by model.
Step 1: Identify Where the Water Is Dripping
Start by observing the faucet before disassembling it.
Check whether water is:
- Dripping from the spout when the faucet is off.
- Escaping around the handle.
- Collecting around the faucet base.
- Leaking beneath the sink.
A spout that continues dripping after the remaining water has drained may indicate a problem with the internal shutoff mechanism. Water around the handle may suggest a worn seal or O-ring. Water beneath the sink may indicate a supply connection or plumbing leak.
Why this matters: Replacing a cartridge will not fix a leaking supply line, and replacing a supply line will not correct a worn internal faucet seal.
Step 2: Turn Off the Water Supply
Locate the hot and cold shutoff valves beneath the sink. Turn both valves clockwise if they use conventional threaded handles.
Do not force a valve that feels stuck or shows signs of corrosion.
After shutting off the water, open the faucet and allow the remaining water to drain. Confirm that the water supply has stopped before continuing.
If the faucet continues to receive water, the shutoff valves may not be closing properly. Stop the repair until the water can be safely isolated.
Step 3: Remove the Faucet Handle
Look for a decorative cap, visible screw, or small set screw that secures the handle. Some faucets use a hex key, while others use a conventional screwdriver.
- Remove the decorative cap carefully, if present.
- Loosen the retaining screw or set screw.
- Lift the handle away from the faucet.
- Place all screws and small components in a container.
If the handle is stuck, avoid prying aggressively against the sink or faucet finish. Check the manufacturer’s instructions for the correct removal method.
Once the handle is removed, inspect the exposed components for corrosion, mineral deposits, and signs of water leakage.
Step 4: Identify the Faucet Mechanism
Before removing internal parts, determine which type of faucet you have.
Compression faucet: Usually has separate hot and cold handles. It typically uses a valve stem and rubber washer to stop water flow.
Cartridge faucet: Often uses one handle, although some two-handle faucets also use cartridges. The cartridge controls water flow and, in many models, temperature.
Ceramic-disc faucet: Uses ceramic discs to regulate water flow. Some designs have a replaceable cartridge or disc assembly.
Ball-type faucet: Uses a movable ball mechanism and associated seals. This design is more common in kitchen faucets but can appear in other fixtures.
Do not assume every two-handle faucet uses washers or every single-handle faucet uses the same cartridge. Consult the model information or inspect the mechanism before purchasing replacement parts.
Step 5: Remove and Inspect the Faulty Component
Once you have identified the mechanism, follow the appropriate procedure.
For a cartridge faucet, remove the retaining clip, nut, or other securing component as specified by the manufacturer. Pull the cartridge out using the recommended method.
For a compression faucet, carefully remove the valve stem and inspect the rubber washer and related seals.
Look for:
- Cracked or flattened rubber.
- Torn or hardened O-rings.
- Corrosion on metal components.
- Mineral deposits around sealing surfaces.
- Visible damage to the cartridge or valve assembly.
Take a photo before removing parts if you are unsure how they fit together. Note the component’s orientation so you can reinstall the replacement correctly.
If a component is seized or badly corroded, do not use excessive force. Damaging the faucet body can turn a minor repair into a more expensive plumbing problem.
Step 6: Replace the Worn Washer, O-Ring, or Cartridge
Choose a replacement part that matches the faucet’s make, model, and mechanism.
For a compression faucet:
- Remove the worn rubber washer from the valve stem.
- Inspect the washer screw and surrounding components.
- Install the correct replacement washer.
- Replace damaged O-rings or other serviceable seals when appropriate.
- Reassemble the valve stem according to the manufacturer’s instructions.
If the valve seat is rough or damaged, a new washer may not stop the leak. Avoid attempting an unfamiliar valve-seat repair without the proper instructions and tools.
For a cartridge faucet:
- Compare the replacement cartridge with the original.
- Check the orientation of the old cartridge before removing it completely, if possible.
- Install the new cartridge in the correct position.
- Reinstall the retaining clip, nut, or other securing component.
- Tighten fasteners according to the manufacturer’s instructions.
Never force a cartridge into its housing. An incorrect or improperly aligned cartridge can cause leaks, interfere with temperature control, or damage the faucet.
Step 7: Clean Mineral Deposits if Necessary
If mineral buildup is visible, clean only the components that the manufacturer permits you to clean.
Use a soft cloth and an appropriate cleaning solution. For removable aerators or other approved parts, follow the recommended cleaning method and rinse thoroughly.
Avoid abrasive tools, harsh chemicals, and unapproved lubricants that could damage rubber seals, ceramic surfaces, or the faucet finish.
If the sealing surfaces are badly corroded or damaged, cleaning alone may not restore a reliable seal.
Step 8: Reassemble the Faucet
Once the replacement part is installed, reassemble the faucet in the reverse order of disassembly.
- Confirm that the cartridge, washer, or valve stem is correctly positioned.
- Reinstall all retaining clips and fasteners.
- Attach the handle securely without overtightening the screw.
- Ensure that seals are seated correctly and that no components have been left out.
If the handle binds or does not move normally, stop and check the installation before restoring the water supply.
Step 9: Restore the Water and Test for Leaks
Slowly reopen the hot and cold shutoff valves. Watch the connections beneath the sink as the water returns.
Test the faucet by:
- Turning the water on and checking that normal flow is restored.
- Moving the handle through its normal range of motion.
- Closing the faucet completely.
- Inspecting the spout for continued dripping.
- Checking the handle, faucet base, and supply connections for leaks.
- Observing the area beneath the sink for moisture.
A small amount of residual water may drain from the spout immediately after shutoff. Give it time to clear before deciding that the repair has failed.
If dripping continues, the replacement part may be incorrect, improperly installed, or unable to seal against a damaged valve seat. Shut off the water and reassess the problem rather than repeatedly tightening the handle.
Also Read:
How to Diagnose a Dripping Bathroom Faucet
The location and behavior of the leak can help you decide what to inspect first.
| Symptom | Possible Cause | Recommended Next Step |
|---|---|---|
| Spout drips after shutoff | Worn washer, cartridge, or internal seal | Identify the faucet mechanism and inspect its sealing components |
| Water leaks around the handle | Worn O-ring, stem seal, or cartridge seal | Inspect the handle area and replace the appropriate serviceable seal |
| Water collects around the faucet base | Damaged seal, loose mounting, or water running down from above | Dry the area and locate the source before tightening or replacing parts |
| Leak appears beneath the sink | Supply line, connection, shutoff valve, or faucet-body leak | Inspect connections and isolate the water supply if needed |
| Faucet remains stiff after cleaning | Mineral deposits, worn cartridge, or damaged mechanism | Check the manufacturer’s maintenance instructions and inspect the mechanism |
| New washer does not stop dripping | Damaged valve seat, incorrect washer, or another internal fault | Verify part compatibility and inspect the valve assembly |
These are possible causes rather than confirmed diagnoses. If the observed symptoms do not match the expected result, investigate further before replacing additional parts.
Common Mistakes to Avoid
Small mistakes can make a simple faucet repair more difficult.
Replacing parts without identifying the faucet type: Different mechanisms require different components.
Buying a cartridge based only on appearance: Similar-looking cartridges may not be interchangeable.
Forcing stuck components: Excessive force can crack the faucet body or damage threads.
Overtightening screws and nuts: Too much force can damage seals, fasteners, and internal parts.
Ignoring leaks beneath the sink: Water around a faucet may come from a supply connection rather than the faucet mechanism.
Using the wrong lubricant: Certain products can damage rubber seals or other materials.
Skipping the final inspection: A faucet may appear fixed while a connection underneath continues leaking.
Assuming every drip means a faulty washer: Cartridge faucets and other designs use different sealing mechanisms.
A careful diagnosis is usually more useful than replacing several components in the hope that one will solve the problem.
When to Call a Professional Plumber
Some dripping bathroom faucets are straightforward DIY repairs, but others require professional attention.
Contact a plumber if:
The shutoff valves will not stop the water flow.
A shutoff valve or supply connection starts leaking during the repair.
The faucet body, valve seat, or internal threads are badly corroded.
A cartridge is stuck and cannot be removed using the recommended method.
The faucet continues dripping after the correct component has been replaced.
Water is leaking inside a wall, cabinet, or other concealed area.
You suspect a damaged pipe or a problem beyond the faucet itself.
You cannot identify the correct replacement part or safely isolate the water supply.
Stop the repair if water begins escaping uncontrollably or you cannot determine where it is coming from. Preventing water damage is more important than completing the job without assistance.
Also Read:
Should You Repair or Replace a Dripping Bathroom Faucet?
Repairing the faucet is often sensible when the fixture is in good condition and the problem involves a replaceable washer, O-ring, or cartridge.
Consider repair when:
- The faucet body is structurally sound.
- Compatible replacement parts are available.
- The leak has a reasonably clear cause.
- The handle and other components operate normally.
Replacement may be more practical when:
- The faucet body is cracked or badly corroded.
- Important internal components are damaged or unavailable.
- Several parts are failing at the same time.
- The faucet has recurring leaks despite correct repairs.
- The cost of parts and professional labor approaches the cost of a suitable replacement.
Before replacing the entire fixture, consider whether the existing faucet has a compatible repair kit. A relatively small internal component may be all that is needed.
For renters, check the lease and contact the property manager before replacing plumbing fixtures or undertaking repairs beyond routine maintenance.
How to Prevent Your Bathroom Faucet from Dripping Again
Regular maintenance can help identify developing problems before they become more serious.
Clean the aerator periodically. Mineral buildup can restrict water flow and cause uneven discharge.
Operate handles gently. Avoid forcing a stiff handle closed.
Clean visible deposits carefully. Use products suitable for the faucet’s finish and materials.
Address small leaks promptly. Persistent moisture can damage cabinets, finishes, and nearby materials.
Inspect beneath the sink occasionally. Look for damp connections, corrosion, or water stains.
Use compatible replacement parts. Correct sizing and design help restore proper sealing.
Follow manufacturer maintenance instructions. Recommended cleaning methods and service procedures vary by model.
If hard water is common in your home, periodic cleaning may be particularly useful. However, cleaning will not repair a worn washer, damaged cartridge, or corroded valve seat.
Frequently Asked Questions
1. Why does my bathroom faucet drip after I turn it off?
A faucet that continues dripping after shutoff may have a worn washer, damaged cartridge, deteriorated seal, or another problem with its internal shutoff mechanism. The exact cause depends on the faucet design. First, allow residual water to drain, then determine whether the dripping continues before inspecting the appropriate component.
2. Can I fix a dripping bathroom faucet without replacing the whole faucet?
Yes, many faucet leaks can be repaired by replacing a washer, O-ring, cartridge, or other serviceable component. A full replacement is generally unnecessary when the faucet body is sound and compatible parts are available.
3. Why is my bathroom faucet still dripping after I replaced the washer?
The valve seat may be damaged, the replacement washer may be incorrect, or another internal component may be faulty. Confirm that the washer fits properly and inspect the remaining components according to the faucet manufacturer’s instructions. Avoid repeatedly tightening the handle to force a seal.
4. How do I know whether my faucet needs a cartridge or a washer?
Identify the faucet’s internal mechanism rather than relying only on its appearance. Traditional compression faucets commonly use washers, while cartridge faucets use replaceable cartridges. Some faucets have different internal designs even when their handles look similar. The manufacturer’s model information is the most reliable way to identify the correct component.
5. Is it safe to use a bathroom faucet that drips?
A minor spout drip is not usually an immediate plumbing emergency, but it should be repaired promptly to reduce water waste and prevent staining. A leak beneath the sink, around a shutoff valve, or inside a cabinet needs more urgent attention because it may cause water damage. Shut off the affected water supply if the leak is uncontrolled.
6. When should I replace a bathroom faucet instead of repairing it?
Consider replacement when the faucet body is cracked, corrosion is extensive, compatible repair parts are unavailable, or repeated repairs have not resolved the leak. If the problem involves one inexpensive, replaceable component, repairing the existing faucet may be the more practical option.
Conclusion
Fixing a dripping bathroom faucet starts with identifying where the water is escaping and determining which internal mechanism controls the flow. A worn washer, damaged cartridge, or deteriorated seal can often be replaced without changing the entire fixture.
Shut off the water before disassembly, use compatible replacement parts, and test every connection after reassembly. If the shutoff valves fail, components are badly corroded, or the leak persists after a careful repair, consult a professional plumber. An accurate diagnosis is the best way to stop the dripping safely and avoid unnecessary replacement costs.

Engineer Ali Hasan is a garage door expert and the founder of FixFasty. With over 16 years of experience in mechanical systems and home maintenance, he provides practical, step-by-step guides on garage door installation, repairs, and maintenance, helping homeowners keep their garage doors safe, reliable, and long-lasting.