
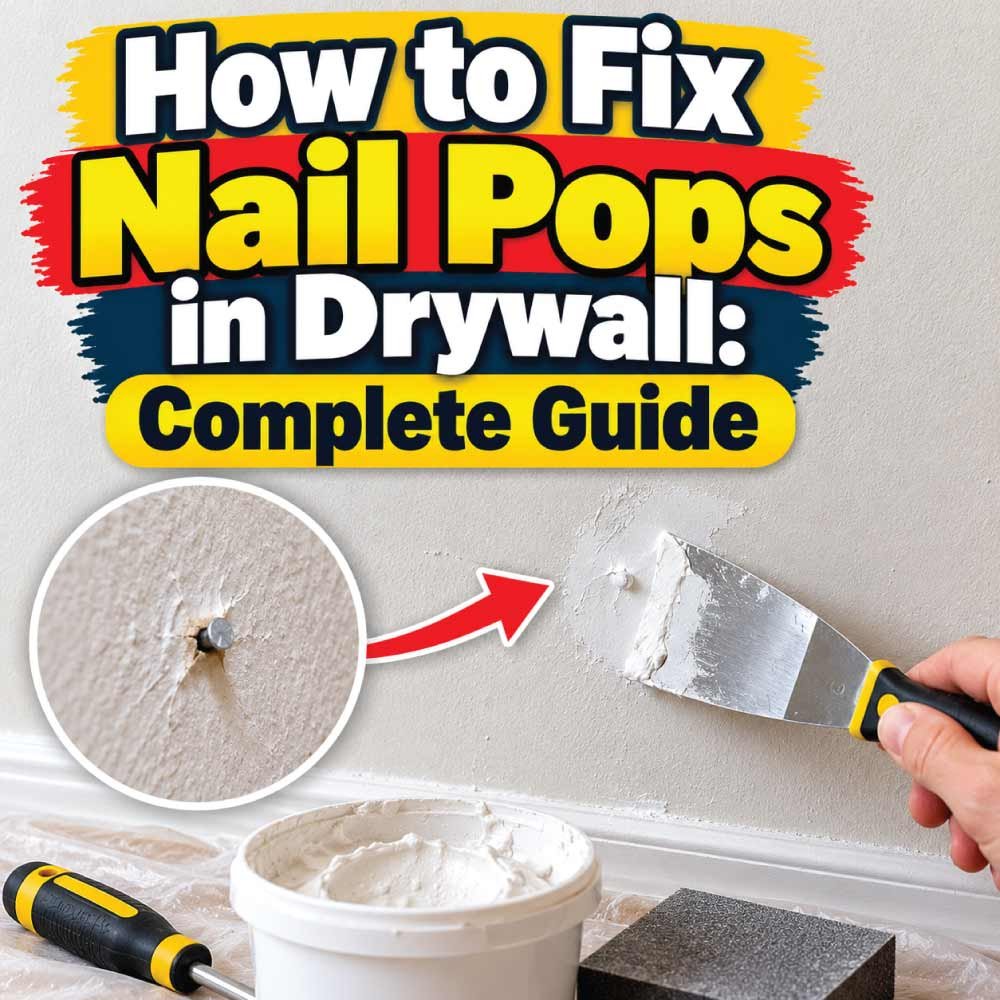
Nail pops in drywall are a common problem in homes, especially in areas where walls and ceilings experience seasonal temperature changes, humidity fluctuations, or slight structural movement. They appear as small bumps, raised circles, or cracks around drywall fasteners and can make an otherwise smooth wall look uneven.
The good news is that most nail pops in drywall are relatively easy to repair with basic tools and materials. You usually do not need to replace the entire drywall panel or hire a professional for a minor repair.
The key is to understand why the nail has pushed outward, secure the drywall properly, and repair the surface so the finished wall looks smooth again.
This complete guide explains how to fix nail pops in drywall, identify their causes, choose the right tools, repair the damaged area step by step, and prevent the problem from returning.
Quick Answer: How Do You Fix Nail Pops in Drywall?
To fix nail pops in drywall, first inspect the raised fastener and surrounding wall for cracks, loose drywall, or signs of moisture. If the drywall is otherwise sound, drive a drywall screw into the framing near the popped nail to secure the panel. Then carefully remove or reset the protruding nail without damaging the drywall surface.
Apply joint compound over the fastener depressions, allow it to dry, sand the area smooth, and apply another thin coat if necessary. Once the repair is completely dry, prime the patched area and repaint it to match the surrounding wall.
For a lasting repair, secure the drywall to the framing rather than simply covering the raised nail with joint compound.
What Are Nail Pops in Drywall?
Nail pops are small bumps or raised spots that develop when a drywall nail or screw moves outward from the wall or ceiling surface.
Drywall panels are typically attached to wood or metal framing using nails or screws. When the fastener loosens, shifts, or no longer holds the panel tightly against the framing, it can push through the joint compound and paint.
Nail pops often appear as:
- Small circular bumps on painted walls
- Raised spots with a nail head visible in the center
- Tiny cracks or rings around a fastener
- Small areas where paint or joint compound has broken away
- Similar bumps appearing in a row along a wall or ceiling
A single nail pop is often a minor cosmetic problem. However, multiple nail pops, recurring damage, or nail pops accompanied by water stains or sagging drywall may indicate a larger issue that needs investigation.
What Causes Nail Pops in Drywall?
Understanding the cause of nail pops helps you choose the right repair and reduce the chances of the problem returning.
1. Wood Framing Shrinkage
Wood framing can shrink as it dries after construction. This movement may cause the drywall fasteners to loosen slightly or allow the framing and drywall to shift relative to one another.
As the panel moves, a nail head can become visible through the wall surface.
This is a common reason nail pops develop in newer homes.
2. Loose or Improperly Installed Nails
A nail may not hold drywall securely if it was installed at the wrong angle, driven too deeply, or placed in a way that damages the drywall’s paper surface.
If the paper around the nail head is broken, the fastener may lose some of its holding strength.
Drywall screws are generally preferred for many repairs because their threads provide a secure grip in the framing.
3. Seasonal Temperature and Humidity Changes
Wood expands and contracts as moisture levels change. Seasonal humidity fluctuations can cause small movements in framing that affect the drywall fasteners.
These movements may gradually cause fasteners to loosen or protrude.
4. Building Movement
Homes naturally experience small amounts of movement as materials respond to changes in temperature, moisture, and loading.
Minor movement may contribute to isolated nail pops. However, widespread or recurring pops accompanied by large cracks, sticking doors, or other changes may warrant further inspection.
5. Drywall Not Properly Secured to Framing
If drywall was not fastened securely during installation, sections may move when pressure is applied or when the framing changes shape.
The result can be protruding nails, raised seams, or small cracks in the finished surface.
6. Moisture Damage
Water intrusion from a roof leak, plumbing problem, or persistent condensation can weaken drywall and affect the surrounding framing.
Moisture-damaged drywall may swell, soften, or separate from fasteners, causing raised spots or other surface defects.
If the drywall is wet, soft, stained, or crumbling, repair the moisture source and assess the damaged material before patching it.
Tools and Materials Needed to Fix Nail Pops in Drywall
Gather the following supplies before beginning the repair:
- Drywall screws appropriate for the drywall thickness and framing type
- Screwdriver or drill with a suitable bit
- Hammer, if removing or resetting a nail is necessary
- Putty knife or drywall taping knife
- Joint compound
- Sanding sponge or fine-grit sandpaper
- Primer suitable for drywall repairs
- Matching interior paint
- Small paintbrush or roller
- Safety glasses
- Dust mask or respirator suitable for the sanding task
- Drop cloth or protective sheet
- Utility knife, if damaged paper needs careful trimming
For most small nail pops, you do not need every item on this list. A drill, drywall screw, putty knife, joint compound, sandpaper, primer, and paint are usually sufficient.
Safety Precautions Before Repairing Drywall Nail Pops
Drywall repairs are generally straightforward, but a few precautions can help prevent injuries and additional damage.
- Wear safety glasses when working overhead or removing fasteners.
- Use a dust mask or appropriate respirator when sanding joint compound.
- Cover nearby furniture and flooring to protect them from dust and paint.
- Avoid driving screws into areas where electrical wiring or plumbing may be present.
- If the wall contains older coatings or building materials that may contain lead or asbestos, do not sand, scrape, or disturb them until the materials have been assessed appropriately.
- If you suspect a leak, investigate the moisture problem before covering the damaged area.
For ceiling repairs, use a stable ladder and avoid overreaching. If the drywall is sagging significantly or appears unstable, do not attempt to secure it while standing directly beneath the damaged section.
How to Fix Nail Pops in Drywall Step by Step
Follow these steps to repair a typical nail pop in a wall or ceiling.
Step 1: Inspect the Nail Pop
Examine the raised spot carefully before making any repairs.
Look for a visible nail head, a small circular crack, loose joint compound, or damage to the drywall paper. Press gently around the area to see whether the drywall moves against the framing.
If the surface is dry, firm, and otherwise in good condition, the problem is likely a routine fastener issue.
If the area is soft, damp, swollen, or stained, investigate possible moisture damage before proceeding.
Also check whether the nail pop is isolated or part of a larger pattern. Several fasteners protruding along the same framing line may indicate that the drywall is moving away from the framing.
Step 2: Secure the Drywall With a Screw
Before removing or resetting the popped nail, secure the drywall panel to the framing.
Use a drywall screw of the correct length for the drywall thickness and framing material. Place it near the popped fastener, preferably into the same framing member, while avoiding electrical wiring and plumbing.
Drive the screw until its head sits slightly below the drywall surface without tearing through the paper facing.
The screw should hold the panel firmly against the framing. Do not drive it so deeply that the paper breaks and the screw loses its holding strength.
If you cannot confidently locate the framing or determine what lies behind the wall, stop and investigate before drilling.
Step 3: Remove or Reset the Popped Nail
Once the drywall is secured, address the protruding nail.
If the nail is loose and can be removed without damaging the surrounding panel, carefully pull it out using an appropriate tool.
If removal would cause unnecessary damage, you may be able to reset the nail slightly below the surface with gentle hammer taps. Avoid striking hard enough to crush the drywall core or create a large depression.
Do not rely on the old nail alone to hold the drywall in place. The nearby screw provides the additional mechanical support needed for a more durable repair.
Step 4: Check the Fastener Depressions
After securing the drywall and dealing with the nail, inspect the surface.
You may have one or two small depressions where the nail and screw heads sit below the wall surface. These depressions need to be filled with joint compound.
If the drywall paper is torn or raised around the fasteners, carefully trim loose paper without cutting deeply into the panel.
Avoid enlarging the damaged area unnecessarily. The smaller and cleaner the repair, the easier it is to blend into the surrounding wall.
Step 5: Apply the First Coat of Joint Compound
Use a putty knife to apply a thin layer of joint compound over the fastener depressions.
Spread the compound slightly beyond the damaged area so the repair can blend smoothly with the surrounding wall.
Press the compound firmly into the depressions and remove excess material with the edge of the knife.
A thin coat is better than one thick application because thick compound can shrink as it dries and may require additional sanding.
Allow the compound to dry according to the product instructions before continuing.
Step 6: Sand the Repair Smooth
Once the joint compound is completely dry, sand the area lightly with a sanding sponge or fine-grit sandpaper.
Use gentle, even strokes to remove ridges and blend the repaired area into the surrounding surface.
Avoid sanding aggressively, as this can expose the drywall paper or create a shallow dip around the repair.
For ceiling repairs, take particular care to minimize airborne dust and protect your eyes.
Wipe away the sanding dust with a clean, dry cloth before applying another coat or primer.
Step 7: Apply a Second Coat if Needed
After sanding, inspect the repair from different angles under normal room lighting.
If the fastener depressions remain visible or the surface is uneven, apply another thin coat of joint compound.
Feather the edges farther out than the first coat to create a gradual transition between the repair and the existing wall.
Allow the compound to dry completely, then sand lightly again.
Small repairs often need two thin coats to achieve a smooth finish.
Step 8: Prime the Repaired Area
Apply a suitable drywall primer to the patched area once the compound is dry and smooth.
Joint compound absorbs paint differently from the surrounding painted surface. Without primer, the repair may appear dull or uneven, even if the surface is smooth.
Follow the primer manufacturer’s drying instructions before painting.
Step 9: Paint to Match the Wall
Apply the matching wall paint using a small brush or roller, blending the edges into the surrounding finish where practical.
Depending on the original paint, lighting, and surface texture, you may need more than one coat.
For the most consistent result, use the same paint color and sheen as the existing wall. If the surrounding paint has faded or changed over time, repainting a larger section may produce a better match.
Step 10: Inspect the Finished Repair
Once the paint has dried, inspect the repaired area under ordinary room lighting.
The surface should look smooth, with no raised nail head, visible depression, or obvious patch edge.
If the nail pop returns after a short time, investigate the underlying cause rather than simply adding more joint compound.
Also Read:
How to Fix Nail Pops in a Drywall Ceiling
Ceiling nail pops can be repaired using the same basic process as wall nail pops, but overhead work requires extra care.
Start by inspecting the ceiling for moisture stains, sagging, cracks, and multiple raised fasteners.
If the ceiling is firm and dry, secure the drywall to the ceiling framing with an appropriate drywall screw. Reset or remove the popped nail, apply joint compound, sand the surface, and finish with primer and paint.
Keep in mind that gravity can make loose ceiling drywall more hazardous than a small wall defect.
If a large ceiling area is sagging, several fasteners are failing, or the drywall feels unstable, avoid standing underneath it and seek professional assistance.
How to Fix Nail Pops Without Making the Wall Look Worse
A durable repair depends on both securing the drywall and blending the surface properly.
Follow these tips to achieve a cleaner result:
- Secure the drywall before applying joint compound.
- Use the correct screw for the drywall and framing.
- Keep the screw head just below the surface without breaking the paper.
- Remove loose material but avoid creating a large hole.
- Apply thin coats of joint compound instead of one thick coat.
- Allow each coat to dry fully before sanding.
- Sand gently to avoid damaging the surrounding paper.
- Prime the repaired area before painting.
- Match the existing paint color and sheen as closely as possible.
Good preparation is often more important than using extra compound. A small, properly secured repair is easier to hide than a large patch that has been repeatedly sanded and filled.
Also Read:
Common Mistakes to Avoid When Fixing Drywall Nail Pops
Avoid these mistakes to prevent the problem from returning.
Covering the Nail Pop With Joint Compound Only
Applying compound over a raised nail may hide the bump temporarily, but it does not secure the drywall to the framing. The nail may protrude again as the panel moves.
Secure the drywall first, then patch the surface.
Driving the Screw Too Deep
A screw that tears through the drywall paper may lose much of its holding strength. Drive the screw only far enough for its head to sit slightly below the surface.
Using Too Much Joint Compound
Thick layers can shrink, crack, and require extra sanding. Apply thin coats and allow each one to dry fully.
Sanding Too Aggressively
Excessive sanding can damage the drywall paper and make the repair more difficult to finish.
Use light pressure and inspect the surface frequently.
Ignoring Water Damage
If moisture is causing the drywall to swell or loosen, patching the surface will not solve the underlying problem.
Find and repair the leak, allow the area to dry appropriately, and replace damaged material when necessary.
Painting Before the Compound Is Dry
Painting over damp compound can produce uneven color, poor adhesion, or visible surface defects.
Follow the drying instructions for the joint compound and primer before applying paint.
Ignoring Multiple Nail Pops
Several nail pops in one area may indicate movement or a broader fastening problem. Repairing each spot cosmetically without investigating the pattern can lead to repeated damage.
When Should You Call a Professional?
Most isolated drywall nail pops can be repaired by a homeowner. However, professional assessment may be appropriate when the damage suggests a more serious issue.
Consider contacting a qualified contractor or other appropriate professional if:
- Multiple nail pops keep returning after repair.
- Large sections of drywall are loose or sagging.
- The ceiling appears unstable.
- The drywall is soft, swollen, or water-damaged.
- Large or widening cracks accompany the nail pops.
- The wall shows signs of significant movement or damage.
- You suspect a plumbing leak, roof leak, or another hidden moisture source.
- The repair involves older materials that may contain hazardous substances.
A single nail pop is usually cosmetic, but recurring damage or changes in the surrounding structure deserve closer attention.
How Much Does It Cost to Fix Nail Pops in Drywall?
The cost depends on the number of nail pops, the location of the damage, the materials required, and whether you complete the repair yourself.
For a small DIY repair, the main expenses are typically drywall screws, joint compound, sandpaper, primer, and paint. If you already own the tools and have leftover materials, the additional cost may be minimal.
Hiring a professional costs more because of labor and service charges. However, professional repair may be worthwhile for multiple nail pops, difficult ceiling work, recurring damage, or repairs involving moisture or structural concerns.
If the damage covers a large area, request an assessment before deciding whether to patch individual spots or repair a larger section of drywall.
How to Prevent Nail Pops in Drywall
Although not every nail pop can be prevented, proper installation and maintenance can reduce the likelihood of recurring problems.
1. Use Appropriate Drywall Screws
Drywall screws generally provide a reliable hold when installed correctly into suitable framing. Choose screws that match the drywall thickness and the type of framing.
2. Secure the Drywall Properly
During installation or repair, make sure the drywall sits firmly against the framing and that the fasteners are installed according to the appropriate spacing and depth requirements.
3. Avoid Damaging the Drywall Paper
The paper facing helps hold the drywall together. Fasteners driven too deeply can tear the paper and reduce their holding strength.
4. Control Indoor Moisture
Maintain reasonable indoor humidity and address leaks promptly. Excessive moisture can affect both drywall and wood framing.
5. Inspect Recurring Problems
If nail pops repeatedly appear in the same area, investigate the cause rather than continuing to patch the surface.
6. Repair Water Leaks Promptly
Roof leaks, plumbing leaks, and persistent condensation can weaken drywall. Repair the source of moisture before refinishing the affected area.
7. Use Proper Installation Techniques
When installing new drywall, follow the recommended fastening pattern, use compatible materials, and ensure the panels are properly supported by the framing.
Frequently Asked Questions
Are Nail Pops in Drywall Normal?
Yes. Nail pops are relatively common, particularly in newer homes where wood framing is still drying and adjusting. Small, isolated nail pops are often cosmetic and can usually be repaired easily.
However, widespread or recurring nail pops may indicate a fastening problem, moisture damage, or movement that deserves further inspection.
Can I Fix Nail Pops Without Removing the Nail?
In many cases, yes. You can secure the drywall with a nearby screw and carefully reset the protruding nail below the surface if it remains suitable for that approach.
If the nail is loose or damaged, removing it may be a better option. The important step is to ensure the drywall is securely attached to the framing before patching.
Can I Just Paint Over a Nail Pop?
No. Paint cannot correct a raised fastener or secure loose drywall. The bump will usually remain visible, and the problem may return.
Secure the drywall, repair the surface with joint compound, sand it smooth, prime the patch, and repaint it.
Why Do Nail Pops Keep Coming Back?
Recurring nail pops can result from loose drywall, poor fastening, framing movement, moisture damage, or a damaged mounting surface.
If the same area repeatedly develops bumps, inspect the underlying cause instead of simply adding more compound.
Should I Use Nails or Screws to Repair Nail Pops?
A drywall screw is generally the preferred choice for securing a loose panel because its threads grip the framing. The original nail can often be removed or reset once the drywall is properly secured.
Use a screw suitable for the drywall thickness and framing type, and avoid driving it deeply enough to tear the paper facing.
How Long Does It Take to Fix Nail Pops in Drywall?
The hands-on work for a small repair may take around 15 to 30 minutes, depending on access and the condition of the wall.
However, the entire project can take longer because joint compound, primer, and paint need time to dry. Multiple coats may require several hours or longer, depending on the products and room conditions.
Do Nail Pops Mean There Is a Structural Problem?
Not necessarily. A single nail pop is commonly caused by fastener movement or normal changes in wood framing.
If nail pops appear alongside widening cracks, significant sagging, major door or window alignment changes, or widespread recurring damage, further assessment may be necessary.
Can Nail Pops Be Caused by Water Damage?
Yes. Moisture can weaken drywall, damage its paper facing, and affect the framing behind it. This can cause fasteners to loosen or protrude.
Look for water stains, soft spots, swelling, or a musty odor. Correct the moisture source and assess the damaged material before patching.
Do I Need to Prime Before Painting a Drywall Repair?
Yes, priming is generally recommended. Joint compound absorbs paint differently from the surrounding painted surface, so an unprimed patch may appear dull or uneven.
Apply a suitable drywall primer and allow it to dry before painting.
Conclusion
Fixing nail pops in drywall is usually a manageable DIY project when the damage is small and the surrounding wall is in good condition. The most important step is to secure the drywall to the framing before repairing the surface.
Start by inspecting the nail pop, installing an appropriate drywall screw, and removing or resetting the protruding nail. Then apply thin coats of joint compound, sand the area smooth, prime it, and repaint the wall.
If nail pops repeatedly return, appear across a large area, or are accompanied by moisture damage or sagging drywall, investigate the underlying problem before making cosmetic repairs.
With the right materials and careful preparation, you can restore a smooth wall or ceiling and reduce the chances of the same nail pops appearing again.

Engineer Ali Hasan is a garage door expert and the founder of FixFasty. With over 16 years of experience in mechanical systems and home maintenance, he provides practical, step-by-step guides on garage door installation, repairs, and maintenance, helping homeowners keep their garage doors safe, reliable, and long-lasting.