
Garage doors are one of the most convenient features in a modern home, offering security, efficiency, and ease of access. However, like any mechanical system, they require proper maintenance. One common issue homeowners face is misaligned garage door sensors. Misalignment can prevent your garage door from opening or closing correctly, posing a safety hazard.
What Are Garage Door Sensors?
Garage door sensors, often located near the bottom of the door tracks, are small safety devices that detect objects in the path of a closing door. These sensors prevent the door from closing on people, pets, or objects, making them an essential safety feature. Most modern garage doors use infrared sensors. When the sensor beams are interrupted, the garage door automatically stops and reverses, reducing the risk of accidents.
Why Sensor Alignment Matters
Even minor sensor misalignment can disrupt garage door operation, causing the door to stop, reverse prematurely, or trigger intermittent errors. Ensuring proper sensor alignment is essential for smooth, reliable, and safe operation, preventing frustration, accidents, and unnecessary wear on the door and opener mechanism.

The door won’t close at all
The door reverses immediately after touching the ground
Intermittent sensor errors
Proper alignment ensures your garage door operates smoothly and safely.
Tools You Will Need
Having the right tools makes sensor maintenance quick and safe. Before starting, gather items like a screwdriver for adjusting brackets, a level to check alignment, a tape measure to ensure sensors are at equal height, and a cloth to clean lenses for optimal performance.
| Tool | Purpose |
|---|---|
| Screwdriver | To adjust sensor brackets |
| Level | To check horizontal alignment |
| Tape measure | To ensure sensors are at the same height |
| Cleaning cloth | To clean sensor lenses |
Step-by-Step Guide to Align Garage Door Sensors
Properly aligned garage door sensors are essential for safe and smooth operation. Misaligned or dirty sensors can cause the door to stop, reverse, or fail to close. This step-by-step guide walks you through inspecting, adjusting, and testing your sensors to ensure reliable performance, so your garage door works safely and efficiently every time.
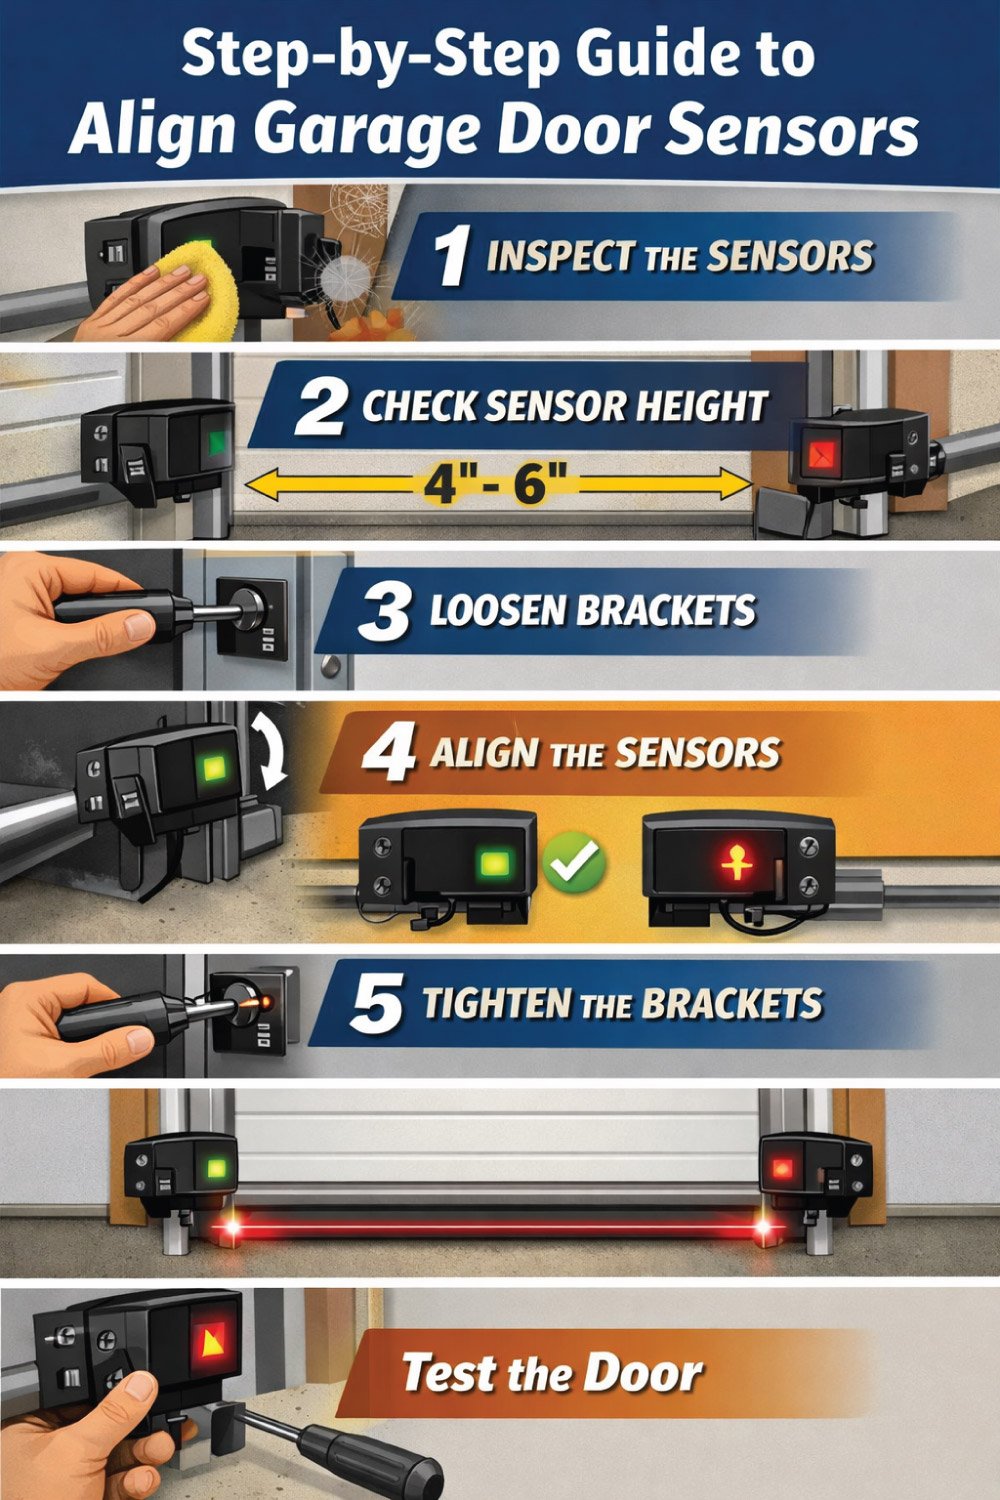
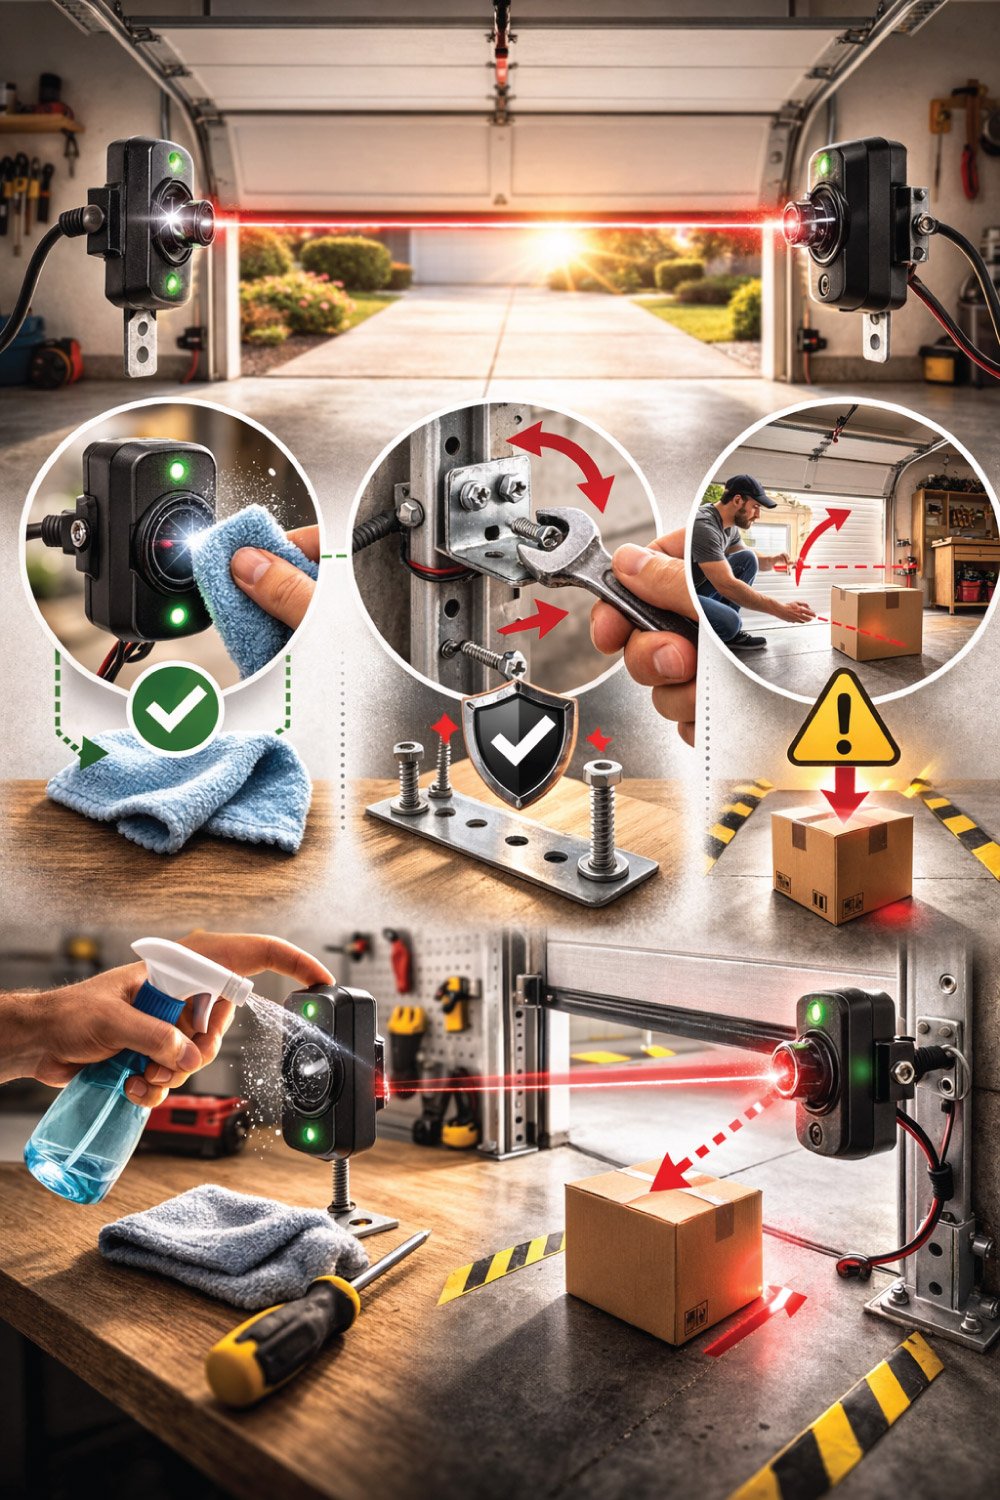
Step 1: Inspect the Sensors
Before making any adjustments, ensure your garage door sensors are clean and free from debris. Dirt, dust, or spider webs can block the infrared beam and prevent proper operation. A quick visual check and gentle cleaning with a soft cloth can save time later.
Check both sensors for dirt, dust, or webs.
Clean the lenses gently with a soft cloth.
Ensure nothing obstructs the beam path.
Step 2: Check Sensor Height
Proper sensor height is critical for reliable operation. Both sensors should sit 4–6 inches above the ground and face each other directly across the garage door track. Correct height ensures the infrared beam functions correctly and prevents false reversals or failures.
Measure the left and right sensor heights.
Adjust brackets to maintain 4–6 inches above ground.
Ensure sensors face each other directly.
Step 3: Loosen Brackets
Loosening the sensor brackets slightly allows you to pivot them for precise alignment. Avoid removing screws completely—just loosen enough so sensors can move freely. Proper adjustment at this stage ensures you won’t have to redo the alignment later.
Use a screwdriver to loosen bracket screws.
Do not remove screws completely.
Allow sensors to pivot for fine-tuning.
Step 4: Align Sensors
Correct alignment ensures the LED lights on the sensors remain stable, indicating the infrared beam is uninterrupted. Slowly adjust the sensors until both lights show solid green. Misalignment often shows as a blinking red light, signaling the need for further adjustment.
Adjust sensors gradually until LEDs are stable.
Green light = proper alignment.
Red blinking light = sensors need realignment.
Step 5: Tighten Brackets
Once the sensors are perfectly aligned, tighten the screws carefully to secure them. Over-tightening can shift the sensors, so ensure brackets are snug but not forcing the alignment out of place. Proper tightening prevents misalignment during daily garage door use.
Carefully tighten all bracket screws.
Ensure sensors remain aligned while tightening.
Avoid over-tightening to prevent shifting.
Step 6: Test the Door
After alignment, slowly close the garage door to test sensor functionality. If the door stops or reverses unexpectedly, check for obstructions and verify the sensor alignment. Repeat adjustments as needed to ensure smooth and safe operation.
Close the garage door slowly.
Observe for stopping or reversing.
Recheck alignment or remove obstructions if necessary.
Common Issues and Fixes
Door won’t close – Check if sensors are obstructed or dirty.
Sensors misaligned repeatedly – Inspect brackets for looseness or damage. Replace if necessary.
LED indicators off – Confirm power supply to sensors. Sometimes wiring can become loose.
Maintenance Tips for Garage Door Sensors
Clean sensor lenses monthly – Dust can block infrared beams.
Check bracket stability – Vibrations from door operation can loosen screws over time.
Test safety reversal function – Place a small object in the doorway to ensure the door reverses automatically.
When to Call a Professional

Wiring issues
Damaged sensors
Problems with the garage door opener
Professional technicians can troubleshoot these problems safely and efficiently.
Safety Precautions
Garage doors are heavy and under tension, so safety should always come first. Disconnect power before working on sensors, keep hands and fingers away from moving parts, and never force the door if it resists. Observing these precautions helps prevent injury and protects your garage door from damage.
Disconnect power before adjusting sensors.
Keep fingers and hands clear of moving parts.
Never force the door manually if it resists movement.
Following these precautions can prevent injury and damage.
Signs Your Garage Door Sensors Are Misaligned
Detecting misaligned garage door sensors early prevents accidents and keeps your door functioning smoothly. Common signs include the door reversing immediately after closing, blinking red sensor LEDs, or the door stopping mid-way without obstruction. Regular inspections help catch alignment issues before they cause bigger problems.
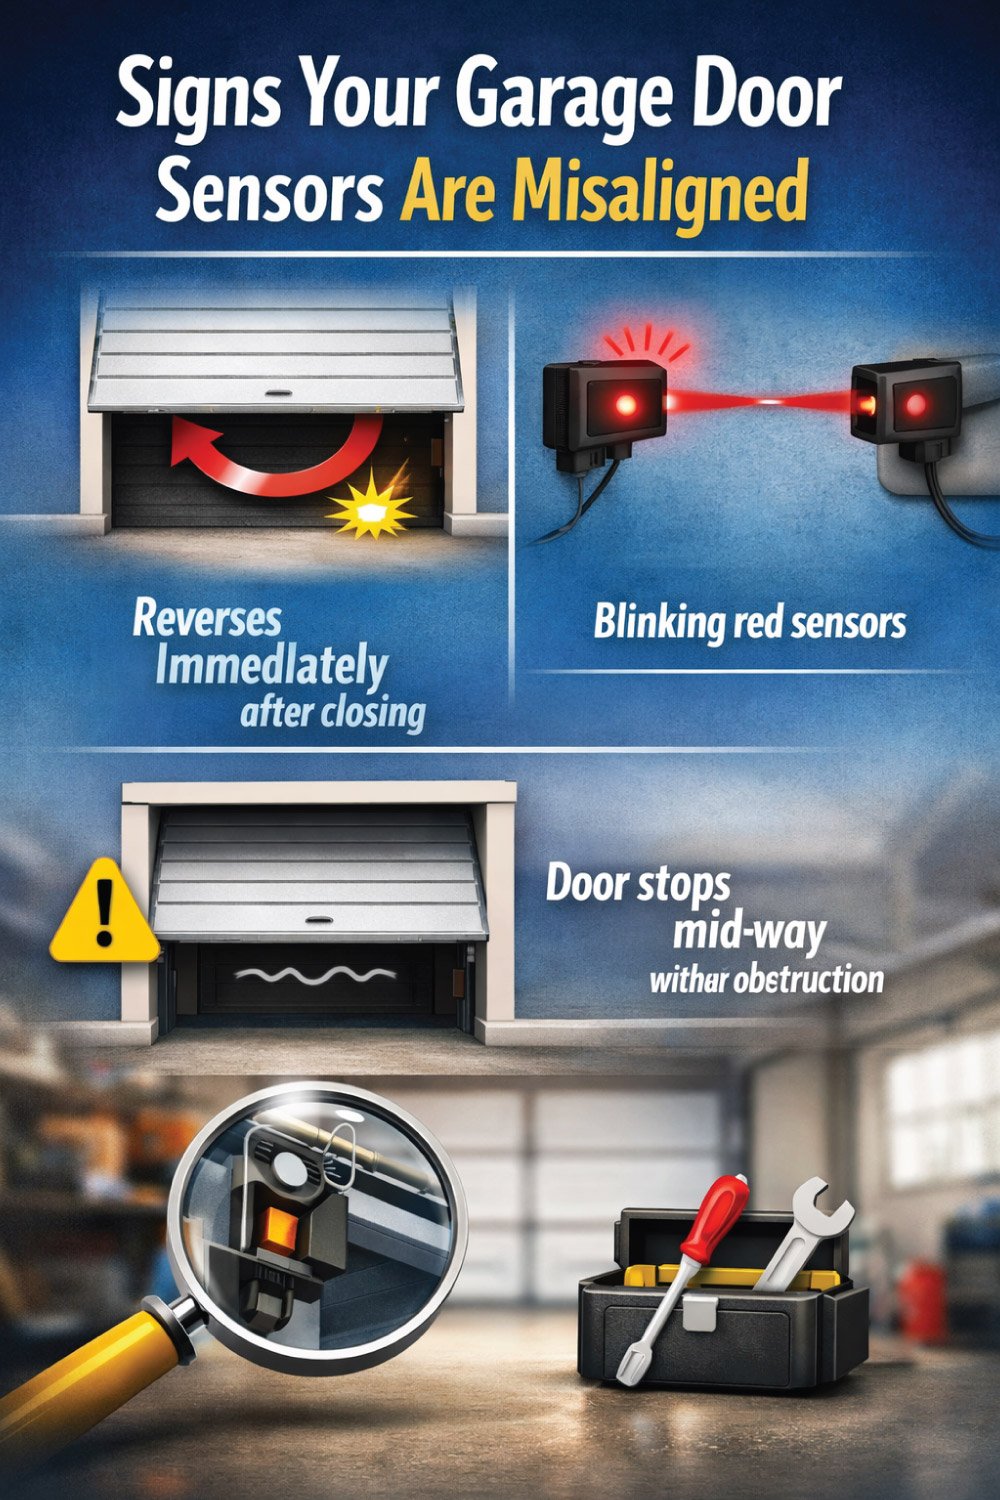
Door reverses immediately after closing
LED lights on sensors are blinking red
Door stops mid-way without obstruction
Regular inspections can help prevent accidents and prolong the life of your garage door system.
Benefits of Proper Sensor Alignment
Keeping garage door sensors properly aligned offers significant advantages. Correct alignment enhances safety by protecting family, pets, and property, ensures smooth and reliable door operation, and reduces wear on opener mechanisms. Spending a few minutes on sensor maintenance can prevent accidents and costly repairs over time.
Safety – Protects family, pets, and property
Efficiency – Smooth, reliable door operation
Longevity – Reduces wear on garage door opener mechanisms
Investing a few minutes in sensor maintenance can prevent costly repairs in the future.
Quick Troubleshooting Table
A quick troubleshooting guide helps you resolve common garage door sensor problems efficiently. From dirty lenses to loose wiring or misaligned brackets, understanding potential causes and solutions allows you to fix issues promptly, keeping your door operating safely and smoothly without unnecessary delays or costly repairs.
| Problem | Possible Cause | Solution |
|---|---|---|
| Door won’t close | Sensors dirty | Clean lenses |
| Door reverses immediately | Sensors misaligned | Re-align sensors using steps above |
| LED indicators off | Wiring loose | Check wiring and power supply |
| Repeated misalignment | Brackets loose or damaged | Tighten or replace brackets |
Conclusion
Aligning your garage door sensors is a straightforward task that can save you time, money, and potential accidents. By following the steps in this guide, cleaning your sensors, and maintaining proper alignment, your garage door will operate safely and efficiently. Proper sensor maintenance is not just a small detail—it’s a key part of ensuring home safety. Take the time to inspect and adjust your garage door sensors today, and enjoy a worry-free, smoothly operating garage door.
Also Read:

Engineer Ali Usman is a professional garage door expert and author at FixFasty, with over 10 years of hands-on experience in garage door systems and mechanical maintenance. He writes clear, step-by-step guides on garage door repairs, parts, and safety practices, helping homeowners fix problems correctly and maintain smooth, secure, and long-lasting garage door performance.