
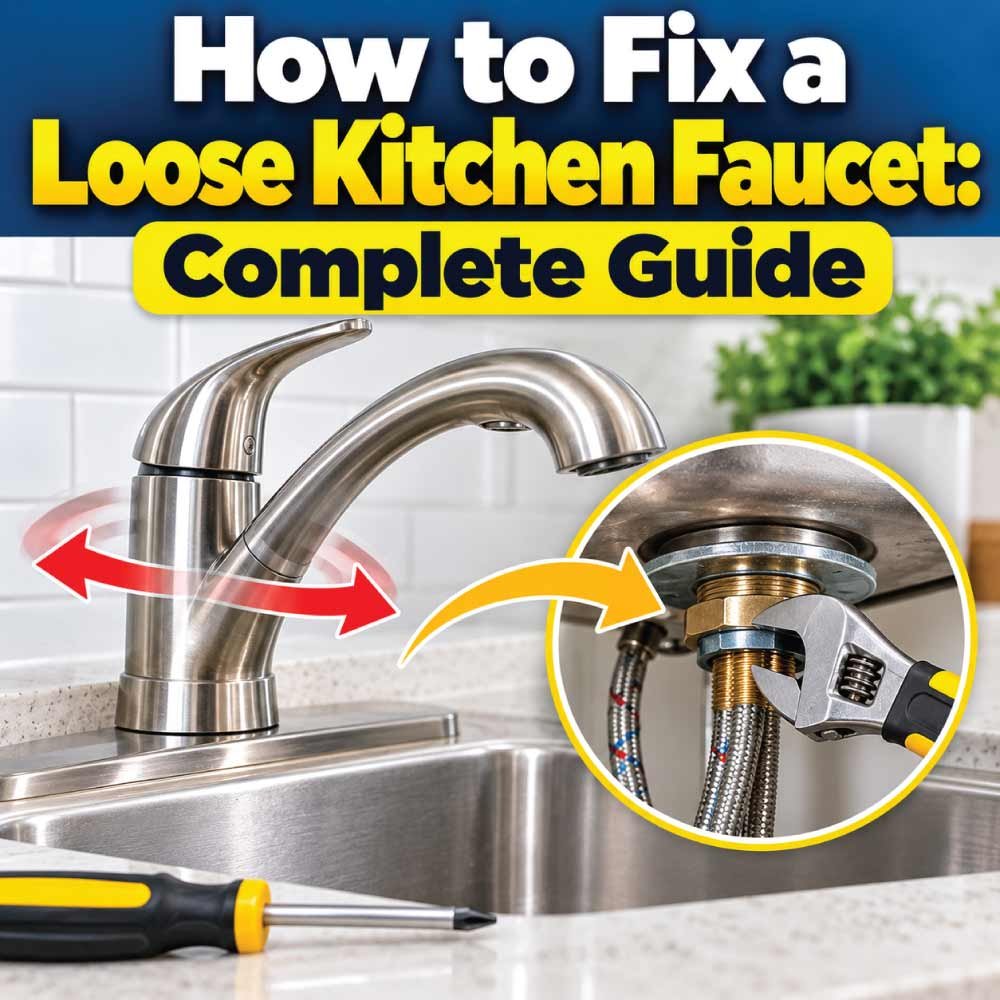
A loose kitchen faucet can be frustrating, especially when the entire faucet moves every time you turn the handle, wash dishes, or pull out the sprayer. Over time, this movement can put stress on the water supply lines, damage the mounting hardware, and allow moisture to collect beneath the sink.
The good news is that fixing a loose kitchen faucet is often a straightforward DIY repair. In many cases, you only need to tighten the mounting nuts or screws underneath the sink. However, the correct solution depends on whether the faucet base, handle, mounting bracket, or sink itself is loose.
This complete guide explains how to fix a loose kitchen faucet, identify the underlying cause, use the right tools, and prevent the problem from returning.
Quick Answer: How Do You Fix a Loose Kitchen Faucet?
To fix a loose kitchen faucet, first turn off the water supply if you will be working near the supply connections. Clear the cabinet beneath the sink and inspect the faucet mounting hardware. Use a basin wrench, adjustable wrench, or the appropriate screwdriver to tighten the mounting nut or screws holding the faucet to the sink or countertop.
Tighten the hardware gradually while keeping the faucet centered above the sink. Avoid overtightening, which can damage the mounting components or sink surface. If the faucet remains loose, inspect the mounting plate, washers, bracket, and sink for damage.
If only the handle moves, the problem may be a loose handle screw rather than the faucet mounting hardware.
What Causes a Loose Kitchen Faucet?
Before starting the repair, determine which part of the faucet is moving. This helps you avoid tightening the wrong component or replacing parts unnecessarily.
1. Loose Faucet Mounting Nut
The mounting nut secures the faucet to the sink or countertop from underneath. Regular use, vibration, and repeated movement can gradually loosen this nut.
When the mounting nut becomes loose, the entire faucet body may rotate or wobble when you use the handle or pull-out sprayer.
This is one of the most common causes of a loose kitchen faucet.
2. Loose Mounting Screws
Some kitchen faucets use mounting brackets secured with screws instead of a single large mounting nut. If these screws loosen, the faucet may shift when you apply pressure.
A screwdriver or the correct hex key may be all you need to tighten the hardware.
3. Worn or Damaged Mounting Hardware
Washers, mounting plates, brackets, and plastic retaining nuts can wear out, crack, or become deformed over time.
If the mounting hardware cannot hold the faucet securely, tightening it may provide only temporary improvement. Damaged components should be replaced with compatible parts.
4. Missing or Misaligned Mounting Plate
Some faucets include a base plate or deck plate that sits between the faucet and the sink. If this plate is missing, incorrectly positioned, or damaged, the faucet may not sit securely.
A misaligned mounting plate can also allow the faucet to shift when you move the handle.
5. Loose Kitchen Faucet Handle
Sometimes the faucet base is secure, but the handle moves independently.
A loose handle is often caused by a loosened retaining screw beneath a decorative cap or behind the handle. This repair is different from tightening the faucet mounting nut.
6. Thin or Flexible Sink Material
Some stainless steel sinks flex slightly when pressure is applied. If the faucet mounting hardware is tight but the sink surface moves, the problem may involve the sink itself rather than the faucet.
A compatible faucet stabilizing plate may help distribute the load beneath the sink. However, damaged countertops, cracked sinks, or deteriorated mounting surfaces may require professional repair.
7. Incorrect Installation
A faucet that was recently installed may become loose if the mounting nut was not tightened correctly, the mounting bracket was installed backward, or the required washer was omitted.
If the faucet has been loose since installation, review its installation instructions before tightening or replacing components.
Tools and Materials You May Need
Gather the necessary tools before starting the repair. Having everything nearby makes it easier to work in the confined space beneath the sink.
- Adjustable wrench
- Basin wrench or faucet installation tool
- Screwdriver set
- Hex keys or Allen wrenches
- Flashlight or headlamp
- Small towel or absorbent cloth
- Bucket or shallow container
- Replacement mounting nut, washer, bracket, or plate, if needed
- Protective gloves
- Manufacturer-approved replacement hardware, if necessary
You may not need every item on this list. The tools required depend on your faucet’s design and the type of mounting hardware used.
Safety Precautions Before Repairing a Loose Kitchen Faucet
Most faucet tightening jobs are relatively simple, but taking a few precautions can prevent damage and unnecessary water problems.
- Remove cleaning products, stored items, and other objects from beneath the sink.
- Place a flashlight where it can illuminate the mounting hardware.
- Check for existing leaks or moisture around the supply lines and shutoff valves.
- Avoid putting excessive pressure on flexible water lines, plastic fittings, or the faucet body.
- Keep tools away from electrical equipment or power connections beneath the sink.
- If you need to disconnect water lines, close both hot- and cold-water shutoff valves first and verify that the water is off.
Important: You generally do not need to disconnect the water supply just to tighten an accessible faucet mounting nut. However, shutting off the water is a sensible precaution if you will be disturbing supply connections or replacing components.
How to Fix a Loose Kitchen Faucet Step by Step
Follow these steps to secure a faucet that moves at its base.
Step 1: Identify Which Part of the Faucet Is Loose
Start by gently moving the faucet from side to side. Watch the base where it meets the sink or countertop.
If the entire faucet body moves, the mounting hardware is likely loose. If only the handle moves, inspect the handle screw instead. If the faucet stays firmly attached but the sink flexes beneath it, the mounting surface may need attention.
Check the faucet from above and below the sink whenever possible. This will help you understand how the hardware is arranged.
Step 2: Clear the Area Under the Sink
Remove everything stored beneath the sink so you have enough room to reach the faucet mounting hardware.
Place a towel or bucket underneath the work area in case you encounter residual moisture. Use a flashlight to locate the mounting nut, screws, bracket, and washers.
Some faucets have mounting hardware positioned far back against the sink, making it difficult to reach with a standard wrench.
If access is limited, a basin wrench or a faucet-specific installation tool can make the job easier.
Step 3: Locate the Faucet Mounting Nut or Bracket
Look directly beneath the faucet where the threaded mounting shank passes through the sink or countertop.
Depending on the design, you may find:
- One large mounting nut
- Two or more mounting screws
- A U-shaped mounting bracket
- A plastic retaining nut
- A mounting plate secured with screws
The mounting hardware holds the faucet in position and prevents it from rotating during normal use.
If you cannot identify the correct component, consult the faucet’s installation instructions or inspect the hardware carefully before turning anything.
Step 4: Tighten the Mounting Hardware
Once you have identified the correct hardware, tighten it gradually.
For a faucet with a mounting nut, use an appropriate wrench or faucet installation tool to turn the nut until it holds the faucet securely. For a faucet with mounting screws, use the correct screwdriver or hex key.
If possible, have someone hold the faucet straight from above while you tighten the hardware underneath. This helps prevent the faucet from becoming crooked.
Avoid applying excessive force. Overtightening can crack plastic mounting components, damage threads, deform thin sink material, or cause other problems.
The goal is to eliminate movement without putting unnecessary pressure on the faucet or sink.
Step 5: Check the Mounting Plate and Washers
If tightening the nut or screws does not solve the problem, inspect the surrounding components.
Look for a mounting plate that is out of position, a washer that has slipped, a cracked plastic bracket, or a missing component.
If the hardware is damaged, replace it with a compatible part designed for your faucet model. Do not substitute random washers or nuts that may not fit correctly.
Reassemble the components in the proper order, following the manufacturer’s instructions.
Step 6: Inspect the Sink and Countertop
After tightening the hardware, check whether the sink or countertop moves when you gently test the faucet.
If the faucet is secure but the sink flexes significantly, tightening the mounting nut further is unlikely to solve the underlying issue.
A compatible stabilizing plate may help with certain thin or flexible sink installations. If the mounting area is cracked, badly corroded, or structurally damaged, the sink or countertop may need repair.
Do not overtighten the faucet to compensate for a weak mounting surface.
Step 7: Test the Faucet
Return to the top of the sink and gently move the faucet from side to side.
The base should remain stable during normal use. Check the handle and sprayer separately to make sure they move as intended.
Turn on the water and inspect the faucet base, supply connections, and area beneath the sink for signs of leakage.
If you disturbed any supply connections during the repair, pay particular attention to those joints. If a leak appears, shut off the water and correct the connection before using the faucet again.
How to Fix a Loose Kitchen Faucet Handle
If the faucet base is secure but the handle wobbles, the repair is usually different.
Step 1: Find the Handle Screw
Look for a decorative cap, a small opening on the side of the handle, or a concealed retaining screw.
Some handles use a Phillips-head screw, while others require a hex key.
Step 2: Remove the Decorative Cap if Necessary
If your faucet has a decorative cap, carefully remove it according to the faucet design. Avoid using excessive force or a sharp tool that could scratch the finish.
You should then be able to see the retaining screw.
Step 3: Tighten the Screw
Use the correct tool to tighten the screw gradually. Make sure the handle is seated properly before securing it.
Do not overtighten the screw, as this can damage the threads or handle.
Step 4: Test the Handle
Move the handle through its normal range of motion. It should feel secure without excessive wobbling.
If the handle remains loose, the screw, handle, or internal attachment point may be worn. Replace the damaged component with a compatible part.
Also Read:
How to Fix a Loose Pull-Down or Pull-Out Kitchen Faucet
Pull-down and pull-out faucets have additional components that can make movement seem like a mounting problem.
If the faucet base itself wobbles, follow the mounting-hardware steps described earlier.
If the faucet body is secure but the spray head or hose moves loosely, inspect the hose connection and spray-head attachment. Check the manufacturer’s instructions before removing any components.
Also inspect the hose routing beneath the sink. A tangled hose or an improperly positioned weight can interfere with the sprayer’s movement or retraction.
Do not tighten the hose connections as a way to fix a loose faucet base. These components serve different purposes, and excessive tightening can damage the connections.
What If the Faucet Is Still Loose After Tightening?
If the faucet continues to move, one of several problems may be responsible.
The Mounting Nut Is Damaged
A stripped or cracked mounting nut may not hold the faucet securely. Replace it with the correct part rather than forcing it tighter.
The Mounting Bracket Is Cracked
Plastic mounting brackets can crack or deform. A damaged bracket should be replaced before the faucet is returned to normal use.
The Faucet Shank or Threads Are Worn
If the threaded portion of the faucet is damaged, the mounting nut may not tighten properly. Depending on the faucet design, the damaged assembly may need replacement.
The Sink Is Too Flexible
If the mounting hardware is secure but the sink bends beneath the faucet, consider whether the installation needs a compatible support plate or a repair to the sink structure.
The Faucet Was Installed Incorrectly
If parts are missing, the bracket is misaligned, or the mounting hardware is assembled in the wrong order, simply tightening the nut may not provide a lasting repair.
In these situations, review the installation instructions and correct the underlying problem before using the faucet normally.
Also Read:
Common Mistakes to Avoid When Fixing a Loose Kitchen Faucet
Avoid these mistakes to make the repair safer and more reliable.
Overtightening the mounting nut: Excessive force can damage plastic parts, threads, or the sink.
Tightening the wrong component: A loose handle screw will not be fixed by tightening the mounting nut.
Ignoring damaged hardware: Cracked brackets and stripped nuts usually need replacement.
Pulling on water supply lines: Flexible lines and connections can be damaged if used to support your body or tools.
Using incompatible replacement parts: Mounting hardware should match the faucet’s design.
Ignoring sink movement: A flexible or damaged sink may need additional support or repair.
Skipping the final leak check: Any connections disturbed during the repair should be inspected before the cabinet is closed.
Using excessive sealant: Faucet mounting hardware generally provides the mechanical support. Sealant should be used only when the faucet manufacturer or sink installation instructions call for it.
When Should You Call a Plumber?
Many loose kitchen faucet problems can be fixed without professional help. However, some situations require more experience or specialized parts.
Consider contacting a plumber if:
- The faucet remains loose after the mounting hardware has been tightened correctly.
- The mounting shank or faucet body is cracked.
- The sink or countertop is damaged around the mounting hole.
- Water is leaking from concealed plumbing connections.
- The shutoff valves are corroded, stuck, or leaking.
- The faucet is difficult to access and the hardware cannot be tightened safely.
- The faucet has been installed incorrectly and you cannot identify the correct assembly.
- The repair requires removing the sink or modifying the countertop.
If you rent your home, contact your landlord or property manager before performing a repair that could affect the sink, countertop, or plumbing connections.
Should You Repair or Replace a Loose Kitchen Faucet?
The best choice depends on the faucet’s condition and the cause of the problem.
| Problem | Recommended solution |
|---|---|
| Loose mounting nut | Tighten the existing nut |
| Loose mounting screws | Tighten the screws |
| Worn or cracked mounting bracket | Replace the bracket |
| Loose handle screw | Tighten or replace the screw |
| Missing mounting hardware | Install compatible replacement hardware |
| Flexible sink material | Consider a compatible support plate |
| Cracked faucet body | Usually replace the faucet |
| Damaged sink or countertop | Repair the mounting surface or seek professional help |
If the faucet is otherwise in good condition, tightening the hardware or replacing a small mounting component is usually the most economical option.
If the faucet body is cracked, the mounting threads are severely damaged, or replacement parts are unavailable, replacing the entire faucet may be more practical.
How to Prevent Your Kitchen Faucet From Becoming Loose Again
A few simple habits can help keep your faucet secure.
1. Avoid Using the Faucet as a Support
Do not lean your body weight against the faucet or use it to pull yourself up from the sink area. Faucets are not designed to support body weight.
2. Handle the Faucet Gently
Avoid forcefully twisting the faucet or pulling the sprayer hose beyond its normal range.
3. Check for Movement Periodically
Every few months, gently test the faucet base and handle. Address any movement before it becomes severe.
4. Inspect the Cabinet Beneath the Sink
Occasionally check for moisture, corrosion, damaged mounting hardware, and leaks around the water supply connections.
5. Use the Correct Replacement Parts
When replacing a mounting nut, bracket, or washer, choose parts that are compatible with your faucet model.
6. Follow the Manufacturer’s Installation Instructions
Different faucets use different mounting systems. Following the correct installation sequence and tightening recommendations helps prevent repeated loosening and damage.
Frequently Asked Questions
Why Does My Kitchen Faucet Keep Coming Loose?
A kitchen faucet may repeatedly come loose because the mounting nut is not holding securely, the bracket or washer is damaged, or the mounting surface is flexible. Incorrect installation can also cause recurring movement.
If tightening the hardware only provides temporary improvement, inspect the mounting components and sink rather than repeatedly tightening the same nut.
Can I Fix a Loose Kitchen Faucet Without Removing the Sink?
Yes. Most loose kitchen faucets can be tightened from underneath the sink without removing the sink itself.
A basin wrench or faucet-specific installation tool can help you reach mounting hardware in tight spaces. Removing the sink is generally unnecessary unless the mounting area is damaged or the hardware cannot be accessed.
Do I Need to Turn Off the Water to Tighten a Loose Faucet?
Usually, you do not need to turn off the water if you are only tightening the faucet mounting nut or screws and are not disturbing the water connections.
However, turn off the hot- and cold-water supplies before disconnecting hoses, replacing components that require disconnection, or working on leaking supply connections.
Why Does My Kitchen Faucet Move Even Though the Nut Is Tight?
If the mounting nut is tight but the faucet still moves, the mounting bracket may be damaged, the threads may be stripped, or the sink may be flexing.
Inspect the entire mounting assembly to determine whether a component needs replacement or the sink needs additional support.
Can I Use Pliers to Tighten a Faucet Mounting Nut?
Pliers may work on certain accessible nuts, but they can slip, damage plastic components, or make it difficult to apply controlled pressure.
A basin wrench or the correct faucet installation tool is usually a better choice. Use the tool recommended for your faucet’s mounting system.
How Much Does It Cost to Fix a Loose Kitchen Faucet?
The cost depends on the cause of the problem, the faucet design, and whether you perform the repair yourself.
If the issue is simply a loose mounting nut, the repair may cost nothing beyond the tools you already own. Replacing a bracket or other small component adds the cost of the part. Professional service will generally cost more because of labor and any additional repairs required.
Is a Loose Kitchen Faucet Dangerous?
A slightly loose faucet is not usually an immediate emergency, but ignoring it can allow the movement to worsen. Repeated movement may strain supply connections, damage the mounting hardware, or contribute to leaks.
Fix the problem promptly and inspect the area beneath the sink for moisture or water damage.
Can I Use Silicone to Stop My Kitchen Faucet From Moving?
Silicone should not be used as a substitute for properly tightened mounting hardware. The faucet must be mechanically secured with the correct nut, screws, or bracket.
Use sealant only when the faucet or sink manufacturer’s instructions call for it. If the faucet remains loose, identify and correct the underlying mounting problem.
Conclusion
Fixing a loose kitchen faucet is often a simple DIY task when the problem is caused by a loose mounting nut or screw. Start by identifying which part moves, clear the area beneath the sink, inspect the mounting hardware, and tighten the appropriate components gradually.
If tightening does not solve the problem, check for damaged brackets, missing washers, worn threads, or a flexible sink surface. Replace defective parts with compatible components, and inspect for leaks after completing the repair.
With the right tools and a careful approach, you can often restore your kitchen faucet’s stability without replacing the entire fixture. Addressing the problem early also helps protect your sink, countertop, and plumbing connections from unnecessary wear.

Engineer Ali Hasan is a garage door expert and the founder of FixFasty. With over 16 years of experience in mechanical systems and home maintenance, he provides practical, step-by-step guides on garage door installation, repairs, and maintenance, helping homeowners keep their garage doors safe, reliable, and long-lasting.