
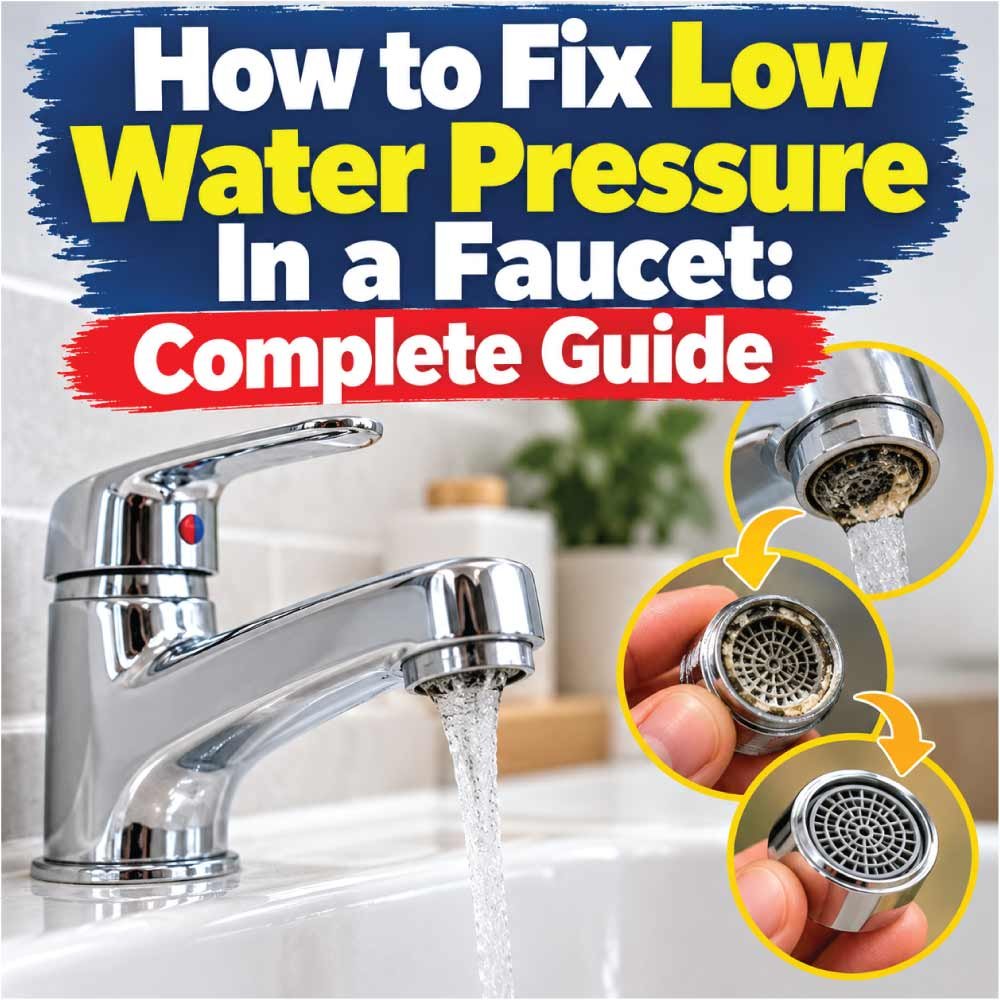
Low water pressure in a faucet can make everyday tasks like washing dishes, brushing your teeth, and cleaning the bathroom frustrating. Water may trickle out instead of flowing normally, or the pressure may be weak only when you use hot water. The cause can range from a clogged faucet aerator to a partially closed shutoff valve, a blocked cartridge, or a larger plumbing issue.
The best way to fix low water pressure in a faucet is to identify where the problem starts before replacing any parts. This guide explains the common causes, simple troubleshooting checks, step-by-step repair methods, and situations where calling a professional plumber is the safest option.
Quick Answer: How Do You Fix Low Water Pressure in a Faucet?
Start by checking whether the low pressure affects one faucet or multiple fixtures throughout your home. If only one faucet has weak flow, the aerator, cartridge, or local supply valves may be responsible. If several fixtures have low pressure, the issue may involve the main water supply, a pressure regulator, or the home’s plumbing system.
Follow these initial steps:
- Check whether other faucets have normal water flow.
- Remove and clean the affected faucet’s aerator if the design allows it.
- Confirm that the hot and cold shutoff valves beneath the sink are fully open.
- Test hot and cold water separately to identify whether one supply is affected.
- Inspect the faucet cartridge or internal components if the simpler checks do not help.
- Contact a plumber if the problem affects multiple fixtures, involves leaking pipes, or persists after basic troubleshooting.
Important: Low water flow does not always mean the home’s water pressure is too low. A clogged aerator or partially blocked faucet can restrict flow even when the supply pressure is normal.
Common Causes of Low Water Pressure in a Faucet
Understanding the possible causes helps you choose the right repair instead of replacing parts unnecessarily.
1. Clogged Faucet Aerator
The aerator is the small attachment at the tip of many faucets. It mixes air into the water stream and helps produce an even flow.
Over time, mineral deposits, rust particles, and other debris can accumulate inside it.
Common symptoms include:
- Water comes out in a weak or uneven stream.
- The flow sprays sideways.
- One faucet has low flow while other fixtures work normally.
- The problem develops gradually.
A clogged aerator is one of the simplest things to check when a faucet suddenly begins flowing poorly.
2. Partially Closed Shutoff Valves
Most bathroom and kitchen faucets have separate hot and cold shutoff valves beneath the sink. These valves control water entering the faucet.
If either valve is partially closed, the corresponding water supply may have reduced flow.
This can happen after plumbing work, routine maintenance, or an accidental adjustment.
Look for valves that are not fully open, but never force a stuck or corroded valve.
3. Blocked or Faulty Faucet Cartridge
Many modern faucets use cartridges to control water flow and temperature. Mineral deposits or debris can restrict the internal passages, while worn components can interfere with normal operation.
Possible signs include:
- Weak flow even after cleaning the aerator.
- Hot water flowing normally while cold water is weak, or vice versa.
- A handle that feels stiff or operates inconsistently.
- Reduced flow that persists after checking the supply valves.
If the cartridge is blocked or damaged, cleaning or replacing it according to the manufacturer’s instructions may restore normal flow.
4. Kinked or Restricted Supply Lines
Flexible supply lines connect the shutoff valves to the faucet. A line that is sharply bent, crushed, or internally obstructed can restrict water flow.
Inspect the visible lines beneath the sink for:
- Sharp bends or kinks.
- Signs of crushing or damage.
- Corrosion around fittings.
- Moisture or active leaks.
Do not disconnect a supply line until the water has been shut off and the faucet opened to release remaining pressure.
5. Mineral Buildup in the Faucet
Hard water can leave mineral deposits inside faucet components. These deposits may narrow internal passages or interfere with cartridge operation.
Mineral buildup is more likely when the problem develops gradually or the faucet has not been cleaned for a long time.
Cleaning removable components may help, but heavily damaged or corroded parts may require replacement.
6. Low Water Pressure Throughout the Home
If several faucets and other plumbing fixtures have weak flow, the problem may extend beyond one faucet.
Possible causes include:
- A partially closed main water shutoff valve.
- A temporary problem with the municipal water supply.
- A malfunctioning pressure-reducing valve, where installed.
- A leak in the plumbing system.
- Corroded or restricted pipes.
- A problem with a private well or its pressure equipment.
These issues may require a plumber or assistance from the water utility, depending on the source.
7. Hot Water Pressure Is Lower Than Cold Water Pressure
If cold water flows normally but hot water is weak, the restriction may be on the hot-water side.
Potential causes include a partially closed hot-water shutoff valve, a restricted supply line, debris in the faucet cartridge, or a problem with the hot-water plumbing system.
Compare hot and cold flow at the same faucet and check another fixture if possible. This can help determine whether the problem is isolated to the faucet or affects the wider hot-water system.
Tools and Materials You May Need
Most initial checks require only a few basic items.
- Adjustable wrench, if necessary.
- Soft cloth or towel.
- Small bowl or container.
- Old toothbrush or soft cleaning brush.
- Mild cleaning solution suitable for faucet components.
- Replacement aerator, if the existing one is damaged.
- Compatible replacement cartridge, if diagnosis indicates it is necessary.
- Flashlight for inspecting the area beneath the sink.
Avoid buying replacement parts until you have identified the likely cause. Many faucet components look similar but are not interchangeable.
Safety Precautions Before Troubleshooting
Low faucet pressure is usually not an emergency, but inspecting plumbing components requires care.
Do not force shutoff valves. Older valves can break or begin leaking if they are turned aggressively.
Turn off the water before disconnecting plumbing parts. Close the relevant supply valves and confirm that the water stops.
Protect the faucet finish. Use a cloth when handling decorative parts with tools.
Be careful with hot water. Allow hot water to cool before handling components that may contain it.
Avoid mixing cleaning chemicals. Use only products suitable for the component and follow their instructions.
Watch for leaks. Stop if a valve, pipe, or connection begins leaking during troubleshooting.
If a shutoff valve is stuck, leaking, or badly corroded, stop and contact a plumber. Do not remove pressurized plumbing components or open equipment you are not qualified to service.
Step-by-Step: How to Fix Low Water Pressure in a Faucet
Work through these steps in order, starting with the simplest checks.
Step 1: Determine Whether the Problem Affects One Faucet or Multiple Fixtures
Turn on the affected faucet and observe the flow. Then check another faucet in the same room and, if practical, another fixture elsewhere in the home.
Compare the results:
Only one faucet has weak flow: The problem may involve its aerator, cartridge, shutoff valves, or supply lines.
Several faucets have weak flow: The cause may be a broader water supply or plumbing issue.
Only hot water is weak: Investigate the hot-water supply and the faucet’s hot-water passage.
Only cold water is weak: Investigate the cold-water supply and corresponding faucet components.
This simple comparison helps prevent unnecessary disassembly.
If the problem started suddenly and affects the entire home, check whether nearby water service has been interrupted or ask the water utility about a possible supply issue.
Step 2: Remove and Clean the Faucet Aerator
If only one faucet has low flow, inspect its aerator first.
- Turn off the faucet.
- Examine the tip of the spout for a removable aerator.
- Unscrew it by hand if possible. If a tool is needed, protect the finish with a soft cloth.
- Note the order and orientation of any washers, screens, and inserts.
- Rinse the components under clean water.
- Use a soft brush to remove loose debris.
- If mineral deposits remain, use a compatible cleaning solution according to the faucet manufacturer’s instructions.
- Rinse thoroughly and reinstall the components in their original order.
Turn the faucet on and check the flow.
What the result means: If water flows normally after cleaning, the aerator was likely restricting the flow. If the stream remains weak, continue troubleshooting.
Some faucets have integrated or specialized aerators that require a particular removal tool. Do not force them out.
Step 3: Check the Hot and Cold Shutoff Valves
Look beneath the sink for the hot and cold water supply valves.
If the valves are accessible and appear to be in good condition, confirm that they are fully open. Conventional multi-turn valves typically open counterclockwise, while quarter-turn valves are generally open when the handle is aligned with the pipe. Designs can vary.
Turn the faucet on and test both temperatures again.
If one side improves, a partially closed valve may have been restricting the flow.
Important: Do not turn a stiff, corroded, or leaking valve forcefully. A damaged shutoff valve may need professional repair or replacement.
Step 4: Inspect the Supply Lines Beneath the Sink
If cleaning the aerator and checking the valves do not help, inspect the visible supply lines.
Look for sharp bends, crushed sections, damaged fittings, or signs of leakage.
A flexible supply line should not be tightly folded or pinched behind stored items. If a line appears damaged or severely kinked, it may need to be replaced.
Do not straighten or disconnect a damaged line while it is pressurized. Shut off the water first, and seek professional help if you cannot safely isolate the supply.
If the lines look normal but flow remains weak, continue to the next step.
Step 5: Test Hot and Cold Water Separately
Run the faucet with only cold water, then with only hot water. Compare the flow, keeping the handle positions consistent where possible.
If one side is significantly weaker, the restriction may be limited to that supply path.
Next, test hot and cold water at another faucet if available.
- If the same side is weak at multiple fixtures, the problem may be in the wider plumbing system.
- If the problem occurs only at one faucet, the faucet’s cartridge or internal passages may be responsible.
- If both sides are weak only at one faucet, the aerator, cartridge, or local supply arrangement deserves closer inspection.
This comparison is particularly useful before purchasing a cartridge.
Step 6: Inspect the Faucet Cartridge or Internal Valve
If the aerator is clean, the supply valves are open, and the supply lines appear normal, the cartridge may be obstructed or damaged.
The removal procedure varies by faucet model.
- Shut off the hot and cold water supplies.
- Open the faucet to release remaining pressure.
- Remove the handle according to the manufacturer’s instructions.
- Locate the cartridge or internal valve assembly.
- Remove any retaining clip, nut, or securing component as directed.
- Inspect the cartridge for visible mineral deposits, debris, or damage.
- Clean it only if the manufacturer permits servicing.
- Replace it if it is damaged or cannot be restored to proper operation.
- Reassemble the faucet and restore the water supply slowly.
Take photos before removing components to help with reassembly.
Do not force a stuck cartridge or assume that a visually similar replacement will fit. If the mechanism is badly corroded or difficult to remove, a plumber can help prevent damage to the faucet body.
Step 7: Check for a Wider Plumbing Problem
If several fixtures have weak flow, focus on the water supply rather than dismantling individual faucets.
Check whether the main water shutoff valve is visibly closed or partially closed, but do not force it if its condition is uncertain.
If your home has a pressure-reducing valve, private well, or other specialized water equipment, the problem may require a professional inspection.
A plumber can determine whether the system has low supply pressure, a restriction, a leak, or a faulty pressure-control component.
Do not adjust a pressure regulator or modify plumbing equipment without understanding the system and following the applicable manufacturer’s instructions.
Step 8: Restore the Water and Test the Faucet
After completing any repair, restore the water supply slowly.
- Open the shutoff valves carefully.
- Turn on the faucet and allow trapped air or debris to clear.
- Test hot and cold water separately.
- Check whether the flow has improved.
- Inspect the faucet base, supply connections, and cabinet beneath the sink for leaks.
If the pressure remains low, avoid replacing additional components without further diagnosis. The restriction may be elsewhere in the plumbing system.
Also Read:
Troubleshooting Low Water Pressure: Symptoms and Possible Causes
Use the following table to narrow down the next step.
| Symptom | Possible Cause | Recommended Action |
|---|---|---|
| One faucet has weak flow | Clogged aerator or restricted cartridge | Clean the aerator first, then inspect the cartridge if needed |
| Hot water is weak but cold water is normal | Hot-side valve, supply line, or internal passage restriction | Compare another fixture and inspect the hot-water supply |
| Cold water is weak but hot water is normal | Cold-side valve, supply line, or internal passage restriction | Compare another fixture and inspect the cold-water supply |
| Several faucets have low flow | Main supply problem, pressure regulator, leak, or restricted pipes | Check for a service interruption and contact a plumber if the issue persists |
| Flow improves after aerator cleaning | Debris or mineral buildup in the aerator | Reinstall it correctly and clean it periodically |
| Flow remains weak after basic checks | Cartridge blockage or a wider plumbing restriction | Inspect the appropriate components or arrange a professional diagnosis |
| Pressure drops suddenly throughout the home | Supply interruption, leak, or equipment problem | Check for visible leaks and contact the water utility or a plumber as appropriate |
These symptoms suggest possible causes rather than confirming a specific fault. The correct diagnosis depends on the plumbing layout and faucet design.
Common Mistakes to Avoid
Avoid these mistakes when troubleshooting low water pressure in a faucet:
Replacing the faucet too early: A dirty aerator or partially closed valve may be the real cause.
Assuming low flow always means low supply pressure: A local blockage can restrict flow even when the supply is normal.
Forcing shutoff valves: Older valves can break or leak.
Using unsuitable cleaning chemicals: Some products can damage finishes, rubber seals, and internal components.
Installing an incompatible cartridge: Incorrect parts may reduce flow further or cause leaks.
Ignoring hot-versus-cold differences: Testing both supplies separately can help isolate the restriction.
Overlooking leaks beneath the sink: Water escaping from a connection can signal a separate plumbing problem.
Adjusting a pressure regulator without proper diagnosis: Incorrect adjustments can create plumbing problems throughout the home.
A methodical approach is more effective than replacing multiple components without confirming the likely cause.
Also Read:
When to Call a Professional Plumber
Some faucet pressure problems are simple to resolve, while others involve the home’s plumbing system.
Contact a plumber if:
- Several fixtures have persistently weak water flow.
- The main shutoff valve is stuck or leaking.
- You discover a damaged or leaking supply line.
- The faucet cartridge is seized or badly corroded.
- The problem persists after cleaning the aerator and checking the accessible valves.
- You suspect a hidden pipe leak.
- A pressure-reducing valve or private well system may be malfunctioning.
- Water pressure changes suddenly and you cannot identify the reason.
If the issue affects the whole home, contact your water utility when a municipal supply problem is possible. A utility can help determine whether the issue originates outside the property, while a plumber can investigate the home’s internal plumbing.
Repair or Replacement: What Is the Better Option?
The right choice depends on where the restriction occurs and the condition of the faucet.
Repair the existing faucet when:
- The problem is caused by a clogged aerator.
- A shutoff valve was simply not fully open.
- A compatible cartridge is available.
- The faucet body and internal components are otherwise in good condition.
Consider replacing the faucet when:
- The faucet body is cracked or heavily corroded.
- Important internal components are damaged and unavailable.
- Repeated repairs have failed to restore normal flow.
- The cost of repair is not reasonable compared with a suitable replacement.
Replacing the faucet will not solve a low-pressure problem affecting the entire home. Diagnose the water supply first to avoid spending money on a new fixture that will have the same issue.
Renters should contact their property manager before replacing fixtures or performing repairs beyond routine cleaning.
How to Prevent Low Water Pressure in a Faucet
Regular maintenance can reduce the likelihood of blockages and help you spot plumbing problems early.
Clean the aerator periodically. Remove mineral deposits and debris before they significantly restrict flow.
Inspect visible supply lines. Make sure they are not sharply bent, crushed, or leaking.
Address leaks promptly. A leaking connection or pipe requires attention even if the faucet still works.
Avoid forcing faucet handles. Stiff operation may indicate buildup or a worn internal component.
Use suitable cleaning products. Follow the manufacturer’s guidance to protect seals and finishes.
Investigate sudden changes in flow. A sudden reduction across multiple fixtures deserves attention.
Maintain specialized plumbing equipment appropriately. Follow professional and manufacturer recommendations for pressure regulators and well systems.
In homes with hard water, periodic aerator cleaning may be especially helpful. However, maintenance cannot correct a damaged cartridge, badly corroded pipe, or inadequate water supply.
Frequently Asked Questions
1. Why is the water pressure low in only one faucet?
If other faucets work normally, the issue is likely localized. A clogged aerator, restricted cartridge, partially closed shutoff valve, or kinked supply line may be responsible. Clean the aerator first and then check the accessible valves and supply lines.
2. Why is my bathroom faucet pressure low but the shower pressure is normal?
The restriction may be within the bathroom faucet, its aerator, cartridge, or supply connections. A shower working normally suggests that the problem may not affect the entire home’s water supply, although the plumbing arrangement matters. Inspect the faucet before investigating larger system components.
3. Why is my faucet pressure low on the hot water side only?
The hot-water shutoff valve may be partially closed, the hot supply line may be restricted, or debris may be obstructing the faucet’s internal hot-water passage. Test another faucet to determine whether the issue affects one fixture or multiple fixtures.
4. Can a clogged aerator cause low water pressure?
Yes. Debris and mineral deposits can restrict the water passing through an aerator, reducing the faucet’s flow. Cleaning the aerator may restore normal flow if it is the source of the restriction.
5. Will replacing a faucet fix low water pressure?
Replacing the faucet can help if its internal components are damaged or severely restricted. However, it will not correct low supply pressure, a blocked household pipe, a faulty pressure regulator, or a water utility problem. Identify the source before replacing the fixture.
6. What should I do if every faucet in my house has low water pressure?
Check whether the problem started suddenly and whether your water utility reports a service interruption. Look for obvious leaks and check the main shutoff valve only if it is safe to do so. If the problem persists, contact the water utility or a licensed plumber to investigate the supply and plumbing system.
Conclusion
Low water pressure in a faucet can result from something as simple as a clogged aerator or as complex as a restriction in the home’s plumbing system. Start by comparing other fixtures, cleaning the aerator, checking accessible shutoff valves, and testing hot and cold water separately.
If those checks do not restore normal flow, the cartridge, supply lines, or wider plumbing system may need further inspection. Avoid forcing valves or dismantling pressurized components, and contact a professional when the cause is unclear. Identifying the source first will help you choose the right repair without replacing parts unnecessarily.

Engineer Ali Hasan is a garage door expert and the founder of FixFasty. With over 16 years of experience in mechanical systems and home maintenance, he provides practical, step-by-step guides on garage door installation, repairs, and maintenance, helping homeowners keep their garage doors safe, reliable, and long-lasting.