
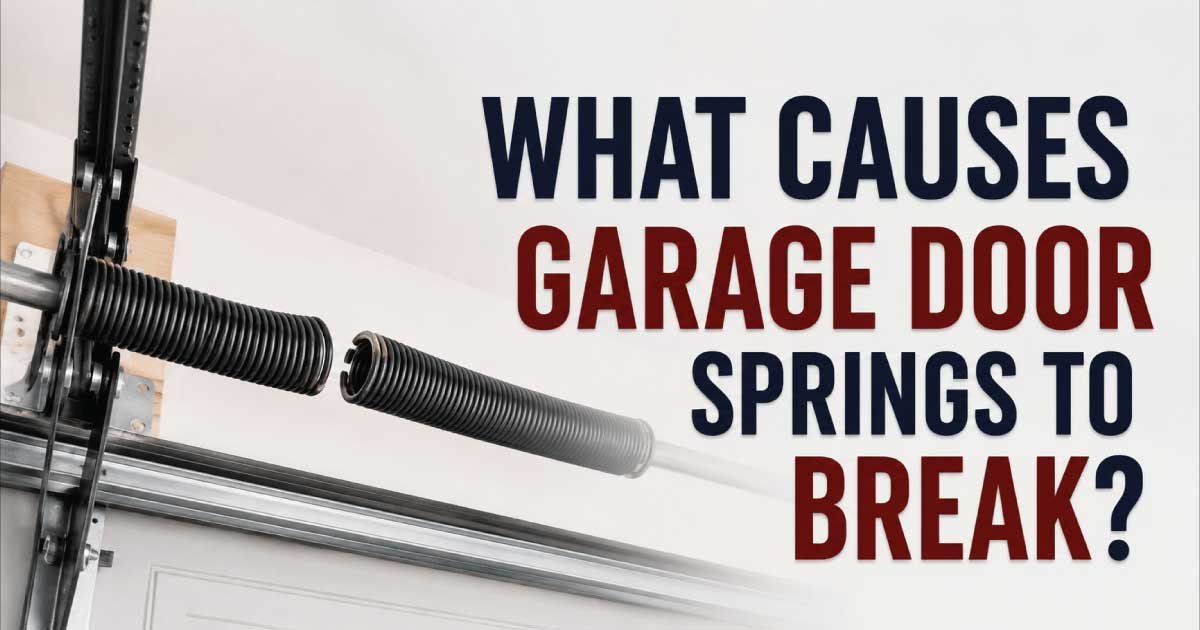
Garage door springs are among the hardest-working parts of any garage door system, yet they are often overlooked until something goes wrong. Every time you open or close the door, the springs carry most of the weight, making the process smooth and balanced. When a spring breaks, the door may suddenly become difficult—or even impossible—to operate safely.
Understanding what causes garage door springs to break can help you spot problems early, avoid costly damage, and reduce the risk of injury. In many cases, springs fail because of normal wear, poor maintenance, rust, incorrect installation, or excessive strain rather than a single sudden event. Recognizing the warning signs before complete failure can save both time and money.
This guide explains how garage door springs work, the most common reasons they fail, how to identify the cause, and the safest way to begin troubleshooting. You’ll also learn which inspections homeowners can perform themselves and which situations require professional repair. Whether your garage door has started making unusual noises or the spring has already broken, this guide will help you understand the problem and choose the right next step.
Table of Contents
ToggleCommon Signs and Symptoms
A broken or failing garage door spring rarely happens without warning. In many homes, the spring gradually weakens before it finally snaps. Learning to recognize these early symptoms makes it easier to schedule maintenance before the door becomes unsafe or unusable.
Common signs include:
- The garage door feels unusually heavy. If lifting the door manually suddenly requires much more effort, the spring may no longer be supporting the door’s weight properly.
- The door opens only a few inches and stops. Automatic openers often detect excessive resistance and stop to protect the motor.
- A loud bang from the garage. Many homeowners mistake a broken spring for something falling or even a small explosion because of the tension released when the spring snaps.
- Visible gap in the spring. Extension and torsion springs usually show a clear separation once broken.
- Door opens unevenly. One side may rise higher than the other if one spring has failed.
- Slow or jerky movement. Worn springs lose their ability to balance the door smoothly.
- Garage door opener struggles or reverses. The opener may work harder than normal because the springs are no longer carrying the load.
- Loose or hanging safety cables. On extension spring systems, broken springs may leave cables dangling.
- Squeaking, grinding, or popping sounds. These noises often indicate excessive friction, rust, or worn components before complete failure.
Practical example:
If your garage door worked normally yesterday but now won’t lift more than a few inches, avoid forcing the opener. A broken spring is one of the most common causes, and continuing to operate the system can damage the opener or bend the door panels.
How the Appliance or System Normally Works
Before troubleshooting, it helps to understand what garage door springs actually do. Many homeowners assume the electric opener lifts the entire weight of the door, but that’s only partially true.
Garage door springs store mechanical energy whenever the door closes. As the door opens, that stored energy helps lift the heavy panels, making the door feel surprisingly light.
Most residential systems use one of two spring designs:
- Torsion springs, mounted above the garage door opening
- Extension springs, mounted alongside the horizontal tracks
In a properly balanced system:
- The door closes.
- The springs become tensioned.
- Opening the door releases stored energy.
- The springs offset most of the door’s weight.
- The opener simply guides the movement rather than lifting the full load.
When a spring weakens or breaks, the balance disappears. Instead of lifting a balanced door weighing only a few pounds of effective force, the opener may suddenly need to move a door weighing well over 100 pounds. That’s why broken springs frequently lead to opener damage if ignored.
Most Common Reasons This Problem Happens
Garage door springs are designed to last for thousands of opening and closing cycles, but no spring lasts forever. Several factors can shorten their lifespan or cause unexpected failure.
Normal Wear and Cycle Fatigue
The most common cause of broken garage door springs is simple age and repeated use. Every time the door opens and closes, the spring completes one cycle. Over time, the metal gradually weakens until it can no longer handle the stress.
Why it happens:
- Metal fatigue develops after thousands of cycles.
- Internal cracks slowly grow with repeated movement.
- The spring eventually snaps under normal operation.
Symptoms:
- Door becomes heavier over time.
- Movement feels less balanced.
- Spring breaks during ordinary use.
How to identify it:
- Spring appears old but otherwise undamaged.
- No obvious rust or impact damage.
- Door has been used regularly for many years.
In many households where the garage serves as the main entrance, springs wear out faster because the door may cycle six to ten times every day.
Rust and Corrosion
Rust is another leading cause of premature spring failure. Corrosion increases friction between the coils while weakening the metal itself.
Why it happens:
- Moisture enters the garage.
- High humidity encourages oxidation.
- Lack of lubrication allows corrosion to spread.
Symptoms:
- Orange or brown discoloration.
- Loud squeaking during operation.
- Rough movement.
How to identify it:
- Visible rust on the spring surface.
- Flaking metal.
- Dry, noisy coils.
Routine lubrication helps reduce friction and slows corrosion significantly.
Poor Maintenance
Many garage doors receive little attention until something breaks. Without regular inspection, small issues gradually become expensive repairs.
Why it happens:
- Springs are never lubricated.
- Loose hardware isn’t tightened.
- Minor wear goes unnoticed.
Symptoms:
- Increased operating noise.
- Jerky movement.
- Gradually declining balance.
How to identify it:
- Dry springs.
- Dirty tracks.
- Worn rollers and hinges.
Annual maintenance often extends spring life by reducing unnecessary strain throughout the system.
Incorrect Spring Size
Not every garage door uses the same spring. Installing the wrong spring places constant stress on the entire lifting system.
Why it happens:
- Previous repair used incorrect replacement parts.
- Door weight changed after adding insulation.
- Spring specifications were miscalculated.
Symptoms:
- Door won’t stay halfway open.
- Opener strains continuously.
- Springs wear out unusually fast.
How to identify it:
- Door feels too heavy or too light.
- Spring dimensions don’t match manufacturer recommendations.
- Balance test fails repeatedly.
Extreme Temperature Changes
Garage doors experience seasonal expansion and contraction. Cold temperatures make metal slightly more brittle, increasing the likelihood of failure if a spring is already worn.
Why it happens:
- Existing cracks expand.
- Cold metal becomes less flexible.
- Older springs lose resilience.
Symptoms:
- Spring breaks during winter.
- Louder operating noises.
- Reduced smoothness.
How to identify it:
- Failure occurs during freezing weather.
- Spring already showed signs of aging.
Cold weather usually doesn’t create the damage by itself—it often reveals weakness that already existed.
Improper Installation
Even high-quality springs can fail early if installed incorrectly.
Why it happens:
- Incorrect tension applied.
- Misaligned mounting hardware.
- Improper winding procedures.
Symptoms:
- Uneven door movement.
- Frequent cable problems.
- Early spring failure.
How to identify it:
- Recent installation followed by repeated issues.
- Door appears unbalanced despite new parts.
Professional installation greatly reduces the risk of premature failure because spring tension must be adjusted precisely.
Excessive Door Weight
Garage doors become heavier over time when homeowners add insulation panels, decorative hardware, or replacement windows.
Why it happens:
- Springs were sized for the original door.
- Added weight exceeds spring capacity.
Symptoms:
- Slower opening.
- Opener works harder.
- Springs wear out faster.
How to identify it:
- Recent modifications to the door.
- Springs appear undersized.
Safety Precautions Before Troubleshooting
Garage door springs are under extremely high tension. Unlike many household repairs, mistakes can cause serious injury. Before inspecting any part of the spring system, take a few basic safety precautions.
Always follow these guidelines:
- Disconnect the automatic opener before performing inspections.
- Never loosen or remove spring mounting hardware. Even experienced technicians use specialized tools for this work.
- Keep hands away from broken spring ends, which can be sharp.
- Wear safety glasses and work gloves during visual inspections.
- Do not stand directly beneath the garage door if a spring has failed.
- Secure the door in the closed position whenever possible.
- Keep children and pets away from the work area.
- Do not attempt to rewind torsion springs without proper training and equipment.
- Avoid using the automatic opener repeatedly if the door feels unusually heavy.
A safe inspection focuses on identifying visible problems—not repairing high-tension components.
Tools Required
Before beginning your inspection, gather a few basic tools. These are intended for diagnosis and routine maintenance only, not for replacing high-tension springs.
| Tool | Purpose |
|---|---|
| Flashlight | Inspect springs, cables, and tracks |
| Safety glasses | Protect eyes during inspection |
| Work gloves | Prevent cuts from sharp metal edges |
| Step ladder | Safely view overhead components |
| Silicone-based garage door lubricant | Lubricate moving parts during maintenance |
| Tape measure | Check spring dimensions if needed |
| Clean cloth | Remove dust and old lubricant |
| Notebook or phone camera | Record damage for comparison or professional evaluation |
Step-by-Step Troubleshooting Guide
A careful inspection helps determine whether the spring is actually the problem or if another component is causing similar symptoms. Work through these steps in order without attempting to remove or adjust any spring hardware.
- Inspect the springs visually.
Look for gaps, rust, stretched coils, or obvious breaks. A visible separation usually confirms a broken spring.
Expected result: Spring appears intact or visibly damaged.
Next: If broken, stop using the door and arrange replacement. - Check whether the door opens manually.
Disconnect the opener using the emergency release and carefully test the door.
Why it matters: A properly balanced door should lift with moderate effort.
Expected result: Smooth movement or excessive weight.
Next: If extremely heavy, suspect spring failure. - Listen during operation.
Slowly move the door while listening for squeaks, grinding, popping, or scraping noises.
Why it matters: Unusual sounds often point to rust, worn hardware, or spring fatigue.
Expected result: Quiet, smooth travel.
Next: Lubricate moving parts if appropriate, or continue inspecting for wear. - Inspect the lift cables.
Look for fraying, slack, or cables that have come off the drums.
Why it matters: A broken spring can cause cable problems, and damaged cables create additional safety hazards.
Expected result: Tight, evenly wound cables.
Next: If cables are damaged or displaced, avoid operating the door until repairs are made. - Examine rollers and tracks.
Check for bent tracks, worn rollers, or debris that could interfere with movement.
Why it matters: Mechanical resistance can place extra stress on otherwise healthy springs.
Expected result: Clean tracks and smoothly rolling hardware.
Next: Remove debris and replace worn rollers if needed, or consult a professional if structural damage is visible.
Also Read:
Quick Diagnosis Table
| Symptom | Possible Cause | Recommended Solution |
|---|---|---|
| Loud bang followed by door failure | Broken spring | Stop using the door and replace the spring |
| Door feels extremely heavy | Failed torsion or extension spring | Inspect springs and arrange replacement |
| Door opens unevenly | One spring broken or cable issue | Inspect both springs and lift cables |
| Squeaking springs | Rust or lack of lubrication | Clean and lubricate moving parts |
| Opener struggles to lift door | Weak or worn springs | Perform a balance check and inspect springs |
| Door stops after opening a few inches | Broken spring or excessive resistance | Inspect springs, tracks, and rollers |
| Visible gap in spring | Complete spring break | Replace the damaged spring before operating the door |
| Jerky door movement | Aging springs or worn hardware | Inspect the entire lifting system and schedule repairs if needed |
How to Fix Each Common Cause
Now that you’ve identified the likely reason your garage door spring failed, the next step is deciding how to address it safely. Some problems involve routine maintenance that homeowners can perform themselves, while others require specialized tools and training. The key is knowing where to draw the line between preventive care and high-risk repairs.
Replace Worn-Out Springs
When springs reach the end of their cycle life, replacement is the only reliable solution. Springs cannot be repaired once the metal has fatigued or broken.
How to fix it:
- Confirm the spring is broken or significantly weakened.
- Identify the correct spring type, size, wire diameter, and length.
- Replace both springs if your system uses a pair, even if only one has broken. Springs wear at similar rates, and replacing both helps maintain proper balance.
- Test the door balance after installation.
DIY or Professional?
- Extension springs: Some experienced DIYers replace these using proper safety cables and precautions, but there is still significant risk.
- Torsion springs: Professional repair is strongly recommended. These springs are under extreme tension and can cause serious injury if handled incorrectly.
Remove Rust and Lubricate Moving Parts
Rust doesn’t always require spring replacement if caught early. Light surface corrosion can often be managed through routine maintenance.
How to fix it safely:
- Wipe dirt and moisture from the springs.
- Remove light rust with a clean cloth or a soft nylon brush.
- Apply a garage door-specific silicone or lithium-based lubricant to the coils.
- Open and close the door several times to distribute the lubricant evenly.
Avoid using heavy grease or penetrating oils that attract dust and debris.
Correct Door Balance Problems
Sometimes the spring is still functional but no longer balances the door correctly because of age or incorrect adjustment.
Signs of poor balance:
- The door drifts downward after being lifted halfway.
- The door rises by itself.
- The opener struggles even though the spring isn’t broken.
A balance problem usually indicates that spring tension needs adjustment. Because adjusting torsion spring tension involves stored mechanical energy, this repair is best left to a qualified technician.
Replace Incorrectly Sized Springs
If previous repairs used springs that don’t match the door’s weight, replacing them with correctly rated springs prevents repeated failures.
A technician will typically measure:
- Door height
- Door weight
- Spring length
- Inside diameter
- Wire size
- Number of turns required
Using properly matched springs reduces strain on both the opener and other hardware.
Repair Related Hardware
A failing spring often places extra stress on surrounding components. During repairs, inspect and replace worn parts such as:
- Lift cables
- Rollers
- Hinges
- Bearing plates
- Center bearing
- Cable drums
- Bottom brackets (professional repair recommended)
Replacing worn hardware at the same time often prevents another service call a few months later.
Also Read:
Advanced Troubleshooting
If replacing or inspecting the springs doesn’t fully solve the problem, another issue may be affecting the garage door system. These less common failures are worth checking before assuming additional spring damage.
Garage Door Opener Problems
Sometimes the springs are functioning normally, but the opener has developed its own fault.
Possible issues include:
- Worn drive gear
- Failing motor
- Broken chain or belt
- Misadjusted travel limits
- Incorrect force settings
If the door operates smoothly by hand but struggles with the opener, the opener itself deserves closer inspection.
Damaged Tracks
Bent or misaligned tracks increase resistance and place unnecessary stress on the springs.
Look for:
- Gaps between rollers and tracks
- Visible dents
- Loose mounting brackets
- Sections that are no longer straight
Minor bracket tightening is generally safe, but bent tracks usually require replacement rather than straightening.
Worn Rollers
Rollers gradually wear flat spots or damaged bearings.
Symptoms include:
- Loud rumbling
- Jerky movement
- Increased friction
- Uneven door travel
Replacing worn rollers often restores smoother operation while reducing stress on new springs.
Cable Drum Issues
The cable drums guide lift cables evenly as the door moves.
Inspect for:
- Cracks
- Loose set screws
- Uneven cable winding
- Damaged grooves
Cable drum repairs frequently involve releasing spring tension, making them unsuitable for most DIY repairs.
Structural Door Damage
Sometimes homeowners mistakenly blame the springs when the real issue is a damaged garage door.
Check for:
- Bent panels
- Broken reinforcement struts
- Loose hinges
- Warped wooden sections
Structural damage changes the door’s weight distribution and may cause repeated spring failures if not corrected.
When Repair Is Not Worth It
Replacing a broken spring is often much less expensive than replacing an entire garage door. However, there are situations where investing in additional repairs may no longer make financial sense.
Replacement becomes the smarter option when:
- The garage door has significant structural damage.
- Multiple major components have failed at the same time.
- Replacement parts are difficult to obtain for an older system.
- Repair costs approach half the price of a new door.
- The door has severe rust, rot, or impact damage.
- The insulation and weather sealing no longer meet your needs.
For example, replacing springs, cables, rollers, tracks, and an aging opener on a 25-year-old garage door may cost nearly as much as installing a modern, safer, and more energy-efficient system.
A professional inspection can help determine whether continued repairs provide good long-term value.
Preventive Maintenance Tips
Garage door springs cannot last forever, but regular maintenance can significantly extend their service life and reduce unexpected breakdowns.
Follow these preventive maintenance practices:
- Lubricate springs every three to six months using a garage door lubricant.
- Inspect springs for rust, cracks, or gaps during seasonal maintenance.
- Test door balance every few months by disconnecting the opener and lifting the door halfway.
- Tighten loose bolts and brackets where appropriate.
- Keep tracks clean and free of debris.
- Replace worn rollers before they increase spring stress.
- Schedule a professional inspection every one to two years for heavily used doors.
- Address unusual noises promptly instead of waiting for complete failure.
- Avoid hanging heavy storage items from the garage door or tracks.
- Replace aging springs before they fail if they are approaching their expected cycle rating.
These simple habits reduce wear across the entire door system, not just the springs.
Also Read:
Common Mistakes to Avoid
Many garage door injuries happen because homeowners underestimate the force stored in garage door springs. Avoiding a few common mistakes can protect both you and your equipment.
Common mistakes include:
- Continuing to use the opener after a spring breaks.
- Attempting to wind torsion springs without proper tools.
- Replacing only one spring when two have similar wear.
- Ignoring rust and unusual noises.
- Installing springs with incorrect specifications.
- Using general-purpose grease instead of garage door lubricant.
- Forgetting to inspect cables and rollers during maintenance.
- Standing directly under an unbalanced door.
- Delaying repairs after noticing early warning signs.
Being proactive usually costs far less than repairing additional damage caused by neglect.
When to Call a Professional
Some garage door maintenance tasks are safe for homeowners, but spring replacement is one of the repairs where professional expertise offers important safety advantages.
Contact a garage door technician if:
- A torsion spring has broken.
- You notice a visible gap in the spring.
- Lift cables have come off the drums.
- The door is crooked or jammed.
- The opener strains despite routine maintenance.
- Multiple components require replacement.
- You are unsure which spring your door uses.
- The door weighs too much to move safely by hand.
- You lack the proper winding bars or safety equipment.
Professional technicians have specialized tools to safely release spring tension, install correctly matched replacements, and verify that the entire system is properly balanced before returning the door to service.
Estimated Repair Costs
| Repair | Estimated Cost | DIY or Professional |
|---|---|---|
| Spring lubrication | $10–$25 | DIY |
| Roller replacement | $30–$150 | DIY or Professional |
| Extension spring replacement | $75–$200 | Professional Recommended |
| Torsion spring replacement | $150–$400 | Professional |
| Lift cable replacement | $100–$250 | Professional |
| Garage door balance adjustment | $75–$150 | Professional |
| Track repair or alignment | $125–$300 | Professional |
| Complete garage door opener adjustment | $75–$200 | DIY (minor settings) or Professional |
| Full garage door replacement | $800–$3,500+ | Professional |
Actual costs vary depending on door size, spring type, labor rates, and your location.
Final Thoughts
Understanding what causes garage door springs to break helps homeowners recognize problems before they become dangerous or expensive. In most cases, broken springs result from normal wear, corrosion, poor maintenance, improper sizing, or additional strain placed on the garage door system. While some preventive tasks—such as lubrication, cleaning, and visual inspections—are well within the abilities of most homeowners, repairs involving high-tension springs require specialized tools and experience.
Regular maintenance remains the best way to extend spring life and improve the overall reliability of your garage door. Pay attention to warning signs like unusual noises, uneven movement, or a door that suddenly feels heavier than normal. Addressing these issues early can prevent damage to the opener, cables, rollers, and other components.
When troubleshooting, always put safety first. Never attempt repairs that involve releasing or adjusting spring tension unless you have the proper training. By combining routine preventive maintenance with timely professional repairs when necessary, you can keep your garage door operating smoothly, safely, and reliably for many years.

Engineer Ali Usman is a professional garage door expert and author at FixFasty, with over 10 years of hands-on experience in garage door systems and mechanical maintenance. He writes clear, step-by-step guides on garage door repairs, parts, and safety practices, helping homeowners fix problems correctly and maintain smooth, secure, and long-lasting garage door performance.