
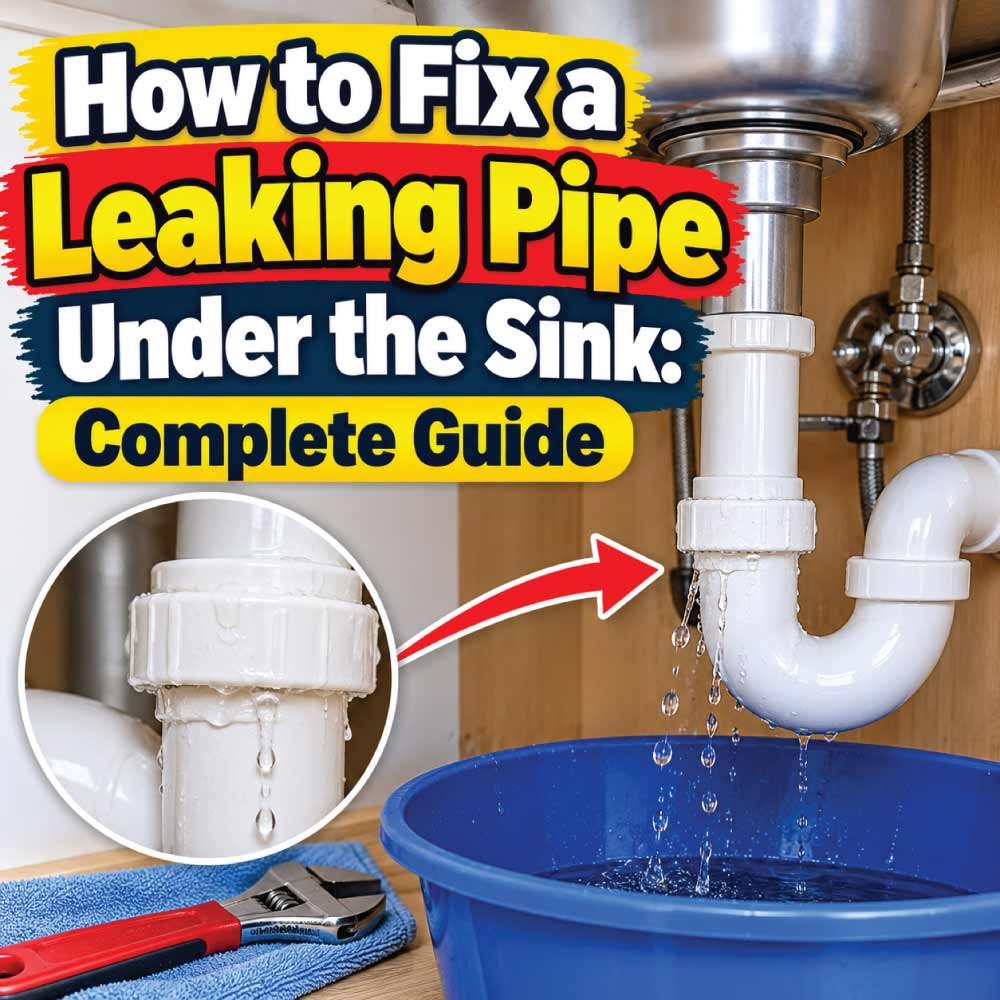
A leaking pipe under the sink can quickly turn a small plumbing problem into a frustrating household issue. Water dripping into the cabinet, damp shelves, unpleasant odors, and water stains are common signs that something is wrong with the plumbing beneath your kitchen or bathroom sink. Fortunately, many minor leaks can be repaired without hiring a professional plumber.
Learning how to fix a leaking pipe under the sink starts with identifying the source of the water. The leak may come from a loose connection, a worn-out washer, a damaged drainpipe, a faulty P-trap, or a leaking water supply line. Each problem requires a slightly different repair method, so finding the exact cause is essential.
This complete guide explains how to inspect the plumbing, identify common leak sources, gather the necessary tools, and complete basic repairs safely. Whether you have a kitchen sink or a bathroom sink, these practical steps can help you stop the leak and prevent further water damage.
Why Is the Pipe Under My Sink Leaking?
Before attempting a repair, determine where the water is coming from. Pipes beneath a sink carry water through the supply lines, drain assembly, and curved trap. A leak in any of these components can leave water inside the cabinet.
Common causes include:
Loose pipe connections: Slip nuts and threaded fittings may loosen over time because of vibration, movement, or improper installation.
Worn-out washers or gaskets: Rubber seals can deteriorate, flatten, or crack, allowing water to escape.
Damaged drainpipes: Plastic or metal pipes may develop cracks, corrosion, or other damage.
Leaking P-trap: The curved pipe beneath the sink can leak around its joints or develop a hole.
Faulty water supply lines: Flexible hoses connecting the faucet to the water supply can wear out or become damaged.
Clogged drains: Blockages can cause water to back up, exposing weak connections and sometimes contributing to leaks.
Improper installation: Misaligned pipes, overtightened fittings, or incorrectly installed seals can cause recurring leaks.
Identifying the cause helps you choose the correct repair instead of replacing parts unnecessarily.
Tools and Materials You May Need
Gather your supplies before starting the repair. The exact tools depend on the type of pipe and the location of the leak.
- Adjustable wrench
- Slip-joint pliers
- Bucket or shallow container
- Old towels or absorbent cloths
- Flashlight
- Replacement washers or gaskets
- Replacement drainpipe or P-trap, if needed
- Replacement water supply line, if damaged
- Plumber’s tape for compatible threaded water-supply connections
- Mild household cleaner for drying and cleaning the cabinet
You may not need every item. A loose plastic drain fitting, for example, might only require careful hand-tightening, while a cracked pipe usually needs replacement.
Step 1: Turn Off the Water Supply When Necessary
Start by protecting the area from additional water damage.
If the leak comes from a faucet supply line or a pressurized water connection, close the appropriate shutoff valve beneath the sink. Turn the valve clockwise gently until it stops. Do not force a stuck valve because it may break or begin leaking.
If the shutoff valve is damaged, inaccessible, or does not stop the water, turn off the main water supply if you can do so safely. Contact a plumber if the flow cannot be controlled.
For a leak coming only from the drainpipe, you usually do not need to turn off the water supply. However, avoid using the sink until the repair is complete.
Place a bucket beneath the leaking section and remove stored items from the cabinet. Wipe away standing water so you can identify the leak more easily.
Important: If water is reaching electrical outlets, wiring, or electrical equipment, avoid touching the wet area and arrange appropriate professional assistance.
Step 2: Find the Exact Source of the Leak
Do not start tightening fittings or replacing pipes until you know where the water originates.
Use a flashlight to inspect the plumbing beneath the sink. Look for moisture around the faucet supply connections, drainpipe joints, P-trap, and the point where the drain connects to the sink.
Dry the pipes and fittings with a clean towel. Then use the sink briefly, if it is safe to do so, and observe the plumbing.
Check the following areas:
Water supply connections: Look for fresh droplets around the valves, hose fittings, or faucet connections.
Drain opening: Examine the connection directly beneath the sink basin.
Drainpipe joints: Check where straight pipe sections connect to one another.
P-trap: Inspect the curved section and both of its connections.
Pipe surfaces: Look for cracks, corrosion, discoloration, or water trails.
If the leak appears only when the sink drains, the problem is likely associated with the drain assembly or drainpipe. If water leaks even when the faucet is off and the sink is not being used, a pressurized supply connection may be responsible.
Water can travel along a pipe before dripping, so the wettest spot is not always the original source.
Step 3: Fix a Loose Drainpipe Connection
Loose drainpipe connections are among the simplest under-sink plumbing problems to repair.
Most modern sink drains use plastic slip-joint fittings with nuts and rubber or plastic washers. These connections generally do not require excessive force to seal properly.
Follow these steps:
- Place a bucket under the connection to catch any remaining water.
- Dry the pipe and surrounding fittings.
- Check whether the slip nut is visibly loose or the pipe is misaligned.
- Realign the pipe sections so they fit together naturally.
- Tighten the slip nut by hand until it feels secure.
- If the fitting still leaks, use slip-joint pliers for a small additional adjustment, provided the fitting manufacturer permits it.
- Run water into the sink and inspect the connection for fresh droplets.
Avoid overtightening plastic fittings. Excessive force can damage the threads, deform the washer, or crack the nut.
If the joint continues leaking after proper alignment and tightening, remove the connection and inspect the washer. Replace it if it is damaged, flattened, or incorrectly positioned.
Step 4: Replace a Worn-Out Washer or Gasket
A damaged washer is another common reason a pipe beneath the sink leaks. Washers create a seal between connected pipe sections, and they can become brittle, misshapen, or worn over time.
How to Replace a Drainpipe Washer
- Place a bucket beneath the joint.
- Loosen the slip nut by turning it counterclockwise.
- Carefully separate the pipe sections.
- Remove the old washer and inspect its condition.
- Purchase a replacement that matches the pipe diameter and fitting type.
- Install the new washer in the correct orientation according to the fitting design.
- Reconnect the pipe sections, making sure they are properly aligned.
- Tighten the nut by hand and make only a small additional adjustment if necessary.
- Run water through the sink and check for leaks.
Some tapered washers must face a particular direction to create a proper seal. If you are unsure, follow the fitting manufacturer’s instructions.
Do not apply plumber’s tape or sealant to a slip-joint washer unless the fitting manufacturer specifically recommends it. These connections generally seal through the washer rather than through the threads.
When Should You Replace the Gasket?
Replace the gasket if it is cracked, brittle, flattened, or no longer fits securely. If a new gasket does not stop the leak, inspect the pipe ends and fittings for damage or misalignment.
Step 5: Repair or Replace a Leaking P-Trap
The P-trap is the curved pipe beneath the sink that holds a small amount of water to help prevent sewer gases from entering the room. It usually sits between the sink drainpipe and the wall drain.
A leaking P-trap may drip from its joints, develop cracks, or become damaged by corrosion.
How to Fix a Leaking P-Trap
- Place a bucket directly beneath the curved pipe.
- Remove standing water from the sink if necessary.
- Loosen the connecting slip nuts carefully.
- Remove the trap and empty the remaining water into the bucket.
- Inspect the trap for cracks, corrosion, blockages, and damaged washers.
- Clean the mating surfaces and remove any debris.
- Replace worn washers or install a new trap if the existing one is damaged.
- Reassemble the trap, ensuring that all pipe sections align naturally.
- Tighten the connections without forcing the fittings.
- Run water through the sink and inspect every joint.
If the P-trap is cracked or severely corroded, replacing it is generally more reliable than attempting a temporary patch.
Make sure the replacement trap matches the existing pipe diameter and configuration. Avoid bending or forcing pipes into position, as this can create additional leaks.
Also Read:
Step 6: Fix a Leaking Water Supply Line
A leaking water supply line requires a different approach because it carries pressurized water. Common warning signs include continuous dripping, moisture around a threaded connection, or water spraying from a damaged hose.
How to Inspect the Supply Line
- Turn off the relevant shutoff valve.
- Open the faucet to release remaining pressure.
- Dry the hose, valve, and connections.
- Inspect the entire flexible line for bulges, cracks, corrosion, or damaged fittings.
- Check whether the leak originates from the connection or the hose itself.
If the connection is loose, carefully tighten it using the appropriate tool while supporting the valve or fitting to avoid twisting the plumbing.
Do not overtighten supply-line connections. Many flexible faucet hoses use rubber seals or compression-style fittings and do not require plumber’s tape on their sealing surfaces.
When to Replace the Supply Line
Replace the line if the hose is cracked, corroded, bulging, frayed, or leaking through its body. Use a replacement with the correct length, fitting type, and pressure rating.
If the shutoff valve itself leaks or cannot close completely, professional repair may be necessary.
Never attempt to patch a damaged pressurized water hose with tape or ordinary household sealant. Replacing a defective line is the safer and more dependable solution.
Step 7: Replace a Cracked or Damaged Drainpipe
A cracked drainpipe can leak whenever water flows through the sink. Small cracks may be difficult to notice until water begins collecting underneath the pipe.
Temporary patches are often unreliable, particularly if the pipe is under stress or the damage is extensive.
How to Replace a Damaged Drainpipe Section
- Stop using the sink and place a bucket under the damaged pipe.
- Remove the affected section by loosening its connectors or following the pipe system’s approved removal method.
- Take the damaged section to a hardware store if needed to match its diameter, material, and connection style.
- Obtain the correct replacement pipe and any required washers or fittings.
- Install the replacement section without forcing or bending the surrounding plumbing.
- Check that all joints are aligned and properly secured.
- Run water through the sink and inspect the repaired area carefully.
If the damaged pipe is glued, soldered, concealed in a wall, or connected to a complex plumbing system, the repair may require specialized tools and experience.
A pipe that is cracked near the wall connection should be inspected carefully. Damage in this area may involve plumbing beyond the visible drain assembly.
Also Read:
Step 8: Check for a Clogged Drain
A clogged sink drain can contribute to leaking by slowing drainage and causing water to back up. However, a clog does not automatically mean the pipe is damaged.
If water drains slowly, check for food particles, grease, hair, soap residue, or other debris.
For a minor blockage, remove and clean an accessible drain stopper or P-trap if you can do so safely. Keep a bucket beneath the trap before loosening it.
Avoid mixing chemical drain cleaners or combining them with other cleaning products. Certain combinations can release dangerous fumes or cause chemical reactions. If a chemical cleaner has already been used, follow its safety instructions before opening the plumbing.
If the drain remains blocked, or you suspect a blockage deeper in the plumbing system, consider contacting a plumber.
Once the clog is removed, inspect the connections again while running water. A previously weakened joint may still need a washer replacement or other repair.
Step 9: Test the Repair for Leaks
After repairing the pipe, test the plumbing before returning items to the cabinet.
Follow this checklist:
- Confirm that all fittings are aligned and secure.
- Wipe every pipe and connection completely dry.
- Run a small amount of water into the sink.
- Check each joint for fresh droplets.
- Increase the water flow gradually.
- Fill the basin partially and release the water to test the drain under heavier flow.
- Inspect the supply lines and shutoff valves for moisture.
- Check the cabinet floor and surrounding surfaces for signs of continued leakage.
Use a dry paper towel around each connection to help identify small leaks that are difficult to see.
If water appears again, stop using the sink and investigate the source. Repeatedly tightening a connection without identifying the cause may damage the fitting or worsen the problem.
Do not store cleaning products or household items beneath the sink until you are confident the repair is holding.
Common Mistakes to Avoid When Fixing a Leaking Pipe Under the Sink
Some repair mistakes can turn a minor leak into a more expensive plumbing problem.
1. Overtightening Plastic Fittings
Plastic nuts and pipes can crack when tightened too aggressively. Tighten connections gradually and follow the manufacturer’s recommendations.
2. Using the Wrong Washer
A washer that is too large, too small, or incorrectly shaped may not seal properly. Match the replacement to the fitting.
3. Applying Plumber’s Tape Everywhere
Plumber’s tape is intended for compatible threaded connections. It usually does not fix a leaking slip-joint washer or a damaged flexible supply hose.
4. Ignoring a Damaged Pipe
A cracked or corroded pipe should be replaced rather than relying on a temporary patch that may fail.
5. Skipping the Final Water Test
A repair may appear successful while the pipes are dry but leak when water begins flowing. Always test the system before considering the job complete.
6. Forcing Misaligned Pipes Together
Pipes that are bent or pulled into position can put stress on the fittings and cause recurring leaks. Adjust the pipe layout or replace incompatible components instead.
7. Leaving Water Inside the Cabinet
Even a small leak can damage cabinet materials, create unpleasant odors, and encourage mold growth. Dry the area thoroughly and monitor it after the repair.
How Much Does It Cost to Fix a Leaking Pipe Under the Sink?
The cost depends on the location of the leak, the type of plumbing, the parts required, and whether you complete the repair yourself or hire a professional.
For a simple DIY repair, the expense may be limited to a replacement washer, gasket, or fitting. Replacing a P-trap or flexible supply line usually costs more because additional parts may be needed.
Professional repairs can cost considerably more because of labor, service-call charges, difficult access, or damage to surrounding plumbing.
Your final cost may depend on:
- The type and material of the pipe
- Whether a single washer or an entire assembly needs replacement
- The condition of the shutoff valve
- Whether the drain is clogged
- The accessibility of the plumbing
- The local cost of labor and replacement parts
For an accurate estimate, inspect the damaged component first and compare the cost of the required replacement parts with a plumber’s quote.
When Should You Call a Professional Plumber?
Many minor drainpipe leaks are manageable DIY projects, but some plumbing problems require professional assistance.
Contact a licensed or otherwise appropriately qualified plumber if:
- Water continues flowing after you close the shutoff valve.
- A supply line has burst or is spraying water.
- A shutoff valve is stuck, damaged, or leaking.
- Pipes inside the wall or floor appear to be leaking.
- The drainpipe is severely corroded or difficult to access.
- A repair requires soldering, specialized fittings, or modifications to the plumbing system.
- The same connection keeps leaking after several careful repair attempts.
- You notice extensive water damage, persistent dampness, or a sewage odor.
If the leak is substantial, prioritize stopping the water flow and protecting the surrounding area. Prompt professional help can prevent damage to cabinets, flooring, and nearby building materials.
How to Prevent Future Leaks Under the Sink
Regular inspection can help you identify small problems before they become serious.
Inspect the plumbing periodically. Look beneath the sink for moisture, mineral deposits, rust, and damaged fittings.
Avoid putting unnecessary stress on pipes. Do not use drainpipes as storage supports or place heavy objects against the plumbing.
Dispose of waste properly. Avoid pouring excessive grease, food scraps, or other unsuitable materials down the sink.
Replace deteriorating components. A cracked hose, damaged washer, or corroded trap should be addressed before it fails completely.
Keep the cabinet dry. Wipe up spills and investigate unexplained moisture promptly.
Use compatible replacement parts. Matching the pipe diameter, fitting type, and washer design helps create a reliable seal.
Check repairs after use. Following a repair, inspect the area over the next several days to make sure the leak has not returned.
Frequently Asked Questions
1. Why is the pipe under my sink leaking only when the water runs?
If the leak occurs only when you use the sink, the problem is often associated with the drain assembly, a drainpipe joint, or the P-trap. Water may be escaping when it passes through the affected section. Dry the pipes and run water carefully to locate the source.
2. Can I fix a leaking pipe under the sink myself?
Yes, many minor leaks can be repaired without professional help. Loose drain fittings, worn washers, and some accessible P-trap problems are common DIY repairs. However, damaged pressurized supply lines, concealed leaks, and complicated plumbing problems may require a plumber.
3. Should I use plumber’s tape on a leaking pipe under the sink?
It depends on the connection. Plumber’s tape can be appropriate for certain compatible threaded fittings, but it generally does not repair leaks caused by damaged washers, slip-joint connections, cracked pipes, or defective supply hoses. Identify the fitting type before applying tape.
4. How do I know if my P-trap needs replacing?
A P-trap may need replacement if it has cracks, significant corrosion, damaged threads, or persistent leaks that cannot be corrected by replacing the washers and properly aligning the joints.
5. Is a small leak under the sink dangerous?
A small leak may not seem serious, but continued moisture can damage cabinets, flooring, and nearby materials. Persistent dampness may also encourage mold growth. Repair the leak promptly and dry the affected area thoroughly.
6. Why does my sink pipe keep leaking after I tighten it?
Repeated leaks may indicate a worn washer, damaged threads, a cracked pipe, misaligned fittings, or an unsuitable replacement part. Tightening the fitting further may make the problem worse. Inspect the connection and replace damaged components as needed.
7. Can duct tape or waterproof tape stop a leaking pipe?
Tape may temporarily contain a small amount of water in limited circumstances, but it is not a reliable permanent repair for plumbing. Pressurized water lines should be repaired or replaced with appropriate plumbing components. Drainpipes with cracks should also be replaced when necessary.
8. Do I need to turn off the water to fix a leaking drainpipe?
For a drainpipe-only leak, turning off the water supply is usually unnecessary, but you should stop using the sink and catch any remaining water. If the leak comes from a pressurized supply line, shut off the appropriate valve before working on the connection.
Final Thoughts
Knowing how to fix a leaking pipe under the sink can help you handle common household plumbing problems before they cause significant damage. The key is to locate the source of the leak, determine whether it comes from a drain connection or a pressurized supply line, and use the correct repair method.
Loose fittings may need careful tightening, worn washers may require replacement, and cracked pipes or damaged supply hoses generally need new components. Always test the plumbing after making a repair and keep the cabinet dry.
If the leak continues, the plumbing is difficult to access, or you cannot safely stop the water, contact a qualified plumber. A careful repair today can help protect your home from costly water damage in the future.

Engineer Ali Hasan is a garage door expert and the founder of FixFasty. With over 16 years of experience in mechanical systems and home maintenance, he provides practical, step-by-step guides on garage door installation, repairs, and maintenance, helping homeowners keep their garage doors safe, reliable, and long-lasting.