
Garage doors are an essential part of home security and convenience. But when your garage door sensor stops working, it can prevent your door from closing properly or even create a safety hazard. Fixing a garage door sensor might seem complicated, but with the right steps and guidance, you can troubleshoot and repair it yourself without calling a technician.
In this guide, we will cover everything you need to know about garage door sensors, common problems, step-by-step fixes, and maintenance tips to ensure your garage door works smoothly for years.
What Is a Garage Door Sensor?
Garage door sensors are safety devices installed near the bottom of your garage door tracks. Their primary function is to detect obstructions and prevent the door from closing if something or someone is in the way. Most modern garage doors use photoelectric sensors, which send an infrared beam from one side to the other. If the beam is broken, the garage door automatically stops closing and reverses to prevent accidents.
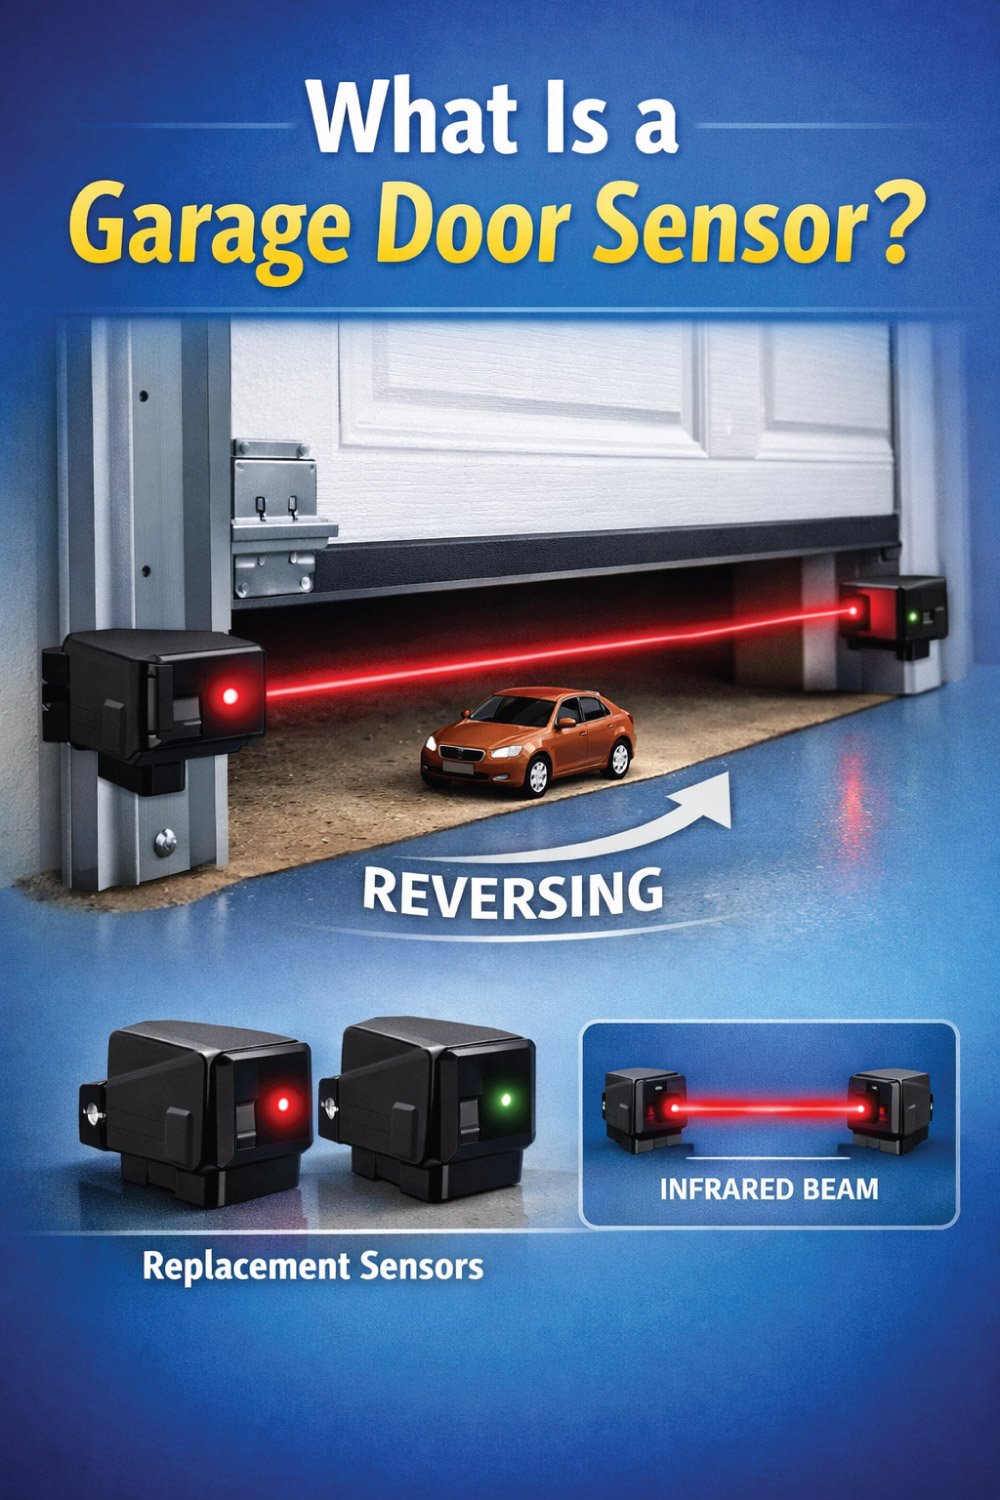
Why They Matter:
Prevent accidents involving children or pets
Avoid damage to cars or property
Ensure your garage door operates correctly
Common Problems With Garage Door Sensors
Garage door sensors are essential for safe operation, but they can experience a range of issues over time. Recognizing typical problems helps you quickly diagnose and resolve malfunctions, preventing unsafe operation or repeated failures. The table below summarizes common sensor issues, their possible causes, and the symptoms to watch for, allowing you to pinpoint the problem efficiently before attempting repairs or replacements.
| Problem | Possible Cause | Symptoms |
|---|---|---|
| Sensor misalignment | Sensors have shifted or moved | Door won’t close, lights blink on the motor |
| Dirty sensor lens | Dust, spider webs, or debris | Intermittent operation or sensor not detecting properly |
| Damaged wires | Wear and tear or rodent damage | Door may reverse randomly or fail to close |
| Obstructions | Objects blocking the sensor beam | Door won’t close, consistent with obstruction location |
| Sensor failure | Internal electrical malfunction | Door doesn’t respond, or LED lights stay off |
Tools You will Need to Fix a Garage Door Sensor
Before beginning any sensor repair or replacement, gather the necessary tools to make the process safer and more efficient. Having the right equipment on hand ensures you can inspect, clean, test, and replace sensors without interruptions or risk of damage. Proper preparation helps prevent mistakes and keeps the repair process smooth from start to finish.
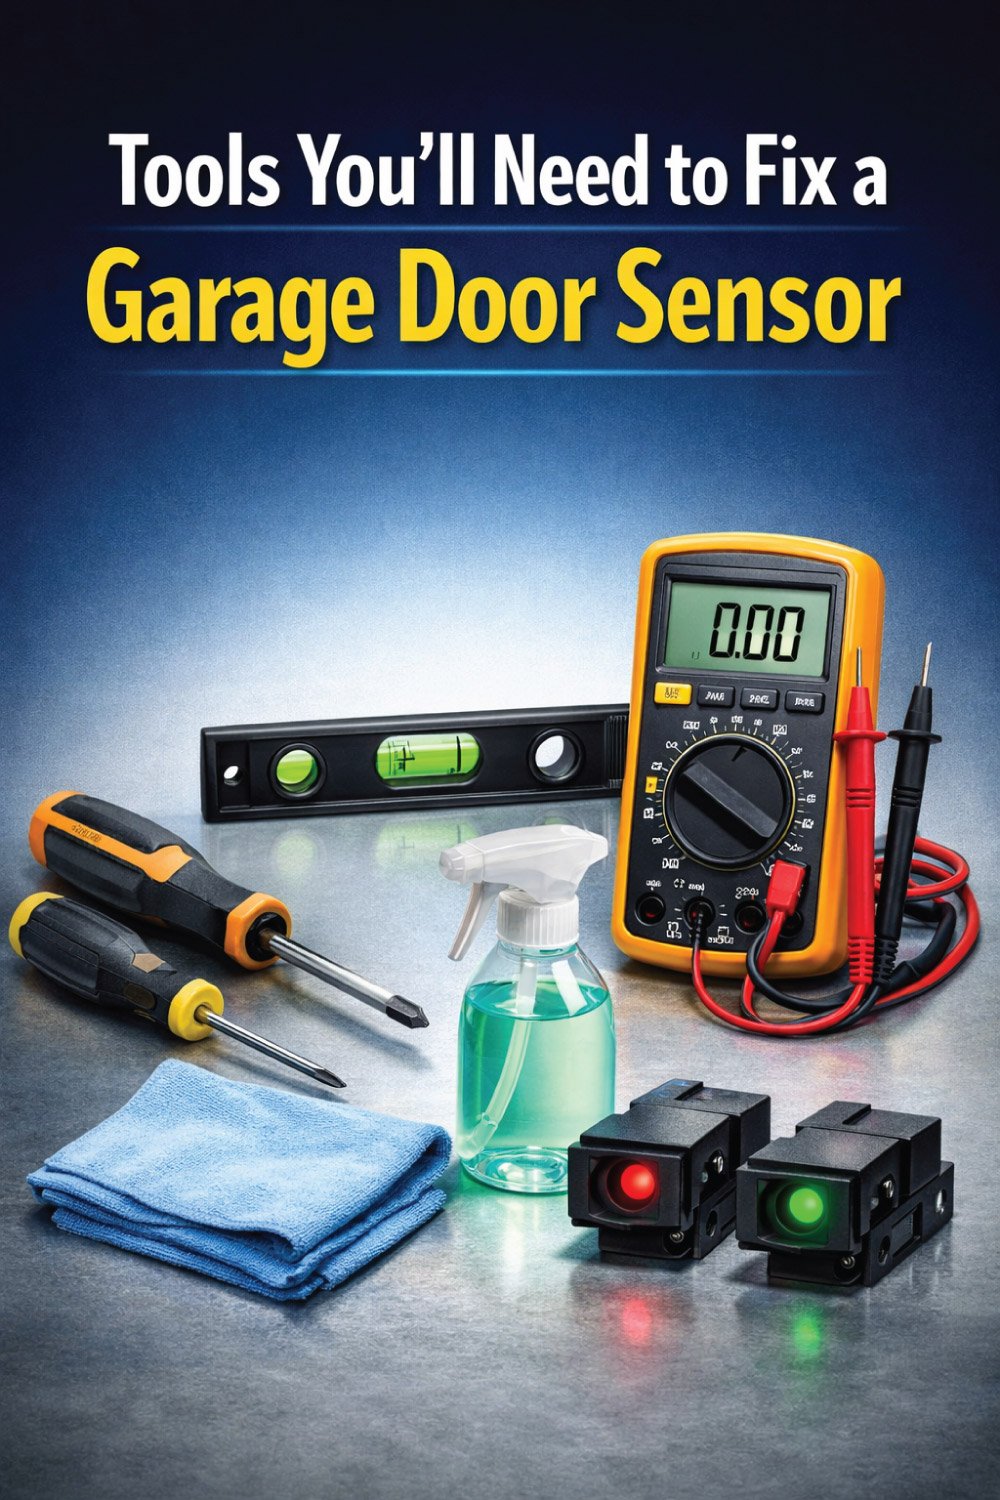
Screwdriver (flathead or Phillips)
Level
Multimeter (for checking electrical continuity)
Soft cloth or sponge
Cleaning solution (mild soap and water)
Replacement sensor (if necessary)
Step-by-Step Guide to Fix a Garage Door Sensor
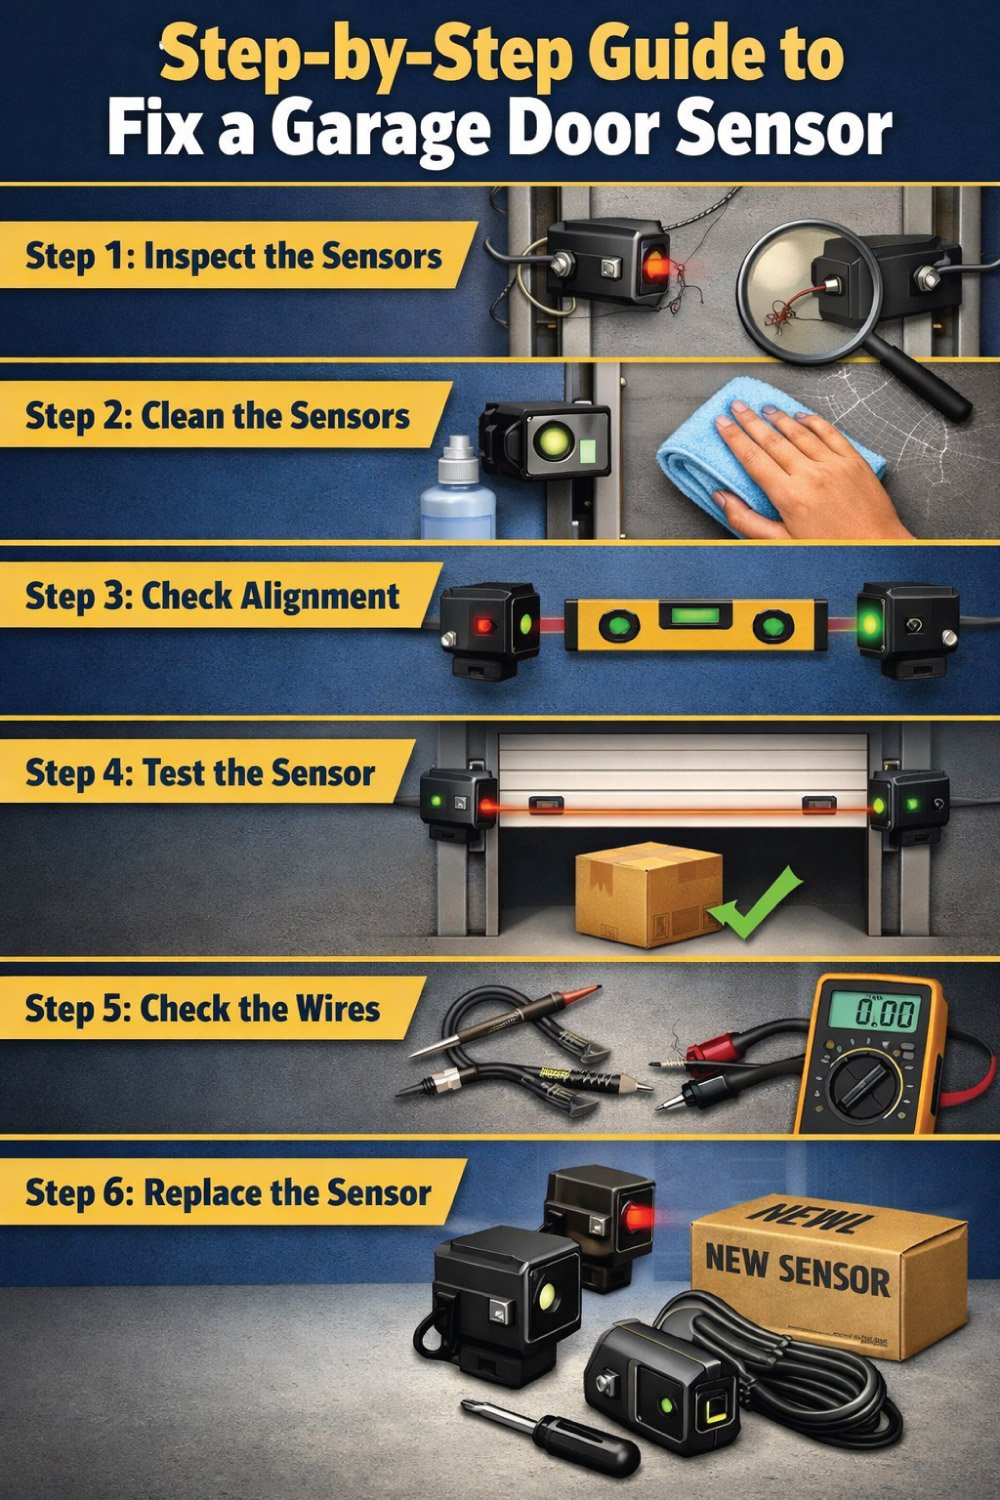
Step 1: Inspect the Sensors
Before attempting any repairs, start by thoroughly examining both sensors installed on either side of your garage door. Loose mounting, misalignment, or damaged wiring can all prevent proper operation. A careful inspection helps identify visible problems and ensures you address the root cause before proceeding to cleaning or alignment adjustments. Catching these issues early can save time and prevent unnecessary replacements.
Check for loose screws or brackets
Inspect sensor alignment and height
Look for broken or frayed wires
Step 2: Clean the Sensor Lenses
Over time, dust, dirt, or spider webs can block the infrared beam between sensors, causing the door to reverse unexpectedly or not close. Cleaning the lenses regularly restores proper function and prevents false errors. Using gentle cleaning methods ensures you do not damage the sensor surface while removing all debris that could interfere with the beam.
Turn off the garage door opener before cleaning
Use a soft cloth with mild soap and water
Avoid harsh chemicals that can scratch the lens
Step 3: Check Sensor Alignment
Proper alignment is critical for garage door sensors to function correctly. Both sensors must face each other directly at the same height. Misaligned sensors will cause the door to reverse or prevent it from closing. Use a level and the LED indicator on each sensor to verify alignment, adjusting brackets carefully until the sensor lights indicate proper positioning.
Use a level to ensure sensors are aligned
Check LED indicators: green = aligned, red/blinking = misaligned
Loosen bracket screws and gently adjust sensor position
Step 4: Test the Sensor
Once the sensors are cleaned and properly aligned, you should test them to confirm functionality. This step ensures the infrared beam is uninterrupted and that the garage door responds correctly. Testing helps determine whether further inspection or replacement is necessary, and it validates that your previous maintenance steps have resolved the problem.
Close the garage door using the opener
Place an object in the sensor beam to trigger reversal
Observe if the door reverses correctly to confirm function
Step 5: Check for Damaged Wires
If the sensors still malfunction, inspect the wiring connecting the sensors to the garage door opener. Damaged or frayed wires can break the circuit, preventing proper operation. Testing electrical continuity ensures that power is reaching the sensors and that the system is intact, helping you identify whether repairs or replacements are required.
Look for breaks, frays, or chewed wires
Use a multimeter to test continuity
Replace any damaged wiring as needed
Step 6: Replace the Sensor
When cleaning, alignment, and wiring checks do not resolve the problem, the sensor itself may be faulty. Replacing the sensor with a compatible unit restores proper operation. Correct installation at the same height and alignment as the previous sensor ensures accurate function and prevents repeated issues. Always test the door after replacement to confirm the repair was successful.
Purchase a compatible replacement sensor from the manufacturer
Disconnect the old sensor and remove it from the bracket
Mount the new sensor at the same height and alignment
Connect the wires, observing proper polarity if indicated
Test the door function to ensure proper operation
Tips for Preventing Garage Door Sensor Problems
Proper maintenance of garage door sensors helps prevent malfunctions and ensures safe, reliable operation. Regular cleaning, alignment checks, wiring inspections, and keeping the sensor path clear can reduce unnecessary repairs and avoid operational hazards. Periodically testing the sensors allows you to catch minor issues early, saving time, effort, and potential damage to the garage door system.
| Maintenance Tip | Description |
|---|---|
| Clean lenses regularly | Wipe the sensors monthly to remove dust and dirt |
| Check alignment | Ensure sensors remain level and directly facing each other |
| Inspect wiring | Look for frays or damage every few months |
| Avoid obstruction | Keep the area in front of sensors clear |
| Test sensors | Periodically test with a small object in the beam path |
Also Read:
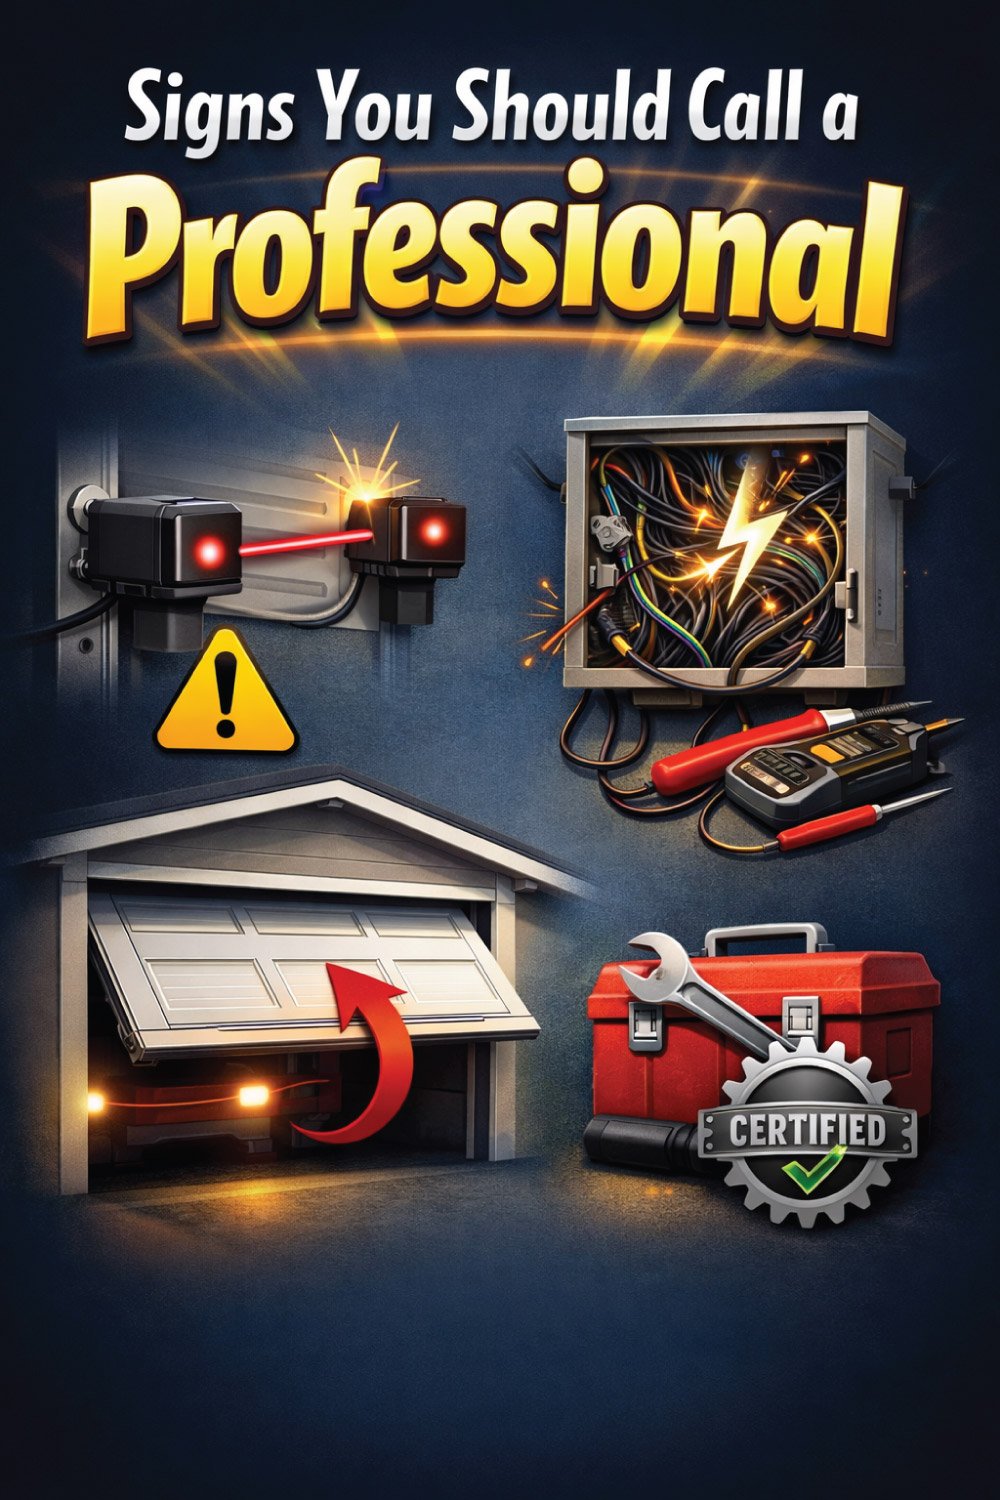
Signs You Should Call a Professional
While many garage door sensor issues can be resolved with basic troubleshooting, certain problems are best handled by a certified technician. Persistent sensor failures, complex electrical issues, or frequent door reversals despite no obstructions can pose safety risks. Calling a professional ensures proper diagnosis, safe repairs, and prevents further damage, giving you confidence that your garage door system will operate reliably and securely.
Persistent sensor failure after cleaning and realignment
Complex electrical wiring problems
Frequent garage door reversals despite no obstruction
Hiring a certified garage door technician ensures safety and proper repair.
Table of LED Indicator Meanings
Many garage door sensors use LED lights to indicate their status. Understanding what each color means helps you quickly identify alignment issues, power problems, or sensor faults. By interpreting the LED correctly, you can take the appropriate action—whether it’s adjusting the sensors, checking wiring, or replacing a faulty component—to ensure your garage door operates safely and reliably.
| LED Color | Meaning | Action Required |
|---|---|---|
| Green | Properly aligned | No action needed |
| Red or Blinking | Misaligned | Adjust sensor alignment |
| Off | No power or faulty sensor | Check wiring or replace sensor |
Table of Troubleshooting Steps
Garage door sensors are vital for safe operation, but they can occasionally cause issues such as the door failing to close or reversing unexpectedly. Following a systematic troubleshooting process helps identify the root cause and resolve problems efficiently. The table below outlines common sensor-related issues along with step-by-step actions you can take to clean, test, or replace components safely.
| Issue | Step 1 | Step 2 | Step 3 |
|---|---|---|---|
| Door won’t close | Clean sensor lenses | Realign sensors | Check wiring |
| Door reverses randomly | Inspect wiring | Test sensor | Replace sensor if faulty |
| Sensor LED off | Check power supply | Test continuity | Replace sensor |
Safety Precautions When Fixing Garage Door Sensors
Garage door sensors are an important safety feature, but working with them can be hazardous if proper precautions aren’t followed. Always disconnect power before inspecting or replacing sensors, never place your hands under a moving door, and use the correct tools rather than improvising. Keep children and pets away during any repairs to prevent accidents and ensure that the door and sensor system remain fully functional and safe.
Disconnect power before inspecting or replacing sensors
Avoid placing hands under a moving door
Use proper tools and avoid makeshift solutions
Keep children and pets away during repairs
Conclusion
A malfunctioning garage door sensor is a common problem, but one you can often fix yourself. By understanding the causes, cleaning the sensors, checking alignment, and replacing faulty components, you can restore your garage door’s safety and convenience. Regular maintenance will help avoid future issues, ensuring your door continues to function smoothly for years. With this guide, fixing your garage door sensor doesn’t have to be complicated. Take the time to inspect, clean, and test the sensors properly. You’ll save money, prevent accidents, and extend the lifespan of your garage door system.
Also Read:

Engineer Ali Hasan is a garage door expert and the founder of FixFasty. With over 16 years of experience in mechanical systems and home maintenance, he provides practical, step-by-step guides on garage door installation, repairs, and maintenance, helping homeowners keep their garage doors safe, reliable, and long-lasting.