
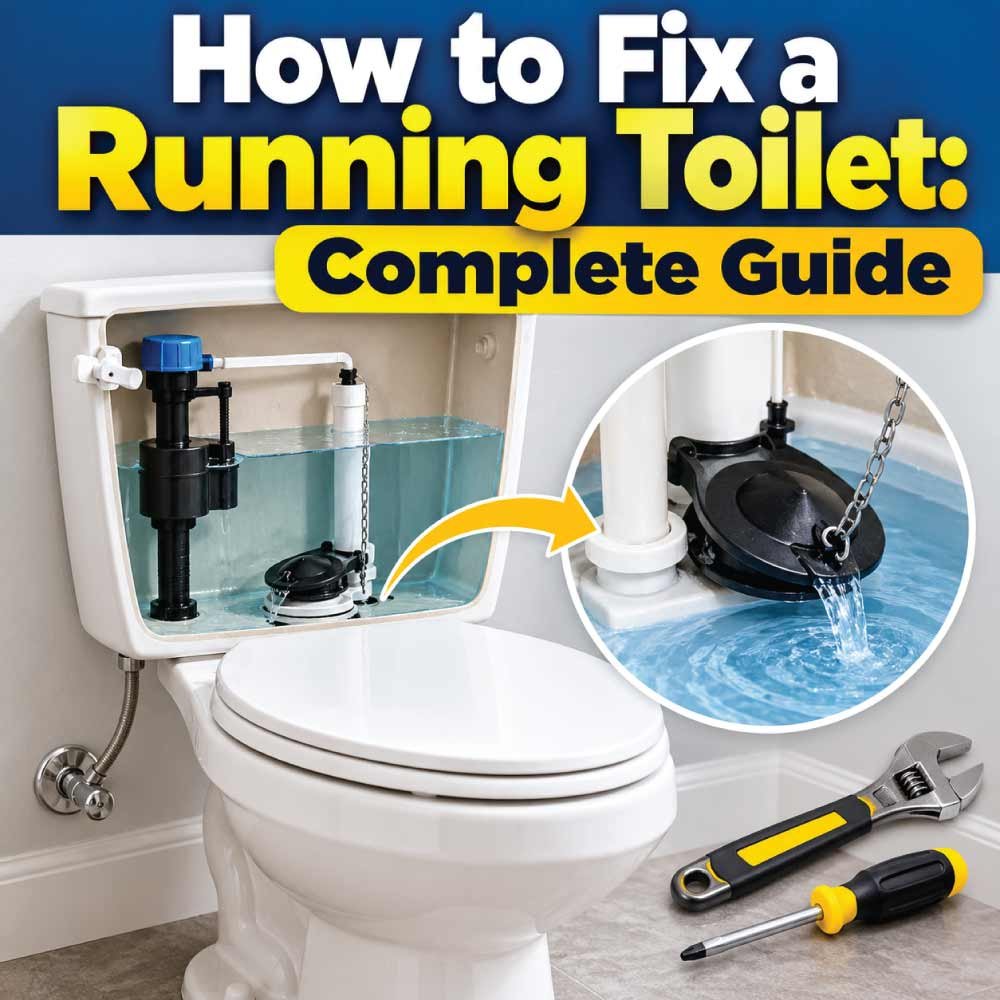
A running toilet can waste water, create annoying noise, and increase your water bill if the problem continues. In most cases, a running toilet is caused by a worn flapper, an incorrectly adjusted float, a faulty fill valve, or a problem with the overflow tube. Fortunately, many of these issues can be diagnosed and repaired with basic tools.
This guide explains how to fix a running toilet step by step, identify the cause of continuous water flow, replace common toilet tank components, and determine when professional plumbing help is necessary. Whether the toilet runs constantly or starts refilling on its own, these troubleshooting steps will help you find the most practical solution.
Quick Answer: How Do You Stop a Running Toilet?
To stop a running toilet, remove the tank lid and observe what happens after flushing. Check whether water continues flowing into the overflow tube, leaks past the flapper, or repeatedly triggers the fill valve.
Start with these simple checks:
Check the flapper: Make sure it sits flat over the flush valve opening and forms a proper seal.
Inspect the chain: Ensure the chain has enough slack to let the flapper close completely without getting caught.
Check the water level: The tank water should generally stop about 1 inch below the top of the overflow tube, unless the manufacturer specifies otherwise.
Adjust the float: If water keeps entering the tank, adjust the float according to the fill valve instructions.
Inspect the fill valve: Replace it if it fails to shut off properly after adjustment and cleaning.
Before making repairs, locate the toilet’s shutoff valve near the floor or wall behind the toilet. Turn it clockwise to stop the water supply if the valve operates normally.
Common Causes of a Running Toilet
Understanding the symptoms can help you avoid replacing parts unnecessarily.
1. Worn or Damaged Toilet Flapper
The flapper is a rubber or plastic component at the bottom of the tank that lifts when you flush and allows water to enter the toilet bowl. After flushing, it should drop back into place and seal the opening.
Over time, the flapper can become stiff, warped, cracked, or covered with mineral deposits. Water may then leak slowly from the tank into the bowl, causing the fill valve to activate repeatedly.
Common signs include:
- Water trickling continuously into the bowl.
- The toilet refilling periodically without being flushed.
- The tank water level dropping when the toilet is not in use.
2. Incorrect Float Adjustment
The float controls the water level inside the tank. When the water reaches the intended level, the float should signal the fill valve to stop filling.
If the float is set too high, water may continue flowing into the overflow tube. If it is damaged or obstructed, it may fail to operate correctly.
3. Faulty Fill Valve
The fill valve refills the tank after flushing and shuts off when the tank reaches its intended water level.
A worn, clogged, or damaged fill valve may continue running even when the tank is full. Mineral buildup and debris can also interfere with its operation.
4. Flush Valve or Seal Problems
The flush valve is the opening at the bottom of the tank where water enters the bowl during flushing. If its sealing surface is damaged or the assembly is cracked, water may leak into the bowl even when the flapper appears to be in good condition.
5. Tangled or Incorrectly Adjusted Chain
The chain connecting the flush handle to the flapper must have enough slack for the flapper to close completely. A chain that is too short can hold the flapper open, while a chain that is too long may become trapped underneath it.
6. Excessive Water Pressure or Installation Problems
Some fill valves may behave improperly because of incorrect installation, incompatible replacement parts, or debris in the water supply. Unusually high water pressure may also contribute to plumbing problems, although it is not the usual cause of a continuously running toilet.
If basic adjustments do not resolve the issue, inspect the specific fill valve instructions and consider professional diagnosis.
Tools and Materials You May Need
Gather the following items before starting the repair:
- Adjustable wrench.
- Sponge or small cup.
- Small towel or bucket.
- Replacement toilet flapper, if needed.
- Compatible replacement fill valve, if needed.
- Replacement flush valve seal, if applicable.
- Clean cloth.
- Manufacturer’s installation instructions.
You may not need every item. Identify the likely problem first so you can purchase the correct replacement component.
Safety Precautions Before Repairing a Running Toilet
Most toilet tank repairs are suitable for beginners, but a few precautions can prevent leaks and unnecessary damage.
- Turn off the water supply before removing or replacing components that connect to the water supply.
- Flush the toilet to lower the tank water level, then use a sponge to remove any remaining water when necessary.
- Handle the tank lid carefully because porcelain can crack or break if dropped.
- Avoid overtightening plastic fittings, nuts, or supply connections.
- Never use a pipe wrench or excessive force on fragile plastic toilet components.
- Do not mix cleaning chemicals or pour harsh chemical drain cleaners into the toilet tank. They can damage rubber seals and other components.
- If the shutoff valve is corroded, leaking, or difficult to turn, do not force it. Contact a plumber if you cannot safely isolate the water supply.
How to Fix a Running Toilet Step by Step
Follow these troubleshooting steps in order. Start with the easiest adjustments before replacing parts.
Step 1: Remove the Tank Lid and Observe the Water Flow
Carefully lift the toilet tank lid and place it on a stable, protected surface.
Flush the toilet and watch how the tank refills. Wait until the filling cycle should have finished.
Look for these signs:
Water flowing into the overflow tube: The float may be set too high, or the fill valve may not be shutting off.
Water trickling into the bowl while the tank fills: The flapper or flush valve seal may be leaking.
Water repeatedly turning on and off: The tank may be losing water through a leaking seal, or the fill valve may be malfunctioning.
Water continuing to spray or flow from the fill valve: The valve may need cleaning, adjustment, or replacement.
These observations help narrow down the cause, but some problems require additional testing.
Step 2: Check and Adjust the Toilet Flapper
If water appears to leak from the tank into the bowl, inspect the flapper first.
- Turn off the toilet’s water supply.
- Flush the toilet to empty most of the tank.
- Inspect the flapper for cracks, warping, stiffness, or mineral deposits.
- Check whether the flapper rests evenly over the flush valve opening.
- Clean the sealing surface gently with a soft cloth if deposits are present.
- Restore the water supply and test the toilet.
If the flapper is damaged or no longer seals properly, replace it with a compatible model.
Important: Some toilets use specialized flush valve seals or canister-style mechanisms rather than a conventional rubber flapper. Identify the mechanism before buying replacement parts.
Step 3: Adjust the Flapper Chain
A chain that prevents the flapper from closing can keep the toilet running even when the flapper itself is in good condition.
- Turn off the water supply if you need to work inside the tank safely.
- Inspect the chain connecting the flush handle to the flapper.
- Check whether the chain is tangled, caught under the flapper, or pulled too tightly.
- Adjust the chain so it has a small amount of slack when the flapper is closed.
- Make sure the chain lifts the flapper properly when the handle is pressed.
- Restore the water supply and flush the toilet several times.
If the flapper closes completely and the water stops flowing, the adjustment may have resolved the problem.
If the toilet continues running, move to the float and fill valve checks.
Step 4: Check and Adjust the Float
The float regulates the amount of water entering the tank. Its design varies between older and newer fill valves.
- Observe the water level as the tank fills.
- Locate the float attached to the fill valve.
- Check whether the float moves freely without rubbing against the tank wall or other components.
- If the water rises into the overflow tube, adjust the float according to the valve manufacturer’s instructions.
- Allow the tank to refill and check whether the fill valve shuts off automatically.
On some older ball-float valves, the adjustment screw or float arm controls the shutoff level. Newer cup-style floats often have an adjustment clip or screw.
Do not bend a plastic float arm or force an adjustment mechanism that is not designed for bending.
Expected result: The water should stop rising before it reaches the top of the overflow tube. The exact level depends on the toilet and fill valve design.
Step 5: Inspect the Overflow Tube
The overflow tube prevents the tank from overflowing if the water level rises too high. Excess water drains through this tube into the bowl.
Check whether water is continuously entering the tube after the tank should have finished filling.
If water flows into the overflow tube, the likely causes include:
- A float set too high.
- A fill valve that does not shut off properly.
- An incorrectly installed or incompatible fill valve.
Adjust the float first. If the water continues rising despite a correct adjustment, inspect the fill valve.
If the overflow tube itself is cracked or damaged, the flush valve assembly may need repair or replacement. This repair can require more disassembly than a basic float adjustment.
Step 6: Clean or Replace the Fill Valve
If the float moves correctly but water continues entering the tank, the fill valve may be clogged or worn.
Some fill valves allow cleaning, while others are designed to be replaced when they malfunction.
To inspect the valve:
- Turn off the water supply.
- Flush the toilet and remove most of the remaining tank water.
- Follow the manufacturer’s instructions for accessing the fill valve and cleaning any accessible screen or inlet.
- Check for visible debris or mineral deposits.
- Reassemble the valve according to its instructions.
- Turn the water supply back on slowly.
- Observe the refill cycle and confirm that the valve shuts off at the correct water level.
If cleaning does not solve the problem, install a compatible replacement fill valve.
Replacement procedures vary by model. Many require disconnecting the water supply line and removing a retaining nut beneath the tank. If you are uncomfortable working with these connections, or if the shutoff valve cannot be operated safely, call a plumber.
Step 7: Test for a Leaking Flapper or Flush Valve Seal
If the tank refills periodically even when nobody uses the toilet, water may be leaking slowly into the bowl.
You can perform a simple dye test:
- Allow the tank to fill completely.
- Add a few drops of food coloring to the tank water without flushing.
- Wait approximately 15–20 minutes.
- Check the water in the toilet bowl.
If colored water appears in the bowl, water is likely leaking from the tank through the flapper or flush valve seal.
Turn off the water supply before replacing the suspected seal. Clean the sealing surface and install a compatible replacement if the existing component is worn or damaged.
Afterward, repeat the test to confirm whether the leak has stopped.
Step 8: Check the Toilet Handle and Flush Mechanism
Sometimes the problem is caused by the flush handle rather than a damaged internal component.
Check whether the handle moves freely and returns to its normal position after flushing.
If the handle sticks, the lift arm may remain raised and prevent the flapper from closing.
To correct the issue:
- Inspect the handle and lift arm inside the tank.
- Check whether the arm contacts the tank wall or another component.
- Loosen the handle mounting nut slightly if it is overtightened, following the manufacturer’s instructions.
- Confirm that the handle returns freely and the chain does not hold the flapper open.
Avoid overtightening the handle nut. Many toilet handles use reverse-threaded mounting nuts, so the removal direction may differ from a conventional nut.
Also Read:
How to Identify the Cause of a Running Toilet
Use the symptoms below to decide which component to inspect first.
| Symptom | Possible Cause | Recommended Action |
|---|---|---|
| Water continuously flows into the overflow tube | Float set too high or faulty fill valve | Adjust the float and test the valve |
| Water trickles into the bowl | Worn flapper or flush valve seal | Perform a dye test and inspect the seal |
| Toilet refills every few minutes | Slow tank leak or faulty fill valve | Check the flapper and observe the refill cycle |
| Handle sticks after flushing | Misaligned handle or lift arm | Inspect and adjust the handle mechanism |
| Tank takes a long time to refill | Restricted water supply or clogged fill valve | Check the shutoff valve and inspect the fill valve |
| Water leaks around the tank or supply connection | Loose or damaged connection, seal, or component | Stop the water supply and inspect for leaks |
These symptoms are diagnostic clues rather than definitive proof. A toilet may have more than one faulty component.
Common Mistakes to Avoid When Fixing a Running Toilet
Avoid these mistakes to reduce the chance of creating additional problems:
Replacing parts without diagnosing the cause: A chain adjustment may solve the problem without requiring a new flapper or fill valve.
Setting the water level too high: Water should not continuously spill into the overflow tube.
Installing an incompatible flapper: Different toilets use different flapper sizes and flush valve designs.
Leaving the chain too tight: A tight chain can prevent the flapper from sealing completely.
Overtightening fittings: Excessive force can damage plastic threads, tank components, and supply connections.
Ignoring small leaks: A slow leak can cause the fill valve to cycle repeatedly and waste water.
Using harsh chemicals in the tank: These products can damage seals and other internal components.
After any repair, allow the tank to refill completely and test several flushes before considering the job finished.
Also Read:
When Should You Call a Professional Plumber?
A running toilet is often a straightforward DIY repair, but some situations require professional assistance.
Contact a plumber if:
- Water continues leaking after replacing or adjusting the flapper and fill valve.
- The flush valve assembly is cracked or requires extensive disassembly.
- The tank or toilet bowl has a crack.
- The shutoff valve is corroded, stuck, or leaking.
- Water leaks around the toilet base, particularly if the toilet rocks or the surrounding floor feels soft.
- The toilet overflows or backs up repeatedly, suggesting a drain blockage rather than a tank problem.
- You cannot identify the source of the leak or safely complete the repair.
If water is actively leaking and you cannot stop it using the shutoff valve, use the building’s main water shutoff if you can safely access and operate it. In a rental property, notify the landlord or property manager promptly.
Should You Repair or Replace a Running Toilet?
In most cases, repairing a running toilet is more practical than replacing the entire fixture.
Repair is usually sensible when:
- The toilet bowl and tank are structurally sound.
- The problem involves a flapper, fill valve, chain, float, or replaceable seal.
- Compatible replacement parts are readily available.
- The toilet flushes properly once the running issue is resolved.
Replacement may be worth considering when:
- The tank or bowl is cracked.
- The toilet has recurring mechanical problems despite appropriate repairs.
- Replacement parts are difficult to find.
- The toilet has other significant problems that make continued repairs impractical.
If you rent your home, check with your landlord before replacing plumbing fixtures or undertaking major repairs.
How to Prevent a Toilet From Running Again
Regular checks can help catch small problems before they waste water.
- Inspect the flapper periodically for deterioration, warping, or mineral buildup.
- Check the chain for tangles and proper slack.
- Keep the tank water level within the range specified by the manufacturer.
- Watch for water trickling into the bowl when the toilet is not being used.
- Replace worn rubber seals before they stop sealing properly.
- Avoid placing in-tank cleaning tablets containing harsh chemicals in the tank unless the toilet manufacturer specifically approves their use.
- Address slow refilling, repeated refilling, or unusual noises promptly.
Routine inspection does not eliminate all toilet problems, but it can help identify leaks and worn components early.
Frequently Asked Questions
Why does my toilet keep running after I flush?
A toilet may continue running because the flapper does not seal properly, the chain holds it open, the float is set too high, or the fill valve fails to shut off. Remove the tank lid and observe the refill cycle to identify which issue is most likely.
How do I stop a toilet from running without replacing parts?
Start by checking the flapper chain, cleaning accessible mineral deposits, and adjusting the float according to the fill valve instructions. If a component is cracked, warped, or worn out, adjustment alone may not solve the problem.
Why does my toilet run every few minutes without being flushed?
This often happens when water slowly leaks from the tank into the bowl. As the tank water level drops, the fill valve activates to replace the lost water. A worn flapper or flush valve seal is a common cause. A dye test can help confirm whether water is leaking into the bowl.
Can a running toilet increase my water bill?
Yes. A continuously running toilet can waste water because the tank keeps refilling to replace water that escapes into the bowl or overflow tube. The amount wasted depends on the severity of the leak and how long it continues.
How do I know if the toilet fill valve needs replacing?
The fill valve may need replacement if it continues running after the float is adjusted correctly, makes persistent abnormal noises, fails to refill the tank properly, or cannot shut off the water supply. Check the manufacturer’s cleaning and troubleshooting instructions before replacing it.
Is it safe to use a toilet that keeps running?
A toilet that runs without overflowing may still flush, but the ongoing water loss should be addressed promptly. If water is overflowing, leaking onto the floor, or escaping from a damaged tank, stop using the toilet and shut off the water supply if it is safe to do so.
Conclusion
A running toilet is commonly caused by a worn flapper, an incorrectly adjusted float, a faulty fill valve, or a leaking flush valve seal. Start by observing the tank during a flush, checking the chain and water level, and performing a dye test when necessary.
Make simple adjustments before replacing components, and always use compatible parts. If the tank is cracked, the shutoff valve is faulty, or the toilet continues leaking after basic repairs, seek professional help to prevent further water damage and waste.

Engineer Ali Hasan is a garage door expert and the founder of FixFasty. With over 16 years of experience in mechanical systems and home maintenance, he provides practical, step-by-step guides on garage door installation, repairs, and maintenance, helping homeowners keep their garage doors safe, reliable, and long-lasting.