
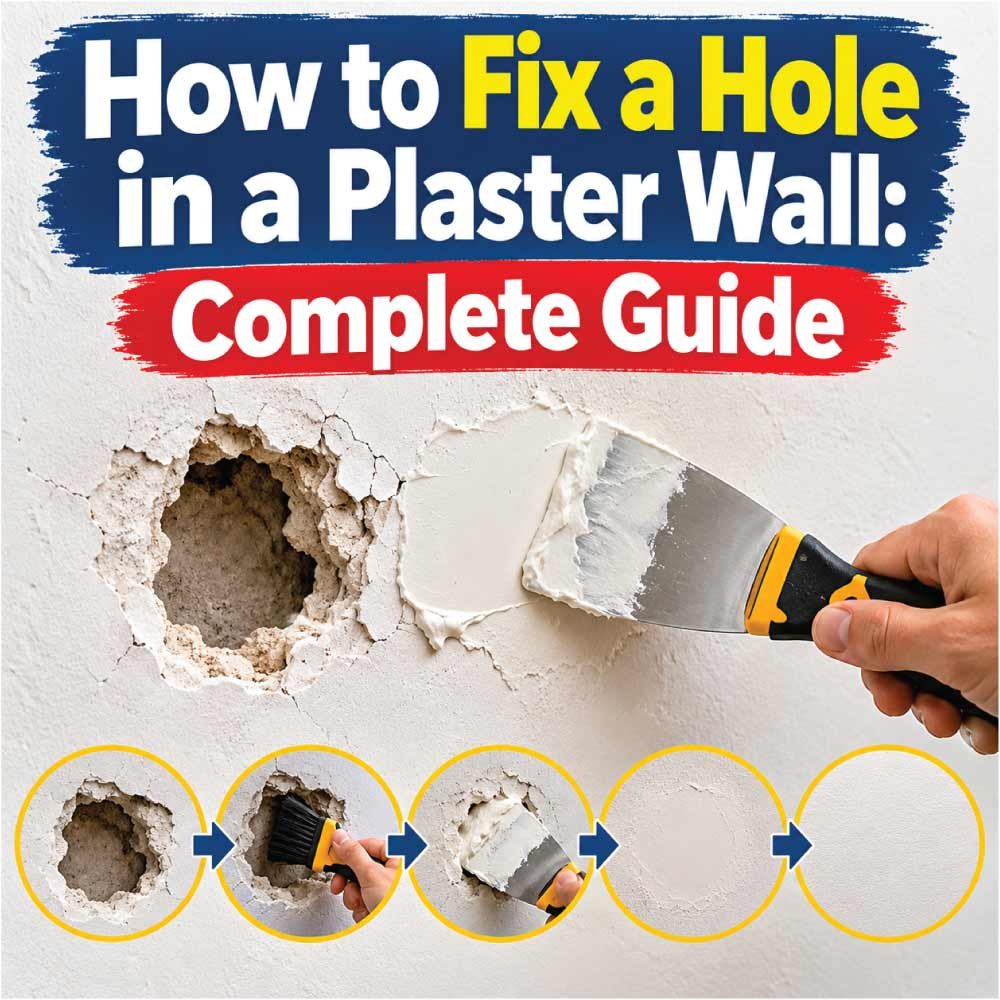
A hole in a plaster wall can happen when removing a wall anchor, moving furniture, hanging a picture, or dealing with deteriorating plaster. Although the damage may look serious, many holes can be repaired with basic tools and the right patching materials. The most important step is choosing a repair method that matches the size of the hole and the condition of the surrounding wall.
Small holes are usually easy to fill, while larger openings may need mesh reinforcement, backing support, or a specialized plaster repair product. This guide explains how to repair different types of plaster wall damage, achieve a smooth finish, and prevent the problem from returning.
Understanding the Type of Plaster Wall Damage
Before starting the repair, inspect the damaged area carefully. The appearance and condition of the hole can help determine which materials and techniques are appropriate.
- Small surface holes: These commonly result from nails, picture hooks, or screws and generally require only a small amount of filler.
- Medium holes: These may be caused by door handles, furniture impacts, or removed wall anchors. They often need a stronger patching method.
- Large holes: Openings that extend through the plaster may require backing support or a rigid patch.
- Crumbled plaster: If the edges break apart easily, the surrounding material may be weak or deteriorated.
- Water-damaged holes: Soft plaster, stains, and peeling paint can indicate an underlying moisture problem.
If the plaster is bulging, extensively cracked, or detached from its backing, repairing only the visible hole may not be enough. Stabilize the damaged area and investigate the cause before applying new material.
Tools and Materials for Plaster Wall Repair
Having the right supplies ready can make the repair easier and help prevent an uneven finish.
Essential Tools
- Putty knife or flexible filling knife
- Sanding sponge or suitable fine-grit sandpaper
- Small brush for removing dust
- Clean cloth
- Drop cloth or protective sheeting
- Safety glasses and an appropriate dust mask
Materials You May Need
- Lightweight spackling compound for small, shallow holes
- Patching plaster or a compatible wall repair compound
- Repair mesh for suitable medium-sized holes
- Backing support or a rigid patch for certain large openings
- Primer suitable for the repaired surface
- Matching interior wall paint
You will not need every item for every repair. Choose materials according to the hole’s depth, the type of plaster, and the instructions provided with the repair product.
Safety note: Older homes may contain lead-based paint or other hazardous materials. Avoid sanding, scraping, or cutting suspect materials until they have been assessed. Check for hidden wiring and plumbing before drilling or cutting into a wall.
How to Fix a Small Hole in a Plaster Wall
Small holes from nails, screws, and picture hooks can usually be repaired without specialized equipment.
Step 1: Prepare the Work Area
Move nearby furniture away from the wall and place a drop cloth underneath the damaged section. This protects the floor and makes cleanup easier.
Make sure you have enough light to see the hole and its edges clearly.
Step 2: Remove Loose Plaster and Dust
Carefully remove loose fragments around the opening. Use a small brush to clear away dust and debris.
Do not scrape aggressively or enlarge the hole unnecessarily. Older plaster can be brittle, and excessive force may create additional damage.
Step 3: Fill the Opening
Take a small amount of suitable spackling compound or wall filler on your putty knife. Press it into the hole so the material fills the opening rather than sitting only on top.
For a deeper hole, follow the product instructions about maximum application thickness and whether multiple layers are necessary.
Step 4: Smooth the Patch
Draw the putty knife across the filled area to remove excess material. Feather the edges outward so the patch blends into the surrounding wall.
Avoid leaving a raised ridge around the opening because it may remain visible after painting.
Step 5: Allow the Compound to Dry
Leave the repair undisturbed for the recommended drying time. Temperature, humidity, and patch thickness can affect how quickly the material dries.
Wait until the patch is completely ready for sanding before continuing.
Step 6: Sand and Finish
Lightly sand the repaired area if the product allows it. Use gentle pressure and stop when the surface feels level with the surrounding wall.
Remove the dust, apply an appropriate primer if needed, and paint the area to match the existing finish.
How to Fix a Medium-Sized Hole in a Plaster Wall
A medium-sized hole may be too deep or wide for ordinary filler alone. In these situations, reinforcement or a repair product designed for larger openings can help create a more stable patch.
Step 1: Examine the Hole
Check the edges for loose plaster, cracks, and crumbling material. Remove only the sections that are already unstable, leaving sound plaster in place.
If the surrounding wall moves, sounds hollow across a large area, or appears detached from its backing, consider professional assessment before proceeding.
Step 2: Select a Suitable Repair Method
For some medium-sized holes, a compatible patching compound and repair mesh are sufficient. Deeper openings may need a specialized plaster repair product or a patching kit with additional support.
Check the product instructions to confirm that it is suitable for the hole’s depth and the existing wall surface.
Step 3: Install the Reinforcement
If the chosen system uses repair mesh, place it over the opening according to the manufacturer’s instructions. Ensure the surrounding surface is clean and stable enough for the patch to adhere.
Mesh is not a substitute for backing support when the hole is too large or extends through the wall.
Step 4: Apply the Repair Material
Spread the repair compound over the damaged section using a putty knife. Work it into the opening and cover the reinforcement as directed.
For deeper repairs, apply separate layers when required rather than building the entire patch with one thick application.
Step 5: Blend the Surface
Apply the finishing layer and feather its edges into the existing plaster. Use steady strokes to create a smooth transition between the patch and the wall.
Allow each layer to dry or cure according to the product instructions.
Step 6: Prepare for Painting
Once the repair is ready, sand it lightly if appropriate and remove all dust. Apply primer and matching paint to complete the job.
Inspect the patch from the side as well as straight on. Side lighting can reveal bumps or dips that are difficult to see from directly in front.
Also Read:
How to Fix a Large Hole in a Plaster Wall
Large holes need more than a simple layer of filler because the patch must have enough support to remain in place.
Step 1: Assess the Extent of the Damage
Look at the hole’s width, depth, and surrounding plaster. Determine whether the opening goes through the wall and whether the material around it remains firmly attached.
Check for damaged backing, water stains, and cracks extending beyond the opening. If the damage is extensive, professional repair may be the safest option.
Step 2: Prepare the Opening
Remove loose fragments carefully without disturbing sound plaster. Keep the edges as neat as practical.
Before cutting, drilling, or installing support, make sure there are no electrical wires or plumbing lines in the work area.
Step 3: Provide Adequate Support
A large opening may require backing support or a rigid patch secured with a suitable repair system. Traditional plaster walls can have different backing structures, so the method must match the wall’s construction.
Do not assume that a repair method designed for modern drywall will work for every plaster wall.
Step 4: Fill the Supported Opening
Apply an appropriate plaster repair compound according to its instructions. Fill the opening evenly, using the required layers and allowing sufficient setting or drying time.
Avoid using a thin surface filler to fill a deep opening that needs structural support.
Step 5: Apply the Finishing Layer
After the repair has reached the required stage, apply the finishing material to create a level surface. Extend the finish slightly beyond the patch to blend it into the surrounding wall.
Allow the final layer to dry or cure completely before sanding.
Step 6: Prime and Paint
Prepare the surface, remove dust, and apply a suitable primer. Finish with matching paint.
For a large repair, painting the entire wall may produce a more consistent appearance than touching up only the patched area.
How to Repair Crumbling Plaster Around a Hole
Sometimes the opening itself is small, but the surrounding plaster continues to break apart. This usually means the material around the hole needs attention before a patch can be applied.
Inspect the edges: Determine whether the plaster is stable or continues to crumble with light contact.
Remove loose fragments: Carefully clear away material that cannot support the repair.
Check for moisture: Look for stains, dampness, or peeling paint that may indicate a leak.
Prepare the remaining surface: Remove dust and use a compatible bonding or preparation product if required by the repair system.
Apply the patch: Use an appropriate repair compound, following its instructions for depth and layering.
Finish the surface: Allow the material to dry or cure, then prepare it for primer and paint.
If large sections of plaster are detached from the backing, simply filling the hole will not solve the underlying problem. The loose plaster may need to be stabilized or repaired more extensively.
How to Fix a Hole Caused by Water Damage
Water can weaken plaster and cause paint to bubble, crack, or peel. Before repairing a water-damaged hole, identify and correct the moisture source.
Step 1: Stop the Source of Moisture
Investigate possible plumbing leaks, roof leaks, or water entering around windows. Arrange the necessary repair before closing the damaged area.
Step 2: Check the Surrounding Wall
Look for soft plaster, discoloration, peeling paint, or a musty smell. The damaged section may extend beyond the visible hole.
Step 3: Let the Wall Dry
Do not apply filler, primer, or paint over damp plaster. Allow the wall to dry thoroughly and investigate persistent moisture before continuing.
Step 4: Remove Unsound Material
Once it is safe to proceed, remove loose or severely deteriorated plaster carefully. If the damage is extensive or hazardous materials may be present, seek professional assistance.
Step 5: Repair and Refinish
Use a compatible plaster repair system on the stable, dry surface. Allow it to cure, then prime and paint as appropriate.
If moisture returns or mold is present, address the underlying problem rather than covering it with a new patch.
How to Get a Smooth Finish on a Plaster Wall Repair
A repair can be strong and stable but still remain visible if the surface is uneven. These techniques help create a cleaner finish.
- Apply thin, controlled layers instead of one unnecessarily thick layer.
- Use a flexible putty knife to spread the material evenly.
- Feather the edges beyond the damaged section.
- Follow the product’s drying instructions before sanding.
- Use gentle sanding pressure to avoid creating a dip.
- Remove dust before priming.
- Prime the repair when recommended to help achieve a consistent paint finish.
- Check the surface under normal room lighting before painting.
If the wall has a textured finish, the repair may also need a compatible texture treatment to blend in with the surrounding area.
Also Read:
Common Mistakes to Avoid
Using Ordinary Filler for a Deep Hole
Surface filler is not designed to provide support for every deep opening. Choose a patching method appropriate for the size and depth of the damage.
Leaving Loose Plaster in Place
New material may adhere to unstable plaster rather than a sound surface. Remove loose fragments carefully before applying the repair.
Ignoring Water Damage
A patch can fail if moisture continues to weaken the surrounding wall. Correct the source of water and allow the area to dry first.
Applying One Thick Layer
Some repair compounds shrink, crack, or dry unevenly when applied too thickly. Follow the manufacturer’s guidance on layer thickness.
Sanding Before the Patch Is Ready
Sanding too early can pull material from the hole or damage the surface. Wait until the compound has dried or cured sufficiently.
Skipping Surface Preparation
Dust, loose paint, and crumbling plaster can prevent proper adhesion. Prepare the wall before applying the patch.
Painting Without Proper Preparation
An unprimed patch may absorb paint differently from the surrounding wall. Prime the repair when needed and allow the coating to dry before judging the final color.
How Much Does It Cost to Repair a Hole in a Plaster Wall?
The total cost depends on the size of the hole, the repair materials, the condition of the wall, and whether you do the work yourself.
Small holes: Usually require only a small quantity of filler, basic tools, and paint.
Medium holes: May need mesh, a patching compound, primer, and additional finishing materials.
Large holes: Can require backing support, specialized repair products, and more preparation time.
Extensive damage: May involve removing unstable plaster, restoring the backing, or hiring a professional.
A DIY repair is often economical for small holes. For extensive damage or unstable plaster, the cost of professional assessment may be worthwhile because an inadequate repair can lead to further work.
When Should You Hire a Professional?
Consider professional help if:
- A large section of plaster is loose, bulging, or separating from the wall.
- The hole extends through the wall and the backing is damaged.
- Cracks keep returning after previous repairs.
- Water damage is extensive or the source of moisture is unknown.
- Electrical wiring or plumbing may have been damaged.
- The wall may contain lead-based paint or other hazardous materials.
- You cannot identify the wall’s construction or choose a safe repair method.
Professional assistance is particularly useful when the damage affects the stability of the surrounding plaster rather than only its surface appearance.
How to Prevent Holes in Plaster Walls
A few preventive measures can help protect plaster walls from future damage.
- Use appropriate anchors and fasteners for the wall’s construction.
- Avoid overloading shelves and wall-mounted fixtures.
- Install doorstops to prevent handles from striking the wall.
- Move furniture carefully when working near plaster surfaces.
- Repair leaks as soon as they are discovered.
- Address small chips before the surrounding plaster deteriorates.
- Inspect older walls for loose plaster before hanging heavy objects.
- Avoid drilling until you have checked for hidden utilities.
Choosing the right fastener for the wall type is particularly important when mounting heavy objects. A fastener that works in modern drywall may not provide adequate support in an older plaster wall.
Frequently Asked Questions
What is the easiest way to fix a small hole in a plaster wall?
Clean the opening, remove loose material, press a suitable wall filler into the hole, and smooth the surface with a putty knife. Once the patch has dried, sand it lightly if appropriate, prime as needed, and paint.
Can I use spackle to repair plaster walls?
Yes, lightweight spackling compound can be suitable for small, shallow holes in stable plaster. Larger or deeper openings may require patching plaster, reinforcement, or a specialized repair system.
Do plaster wall repairs need primer?
Primer is often recommended because the repaired area may absorb paint differently from the surrounding wall. Choose a primer suitable for the patching material and follow the product instructions.
How do I fix a hole that keeps cracking?
Repeated cracking may indicate loose plaster, insufficient support, moisture, movement, or an incompatible repair material. Investigate the underlying cause before applying another patch.
Can I repair a plaster wall without sanding?
Some small repairs can be smoothed carefully with a putty knife and may require little or no sanding. However, larger patches often need light sanding or another approved finishing method to achieve a level surface.
How long should I wait before painting a repaired plaster wall?
Wait until the repair compound has dried or cured for the time specified by its manufacturer. Deep patches, high humidity, and cool conditions can extend the required waiting period.
Can a large hole in plaster be repaired without replacing the wall?
Many large holes can be repaired without replacing the entire wall. However, the opening may need backing support or a rigid patch, and extensive damage to the surrounding plaster may require a more comprehensive repair.
Conclusion
Repairing a hole in a plaster wall starts with understanding the size of the opening and the condition of the surrounding material. Small holes are often easy to fill, while medium and large openings may need reinforcement, backing support, or specialized plaster repair products.
Prepare the surface carefully, use materials suited to the wall, and allow sufficient drying time before sanding and painting. If the damage involves moisture, loose plaster, or recurring cracks, address the underlying cause to help prevent another repair.
With the right preparation and repair method, you can restore the wall’s appearance and achieve a smooth finish that blends with the surrounding surface.

Engineer Ali Hasan is a garage door expert and the founder of FixFasty. With over 16 years of experience in mechanical systems and home maintenance, he provides practical, step-by-step guides on garage door installation, repairs, and maintenance, helping homeowners keep their garage doors safe, reliable, and long-lasting.