
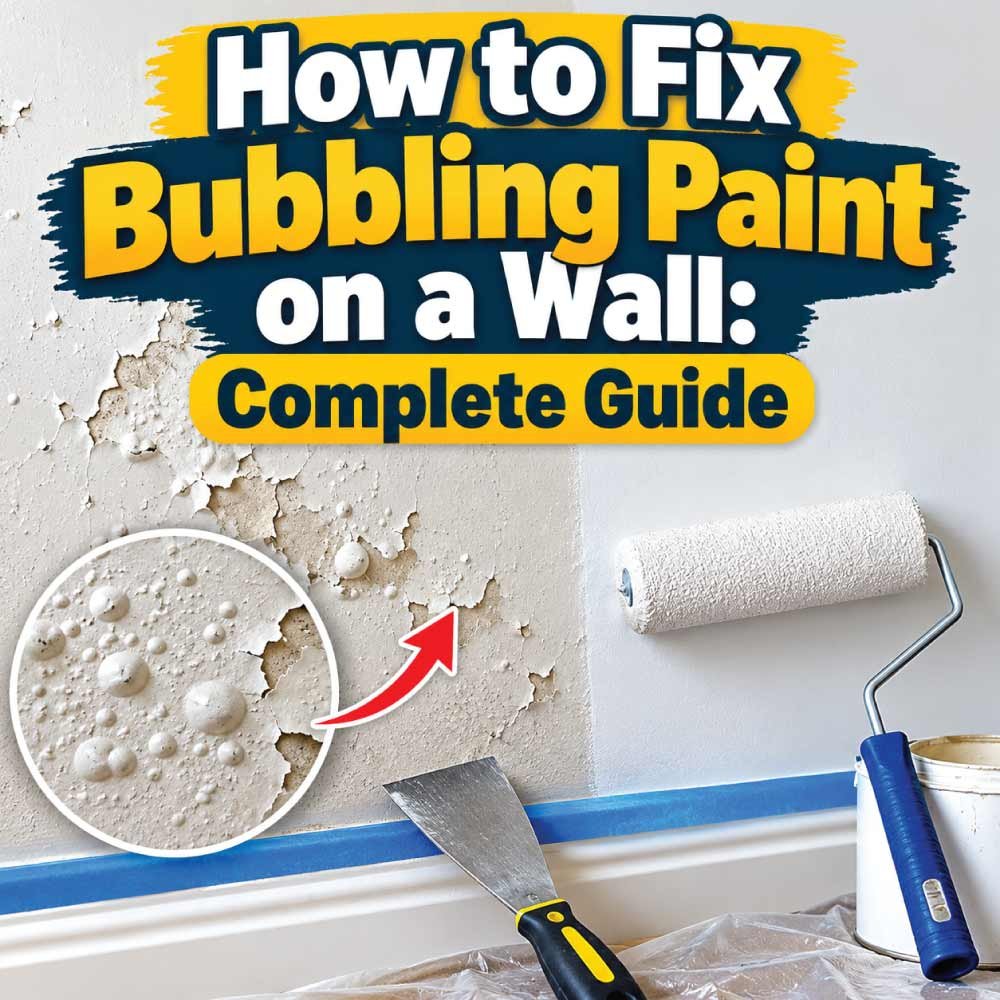
Bubbling paint on a wall can make an otherwise clean room look damaged and poorly maintained. These bubbles or blisters often appear when paint loses adhesion to the surface beneath it. Common causes include moisture, poor surface preparation, painting over a dirty or glossy surface, and applying paint under unsuitable conditions.
The good news is that small areas of bubbling paint can often be repaired with basic tools and the right preparation. However, if moisture is entering through a leak, condensation, or damp masonry, that underlying problem must be corrected before repainting.
This guide explains how to identify the cause of bubbling wall paint, remove damaged paint, prepare the surface, and achieve a smooth finish that lasts.
To fix bubbling paint, first identify and correct the cause. If moisture is responsible, resolve the leak or dampness and allow the wall to dry. Then remove loose paint, smooth the damaged area, apply a suitable primer, and repaint.
Follow these basic steps:
Inspect the bubbles: Determine whether the paint is loose, cracked, damp, or discolored.
Find the underlying cause: Check for plumbing leaks, roof leaks, condensation, or poor paint adhesion.
Remove loose paint: Scrape away paint that is no longer firmly attached.
Prepare the surface: Sand the edges, repair imperfections, and clean away dust.
Apply primer: Use a primer suitable for the wall material and the underlying problem.
Repaint: Apply compatible interior paint according to the manufacturer’s instructions.
Important: Do not simply paint over bubbling paint. The new coating may blister or peel again if the loose paint or underlying moisture problem remains.
Common Causes of Bubbling Paint on a Wall
Before repairing the damaged area, determine why the paint is bubbling. The correct solution depends on the condition of the wall and the type of paint failure.
1. Moisture Behind the Paint
Moisture is one of the most important causes to investigate, particularly when bubbling appears near ceilings, windows, bathrooms, kitchens, or exterior walls.
Water can enter a wall through leaking pipes, roof damage, failed exterior sealant, or moisture moving through masonry. As the wall becomes damp, the paint may lose adhesion and form blisters.
Common signs include:
- Paint bubbles accompanied by damp patches.
- Yellow or brown water stains.
- Peeling paint near plumbing fixtures or windows.
- A persistent musty smell.
- Repeated bubbling after repainting.
If the wall feels damp or the damage continues spreading, locate and correct the moisture source before repairing the paint.
2. Poor Surface Preparation
Paint needs a clean, sound surface to adhere properly. Dust, grease, soap residue, loose old paint, and other contaminants can prevent a new coat from bonding correctly.
Painting over a glossy surface without suitable preparation can also contribute to adhesion problems.
Before repainting, remove loose material, clean the surface as appropriate, and prepare it according to the paint and primer instructions.
3. Painting Over a Damp Surface
Even when there is no active leak, painting over a wall that has not dried sufficiently can cause adhesion problems and blistering.
This may happen after washing a wall, repairing plaster, applying joint compound, or addressing water damage.
Allow the surface to dry fully before priming or painting. The required drying time depends on the wall material, moisture level, ventilation, and product instructions.
4. Applying Paint Under Unsuitable Conditions
Paint may fail when applied outside the temperature or humidity range specified by the manufacturer.
Excessive heat, direct sunlight, high humidity, or inadequate ventilation can interfere with proper film formation or drying.
Check the paint label for the recommended application conditions, and avoid painting when the surface or room conditions fall outside those limits.
5. Incompatible Paint Layers
Applying a new coating over an unsuitable or poorly bonded existing finish can lead to bubbling or peeling.
For example, a new coat may fail if the underlying paint is already loose or if the surface has not been prepared for the new product.
Identify the existing finish where possible and use a compatible primer and paint system.
6. Excessive Paint Buildup
Repeatedly applying paint over old, thick, or poorly adhered layers can create a weak coating that eventually blisters or separates.
If multiple layers are peeling or bubbling, remove the loose material and assess the condition of the underlying surface before rebuilding the finish.
Tools and Materials You May Need
For a typical small repair, gather:
Paint scraper or putty knife.
Sandpaper or a sanding sponge.
Dust mask and safety glasses.
Gloves.
Clean cloth or sponge.
Drop cloth or protective sheeting.
Suitable wall patching compound.
Putty knife for applying filler.
Primer compatible with the wall and paint.
Matching interior wall paint.
Paintbrush or small roller.
You may not need every item. Choose products based on whether the wall is drywall, plaster, masonry, or another material.
If the bubbling is caused by a persistent moisture problem, you may also need a qualified plumber, roofer, or building professional to correct the source.
Safety Precautions Before Repairing Bubbling Paint
Before scraping or sanding, take precautions to protect yourself and your home.
Wear safety glasses and an appropriate dust mask when removing paint or sanding.
Cover furniture and floors to collect dust and paint chips.
Keep children and pets away from the work area.
Avoid scraping or sanding paint in older homes until you have considered the possibility of lead-based paint. In the United States, homes built before 1978 may contain lead-based paint.
If lead-based paint is suspected, avoid disturbing it and consult an appropriately qualified lead-safe professional.
Do not paint over active leaks, persistent dampness, or suspected mold growth.
If water is near electrical outlets or wiring, avoid touching wet electrical components and have the hazard assessed safely.
Follow the manufacturer’s ventilation, protective equipment, and drying instructions for primers, paints, and patching materials.
If the wall is soft, severely damaged, or visibly moldy over a substantial area, seek an appropriate professional assessment before proceeding.
How to Fix Bubbling Paint on a Wall Step by Step
Once the underlying cause has been addressed and the wall is suitable for repair, follow these steps.
Step 1: Inspect the Wall and Identify the Cause
Start by examining the affected area carefully.
- Look for water stains, cracks, peeling paint, and discoloration.
- Check whether the bubbles are concentrated near a window, ceiling, bathroom, or plumbing fixture.
- Look for signs of a leaking roof, plumbing connection, or damaged exterior seal.
- Check whether the paint is lifting only in one small patch or across a larger section.
- Consider whether the wall was recently washed, patched, or painted.
If the wall is damp, soft, or repeatedly develops bubbles, do not begin repainting yet.
What the findings may indicate:
- Bubbles around a plumbing fixture may suggest a leak.
- Widespread bubbling on a bathroom wall may be related to moisture or condensation.
- Peeling paint over a glossy or dirty surface may indicate poor adhesion.
- Damage following a recent paint job may point to inadequate preparation or unsuitable application conditions.
These are clues rather than definitive diagnoses. If the source of moisture is unclear, professional investigation may be necessary.
Step 2: Correct Any Moisture Problems
If moisture is causing the paint to bubble, resolve that issue before continuing.
Possible actions include:
- Repairing a leaking water supply or drainpipe.
- Correcting a roof leak.
- Improving bathroom ventilation.
- Repairing failed exterior caulking or weatherproofing.
- Addressing water intrusion through masonry.
After the source has been corrected, allow the wall to dry thoroughly. Drying may take longer than expected, particularly in thick plaster, masonry, or walls with insulation.
Do not rely only on the surface feeling dry. A moisture meter or professional assessment may be helpful when water damage is extensive or the wall’s internal condition is uncertain.
If moisture returns after drying, investigate further rather than covering the area with more paint.
Step 3: Scrape Away Loose and Bubbling Paint
Once the wall is dry and the underlying issue has been corrected, remove the damaged coating.
- Place a drop cloth below the repair area.
- Wear safety glasses and an appropriate dust mask.
- Use a paint scraper or putty knife to lift paint that is already loose.
- Continue until the remaining paint is firmly attached.
- Avoid digging aggressively into the drywall paper or plaster.
- Collect and dispose of paint chips appropriately.
Do not try to preserve paint that separates easily from the surface. Leaving loose material behind can cause the repaired area to fail again.
If the paint is suspected to contain lead, stop and use a lead-safe professional instead of scraping or sanding it yourself.
Step 4: Sand the Edges Smooth
After removing the loose paint, smooth the transition between the exposed wall and the remaining coating.
- Use suitable sandpaper or a sanding sponge.
- Lightly feather the edges of the remaining paint.
- Remove raised edges and loose particles without damaging the wall.
- Wipe away dust with a clean cloth using a method suitable for the surface.
- Allow the surface to dry if cleaning introduces moisture.
The goal is to create a stable, smooth surface that will not show an obvious ridge after repainting.
Avoid aggressive sanding, particularly on drywall, where excessive abrasion can damage the paper facing.
Step 5: Repair Damaged Drywall or Plaster
If scraping reveals small dents, gouges, or shallow imperfections, use an appropriate patching compound.
- Remove loose fragments from the damaged area.
- Apply a compatible patching compound with a putty knife.
- Smooth the compound so it blends with the surrounding wall.
- Allow it to dry according to the product instructions.
- Sand gently if required.
- Remove the resulting dust before priming.
Use a patching product suitable for the wall material and the depth of the damage.
If drywall paper is torn, the plaster is crumbling, or the wall feels soft from prolonged water exposure, additional repair may be necessary. Extensive damage may require replacing part of the wall rather than filling the surface.
Step 6: Apply a Suitable Primer
Primer helps create a consistent surface and improves adhesion between the repaired wall and the new paint.
Choose a primer appropriate for the surface and the problem you are addressing.
Bare drywall or patching compound: Use a compatible drywall or general-purpose primer.
Stained surfaces: Consider a stain-blocking primer designed for the type of discoloration.
Previously glossy surfaces: Use a primer suitable for the existing finish after proper preparation.
Masonry or plaster: Select a product approved for that substrate and its moisture conditions.
Apply the primer according to the manufacturer’s instructions and allow it to dry completely.
Important: Stain-blocking primer is not a substitute for repairing a leak. Do not use primer to conceal active moisture damage.
Step 7: Repaint the Wall
Once the primer has dried and the surface is ready, apply the finishing paint.
- Choose a paint compatible with the primer and existing wall finish.
- Stir the paint thoroughly.
- Apply an even coat using a brush or roller.
- Follow the recommended coverage and drying instructions.
- Apply a second coat if needed.
- Allow the final coating to dry and cure according to the product label.
Avoid applying thick coats to speed up the job. Proper film thickness and drying conditions help produce a more durable finish.
If the repaired area looks different from the surrounding wall, repainting the entire wall from corner to corner may provide a more uniform appearance.
Step 8: Monitor the Repaired Area
After repainting, check the wall periodically for signs of recurring damage.
Look for:
- New bubbles or blisters.
- Peeling paint around the repair.
- Fresh water stains.
- Musty odors or persistent dampness.
- Cracking or soft areas in the wall.
If the bubbles return, do not simply apply another coat. Reassess the moisture source, surface condition, and compatibility of the paint system.
How to Identify the Cause of Bubbling Wall Paint
The location and appearance of the damage can help narrow down the likely cause.
| Symptom | Possible Cause | Recommended Action |
|---|---|---|
| Bubbles near a pipe or plumbing fixture | Possible plumbing leak | Inspect the plumbing and repair any leak |
| Blisters near the ceiling | Roof leak, upper-floor leak, or condensation | Investigate the source of moisture |
| Peeling paint over a glossy surface | Poor adhesion or insufficient preparation | Remove loose paint and prepare the surface |
| Bubbling shortly after repainting | Damp surface, unsuitable conditions, or incompatible coatings | Review preparation and application conditions |
| Yellow or brown stains with peeling paint | Previous or ongoing water damage | Identify the moisture source and assess the substrate |
| Widespread peeling with soft drywall | Prolonged moisture damage | Obtain a professional assessment and repair damaged material |
These observations can help guide the inspection, but the appearance alone cannot confirm the cause.
Also Read:
Common Mistakes to Avoid When Fixing Bubbling Paint
Avoid these common mistakes to improve the quality and durability of the repair.
Painting over loose bubbles: The new coating may separate along with the old paint.
Ignoring moisture: Water intrusion can cause the problem to return even after careful repainting.
Skipping surface preparation: Dust, grease, and loose material can prevent proper adhesion.
Applying primer too soon: Primer should not be applied to a wall that remains damp.
Using the wrong primer: Different surfaces and stains may require different products.
Applying overly thick paint coats: Thick layers may dry unevenly and produce an inferior finish.
Sanding suspected lead-based paint: Disturbing lead-based paint can create hazardous dust.
Covering damaged drywall without inspection: Soft or deteriorated wall material may need replacement.
Taking the time to identify the cause and prepare the wall correctly is often more important than applying additional coats of paint.
When Should You Call a Professional?
Small areas of bubbling paint can often be repaired as a DIY project. However, professional assistance is appropriate when:
- The wall remains damp despite attempts to identify and correct the source.
- Water stains keep returning.
- The drywall or plaster is soft, crumbling, or extensively damaged.
- Mold growth is extensive or appears to be associated with hidden moisture.
- The damage may involve a leaking roof, concealed plumbing, or exterior water intrusion.
- The home may contain lead-based paint that would be disturbed during repairs.
- Water damage extends into electrical areas or other parts of the building.
A plumber, roofer, moisture specialist, or qualified painting contractor may be needed depending on the cause.
Should You Repair or Replace the Damaged Wall?
The decision depends on the extent of the damage and the condition of the underlying material.
Repair and repaint may be suitable when:
- The bubbling is limited to a small area.
- The underlying wall is solid and dry.
- The damaged paint can be removed without extensive surface damage.
- Any moisture source has been corrected.
Partial wall replacement may be necessary when:
- Drywall has become soft, swollen, or crumbled.
- The wall material has lost its structural integrity.
- Water damage extends behind the visible paint.
- Mold or persistent dampness indicates a more extensive problem.
Do not replace drywall or cover damaged plaster until the source of moisture has been addressed and the affected area has been assessed appropriately.
How to Prevent Bubbling Paint in the Future
Preventive maintenance can help keep wall paint in good condition.
- Repair plumbing and roof leaks promptly.
- Use bathroom exhaust ventilation to control excess humidity.
- Keep walls clean and dry before painting.
- Remove loose paint and prepare glossy surfaces appropriately.
- Follow the primer and paint manufacturer’s instructions.
- Apply paint within the recommended temperature and humidity ranges.
- Allow patching compounds, plaster, and cleaned surfaces to dry before painting.
- Inspect areas around windows, plumbing fixtures, and ceilings for early signs of moisture damage.
Good preparation and moisture control help reduce the likelihood of bubbling paint returning.
Also Read:
Frequently Asked Questions
Why is my wall paint bubbling all of a sudden?
Sudden bubbling may result from moisture entering the wall, painting over a damp surface, or a coating losing adhesion. Check for plumbing leaks, roof leaks, condensation, and recent painting work before deciding how to repair the area.
Can I paint over bubbling paint?
No. Loose or blistered paint should be removed before repainting. Otherwise, the new coating may not adhere properly. Correct any underlying moisture problem, prepare the surface, apply a suitable primer, and repaint.
Does bubbling paint always mean there is a water leak?
No. Moisture is a common cause, but poor surface preparation, incompatible paint layers, and unsuitable application conditions can also cause bubbling. The location and condition of the wall help determine which cause is most likely.
How long should I wait before repainting a repaired wall?
Wait until the wall, patching compound, and primer have dried according to their respective product instructions. If the wall suffered water damage, it may require additional drying time. Do not repaint while the substrate remains damp.
Can bubbling paint cause mold?
Bubbling paint does not automatically mean mold is present. However, persistent moisture behind a painted wall can support mold growth on suitable materials. Investigate dampness and address the source instead of simply covering the affected area.
Why does my wall paint bubble again after repair?
Recurring bubbles often indicate that the original problem was not fully corrected. Possible causes include continued moisture intrusion, an inadequately prepared surface, incompatible coatings, or damaged underlying material. Reassess the wall before attempting another repair.
Conclusion
Bubbling paint on a wall is usually a sign of poor adhesion, moisture, or unsuitable painting conditions. The most reliable repair is to identify the cause, correct any moisture problem, remove loose paint, prepare the surface, apply a suitable primer, and repaint under the recommended conditions.
For small, dry areas, these steps can often restore a smooth finish. If the wall remains damp, the damage is extensive, or the paint may contain lead, seek appropriate professional help before disturbing the surface.

Engineer Ali Hasan is a garage door expert and the founder of FixFasty. With over 16 years of experience in mechanical systems and home maintenance, he provides practical, step-by-step guides on garage door installation, repairs, and maintenance, helping homeowners keep their garage doors safe, reliable, and long-lasting.