
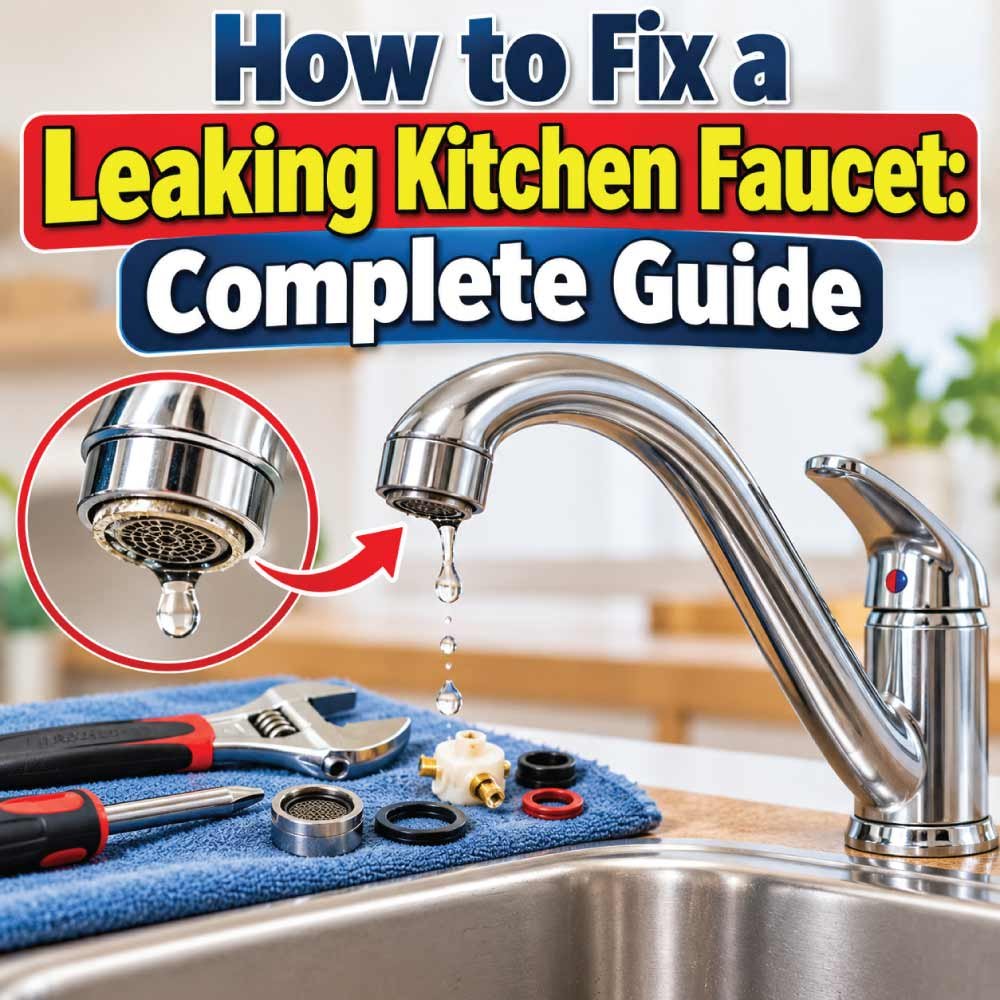
A leaking kitchen faucet can waste water, leave puddles around the sink, and damage the cabinet below if the problem goes unnoticed. The good news is that many faucet leaks can be fixed with basic tools and a replacement washer, O-ring, cartridge, or other compatible part.
The best way to fix a leaking kitchen faucet is to identify where the water is coming from before taking anything apart. A faucet that drips from the spout usually has a worn internal seal or cartridge, while water leaking around the handle or beneath the sink may point to a different problem.
This guide explains how to identify common faucet leaks, choose the right repair, replace worn components, and determine when professional plumbing help is necessary.
How to Fix a Leaking Kitchen Faucet: Quick Answer
Start by turning off the faucet and observing where the water appears. If water drips from the spout while the handles are fully closed, the cartridge, valve seals, or washers may be worn. If water leaks around the handle, an O-ring or cartridge seal may need replacement.
Follow these initial checks:
Dripping spout: Inspect the cartridge, washers, or valve seals.
Leaking handle: Check the handle assembly and internal O-rings.
Water around the faucet base: Inspect the base seals, connections, and nearby sink surfaces.
Leak beneath the sink: Check the supply-line connections, shutoff valves, and faucet mounting area.
Water leaking only when the faucet runs: Inspect the spout, spray hose, faucet body, and connections.
Before disassembling the faucet, turn off the hot and cold water supply valves beneath the sink. Open the faucet to release pressure and confirm that the water has stopped flowing.
The exact repair depends on the faucet design, so identify the manufacturer and model when possible before purchasing replacement parts.
Common Causes of a Leaking Kitchen Faucet
Understanding the symptoms can help you narrow down the cause without replacing parts unnecessarily.
1. Worn or Damaged Faucet Cartridge
Many single-handle kitchen faucets use a cartridge to control water flow and temperature. Over time, internal seals can wear out, mineral deposits can interfere with operation, or the cartridge itself can become damaged.
Common symptoms include:
- Water dripping from the spout after the faucet is closed.
- Difficulty controlling water temperature.
- A handle that feels unusually stiff or loose.
- Water leaking around the handle.
If the faucet continues dripping after the water supply has been shut off and the remaining water has drained, a worn cartridge or valve seal may be responsible.
2. Damaged Rubber Washers or Valve Seals
Some traditional compression faucets use rubber washers that press against a valve seat to stop water flow. Repeated use can wear down these washers, causing water to escape even when the faucet is closed.
Look for persistent dripping from the spout, especially when the handle is fully turned off.
Depending on the faucet design, replacing a washer or valve seal may solve the problem without replacing the entire faucet.
3. Worn O-Rings
O-rings are small rubber seals that help prevent water from escaping around moving faucet components.
When an O-ring becomes cracked, flattened, or brittle, water may leak around the handle, spout, or another joint.
The correct replacement must match the original seal’s size and type. An O-ring that is too large, too small, or incorrectly seated can cause the leak to continue.
4. Loose or Damaged Water Supply Connections
Flexible supply lines connect the faucet to the hot and cold water supplies. Connections can develop leaks because of damaged seals, corrosion, deteriorated hoses, or improper installation.
Signs include:
- Water droplets around a threaded connection.
- Moisture on the supply hose.
- Water collecting on the cabinet floor.
- A leak that becomes noticeable when the faucet is running.
A loose connection may be the cause, but tightening it is not always the correct solution. Damaged hoses, seals, or fittings may need replacement.
5. Damaged Faucet Base Seals
Water around the base of the faucet does not automatically mean the faucet’s internal valve is leaking.
Water from a wet countertop, a poorly sealed sink area, a loose mounting assembly, or an internal faucet connection may collect around the base.
Dry the surrounding surfaces and observe where fresh water first appears. This can help distinguish a faucet leak from water splashing around the sink.
6. Mineral Deposits or a Damaged Faucet Body
Hard-water deposits can interfere with moving parts and seals. In some cases, corrosion, cracks, or damage to the faucet body can cause persistent leakage.
Cleaning accessible mineral deposits may help if they are affecting operation. However, a cracked faucet body or badly corroded component usually requires replacement rather than a simple seal repair.
Tools and Materials You May Need
Gather the necessary tools before beginning. The exact items depend on your faucet model and the location of the leak.
- Adjustable wrench.
- Screwdrivers that fit the faucet’s fasteners.
- Hex keys or Allen wrenches, if required.
- Replacement cartridge, washer, or O-rings compatible with the faucet.
- Clean cloths or towels.
- Small container to catch residual water.
- Flashlight for inspecting the cabinet beneath the sink.
- Manufacturer-recommended faucet lubricant, if required.
- A parts tray for keeping small screws and components organized.
Avoid using pliers directly on decorative faucet surfaces. A cloth or suitable protective covering can help prevent scratches.
Do not use general-purpose grease or petroleum jelly on rubber seals unless the manufacturer specifically permits it. Some lubricants can damage seal materials.
Safety Precautions Before Repairing a Kitchen Faucet
A faucet repair is usually manageable for a homeowner, but preparation is important.
Turn off both water supplies. Close the hot and cold shutoff valves beneath the sink. If either valve is stuck, badly corroded, or leaking, do not force it.
Release water pressure. Open the faucet after closing the valves and allow any remaining water to drain.
Protect the cabinet. Place a towel or shallow container beneath the plumbing to catch residual water.
Keep track of small parts. Screws, clips, springs, and seals can be easy to lose during disassembly.
Avoid excessive force. Corroded fasteners and plastic components can break if forced. Stop if a part will not loosen with reasonable pressure.
Check for electrical hazards. If water has reached an electrical outlet, appliance connection, or energized equipment, do not touch the wet area or electrical equipment. Seek qualified assistance.
If the shutoff valves do not stop the water completely, stop the repair and arrange for the water supply to be isolated safely before removing faucet components.
Step-by-Step: How to Fix a Leaking Kitchen Faucet
The following procedure covers common faucet repairs. Follow the instructions for your specific faucet design rather than assuming every model comes apart the same way.
Step 1: Identify Where the Faucet Is Leaking
Dry the faucet, sink, and cabinet beneath the sink with a clean cloth.
Turn on the faucet briefly, if it is safe to do so, and observe where fresh water appears. Then close the faucet and check whether dripping continues.
Pay attention to these areas:
- The end of the spout.
- Around the handle.
- The base of the faucet.
- The spray hose and its connections.
- The hot and cold supply connections beneath the sink.
- The shutoff valves and surrounding plumbing.
What the results mean: A leak from the spout when the faucet is off often indicates an internal valve or sealing problem. A leak beneath the sink may involve the supply connections, hose, valve, or faucet body.
Once you have identified the likely location, turn off the water supplies before proceeding with disassembly.
Step 2: Locate the Faucet Model and Obtain the Correct Parts
Look for a brand name or model number on the faucet, its packaging, or the installation paperwork.
Use the manufacturer’s documentation to identify the correct cartridge, washer, seal kit, or replacement component. Faucet parts can look similar while having different dimensions or fitting arrangements.
If the model cannot be identified, remove the necessary component only after safely shutting off the water. Take the old part to a plumbing supply store for comparison.
Important: Do not buy a replacement cartridge based only on appearance. Confirm compatibility with the faucet model whenever possible.
Step 3: Remove the Faucet Handle
If the leak appears to come from the spout or handle, you may need to access the internal valve.
- Confirm that both water supplies are off.
- Look for a decorative cap or cover on the handle.
- If present, carefully remove the cap without damaging the finish.
- Locate the retaining screw and use the correct screwdriver or hex key to loosen it.
- Lift the handle away from the faucet.
- Keep the screws and other small parts together.
Some faucets have hidden fasteners or different handle-removal methods. Consult the manufacturer’s instructions if you cannot locate the retaining screw.
Do not pry aggressively against the faucet body. If the handle is seized by corrosion or mineral deposits, stop before damaging the assembly.
Step 4: Inspect the Internal Components
With the handle removed, inspect the accessible parts for signs of wear or damage.
Depending on the faucet design, you may see a cartridge, retaining nut, clip, valve stem, washers, or O-rings.
Look for:
- Cracked or flattened rubber seals.
- Mineral deposits around moving parts.
- A damaged cartridge.
- Corrosion or visible cracks.
- Loose or incorrectly positioned retaining components.
A visible defect can help identify the faulty part, but some internal cartridge failures are not obvious from appearance alone.
Before removing a cartridge or valve assembly, note the position of the components and consult the model-specific instructions. Some cartridges must be aligned in a particular direction.
Step 5: Replace a Worn Cartridge or Washer
The replacement method depends on the faucet type.
For a cartridge faucet:
- Remove any retaining clip or nut using the method specified by the manufacturer.
- Pull the old cartridge out carefully, keeping track of its orientation.
- Inspect the cartridge opening for accessible debris or mineral buildup.
- Clean the accessible area gently without scratching the sealing surfaces.
- Install the correct replacement cartridge in the specified orientation.
- Reinstall the retaining components and handle.
For a compression faucet with a replaceable washer:
- Follow the faucet’s instructions to remove the valve stem.
- Locate the worn washer and its retaining screw, if applicable.
- Replace the washer with a compatible part.
- Inspect other accessible seals for damage.
- Reassemble the valve stem and handle according to the manufacturer’s instructions.
Do not force a cartridge into place. If it does not fit properly, verify its compatibility and alignment before continuing.
If the valve seat, faucet body, or another critical component is damaged, replacing the washer or cartridge alone may not stop the leak.
Step 6: Reassemble the Faucet
Once the damaged component has been replaced, put the faucet back together carefully.
- Confirm that the replacement component is seated correctly.
- Reinstall any retaining clips, nuts, and screws.
- Reattach the handle and decorative cap.
- Tighten fasteners securely without overtightening them.
- Check that the handle moves normally and that no parts have been left loose.
If the handle binds, the cartridge may be misaligned or a component may not be seated correctly. Correct the problem before restoring the water supply.
Step 7: Restore Water and Test for Leaks
Open the hot and cold shutoff valves slowly. Watch the connections beneath the sink as the water pressure returns.
Then test the faucet:
- Turn on the water gently.
- Check the faucet base and handle for moisture.
- Run both hot and cold water, where available.
- Operate the handle through its normal range.
- Close the faucet and check whether the spout continues dripping.
- Inspect the supply connections and cabinet area again.
If the leak has stopped, dry the area and recheck it after using the faucet normally.
If water continues leaking, turn off the water supplies again if it is safe to do so. Recheck the component fit and compatibility. A continuing leak may indicate another damaged seal, a faulty valve seat, a cracked body, or a problem outside the faucet itself.
Do not keep tightening components in an attempt to stop a leak. Excessive force can damage threads, fittings, or plastic parts.
How to Fix a Leak Around the Kitchen Faucet Base
If water collects around the faucet base, first determine whether it is coming from inside the faucet or simply running across the sink surface.
- Dry the faucet base, countertop, and sink.
- Run water into the sink without splashing it onto the faucet.
- Observe whether moisture appears around the base.
- If the area remains dry, carefully direct a small amount of water around the base and check whether it enters the gap between the faucet and sink.
- If the leak occurs only when water splashes onto the base, the issue may involve the mounting seal or water management around the sink.
- If water appears from inside the faucet assembly, inspect the relevant seals and connections according to the manufacturer’s instructions.
A loose mounting nut can sometimes allow the faucet to move, but tightening it will not repair a damaged internal seal or cracked faucet body.
Avoid applying silicone sealant around the faucet as a first response to every leak. Some faucet designs do not require additional sealant, and sealing the outside may conceal an underlying plumbing problem.
How to Fix a Kitchen Faucet Leaking Under the Sink
A leak beneath the kitchen sink deserves prompt attention because water can damage cabinets, flooring, and nearby materials.
Inspect the Water Supply Lines
- Dry the supply hoses and connections.
- Use a flashlight to inspect the hot and cold supply lines.
- Look for droplets around the fittings, moisture along the hoses, or signs of corrosion.
- If necessary, briefly run the faucet while watching the connections, provided there are no electrical hazards and the leak is manageable.
- If a hose itself is leaking, arrange for its replacement with a compatible supply line.
A connection that appears loose may have a damaged seal or fitting. Do not automatically tighten every connection, especially plastic fittings or connections with manufacturer-specified torque requirements.
Check the Spray Hose and Connections
Pull-down and pull-out kitchen faucets often contain a flexible spray hose beneath the sink.
If water appears around the hose connection or inside the cabinet while using the sprayer, inspect the hose, connectors, and faucet assembly for damage.
A worn or cracked hose generally needs replacement. Follow the manufacturer’s instructions for disconnecting and reconnecting the hose, and confirm that the replacement is compatible with the faucet.
Inspect the Shutoff Valves
If water appears around a shutoff valve, the leak may be coming from the valve body, handle stem, or supply-line connection.
Do not force a corroded valve or attempt to dismantle a valve that is still under water pressure. If the valve leaks, cannot be operated safely, or fails to shut off the water, contact a qualified plumber.
Also Read:
Common Faucet Leaks and Their Likely Causes
Use the following table to narrow down the problem before replacing parts. These are possible causes, not guaranteed diagnoses.
| Symptom | Possible Cause | Recommended Action |
|---|---|---|
| Spout drips when closed | Worn cartridge, washer, or valve seal | Inspect the faucet’s internal valve components |
| Water leaks around the handle | Damaged O-ring or cartridge seal | Inspect and replace the compatible seal or cartridge |
| Water collects around the faucet base | Splashing, damaged base seal, or internal leak | Dry the area and identify where water first appears |
| Water leaks beneath the sink | Faulty supply line, connection, or shutoff valve | Inspect the plumbing and replace damaged components |
| Leak occurs while using the sprayer | Damaged hose or connector | Inspect the spray hose and fittings |
| Faucet continues leaking after a repair | Incorrect part, poor alignment, or additional damage | Recheck compatibility and inspect other components |
Common Mistakes to Avoid When Repairing a Leaking Faucet
Even a straightforward repair can create additional problems if components are handled incorrectly.
Replacing parts before identifying the leak: Determine where water first appears before purchasing replacement components.
Buying an incompatible cartridge: Verify the faucet model and replacement part specifications.
Overtightening fittings: Excessive force can damage threads, plastic components, and seals.
Forcing stuck components: Corrosion and mineral buildup can make parts difficult to remove. Stop if reasonable force does not work.
Ignoring leaks beneath the sink: Small leaks can cause damage before they become obvious.
Using the wrong lubricant: Use only a lubricant compatible with the faucet’s seals and approved by the manufacturer.
Applying sealant without diagnosing the cause: Exterior sealant may conceal a problem rather than fix it.
Failing to test the repair: Always restore the water slowly and inspect the faucet, supply lines, and cabinet for leaks.
When to Call a Professional Plumber
A professional plumber is the better choice when the problem cannot be identified confidently or the repair involves damaged plumbing components.
Seek professional help if:
- The shutoff valves do not stop the water.
- A shutoff valve, supply pipe, or fitting is badly corroded.
- Water is leaking from inside a cracked faucet body.
- The faucet continues leaking after the correct replacement part has been installed.
- A supply line is split or leaking heavily.
- The plumbing connection is inaccessible or difficult to remove safely.
- Water has reached electrical equipment or created a potential electrical hazard.
- The faucet is connected to an unusual plumbing system that you do not understand.
If water is flowing heavily, close the main water shutoff only if you can reach and operate it safely. If the leak cannot be controlled, seek urgent plumbing assistance.
Do not continue using a faucet with an uncontrolled leak simply because the visible dripping seems minor. Hidden water damage can become more expensive than the original repair.
Also Read:
Should You Repair or Replace a Leaking Kitchen Faucet?
Repair is often reasonable when the faucet body is in good condition and the leak comes from a replaceable cartridge, washer, O-ring, or connection.
Replacement may be more practical when the faucet has multiple failing components, extensive corrosion, a cracked body, or discontinued parts that are difficult to obtain.
Consider these factors before deciding:
Condition: A faucet with a sound body and accessible replacement parts is often worth repairing.
Availability of parts: Confirm that the correct cartridge or seal kit is available.
Extent of the damage: Multiple leaks or significant corrosion may make replacement more sensible.
Installation condition: Damaged supply lines or shutoff valves may need attention regardless of whether you keep the faucet.
Long-term value: Compare the cost of the repair and any related plumbing work with the cost of a suitable replacement faucet.
Do not assume that a new faucet will automatically solve a leak beneath the sink. If the source is a shutoff valve or supply line, that plumbing issue must be addressed separately.
How to Prevent Kitchen Faucet Leaks
Regular inspection can help you catch small problems before they cause water damage.
Check beneath the sink periodically. Look for damp cabinet surfaces, corrosion, and moisture around the supply lines.
Operate the handles gently. Avoid forcing a handle that feels stiff or restricted.
Address dripping promptly. Persistent dripping can indicate a worn internal component that may deteriorate further.
Clean mineral deposits carefully. Follow the faucet manufacturer’s cleaning instructions to avoid damaging the finish or seals.
Inspect flexible hoses. Replace hoses that show cracking, bulging, corrosion at the fittings, or other signs of deterioration.
Avoid excessive water pressure adjustments. If you suspect unusually high water pressure, have it checked rather than modifying the faucet to compensate.
Use compatible replacement parts. Correctly fitted cartridges and seals help the faucet operate as designed.
Check repairs after use. Look for moisture around the faucet and inside the cabinet after replacing a component.
These checks do not eliminate normal wear, but they can help identify developing problems early.
Frequently Asked Questions
1. Why does my kitchen faucet drip after I turn it off?
A faucet that continues dripping may have a worn cartridge, damaged washer, faulty valve seal, or debris affecting the valve’s sealing surface. First, allow any water remaining in the spout to drain. If dripping continues, inspect the faucet’s internal components according to the manufacturer’s instructions.
2. Can I fix a leaking kitchen faucet without replacing the entire faucet?
Yes. Many leaks can be repaired by replacing a compatible cartridge, washer, O-ring, or damaged connection. The best option depends on the faucet design and the condition of its components. A cracked faucet body or extensive corrosion may make replacement more practical.
3. Why is my kitchen faucet leaking underneath the sink?
Common possibilities include a damaged supply hose, leaking connection, faulty shutoff valve, spray hose problem, or leak from the faucet assembly itself. Dry the area and identify where fresh water first appears. If a valve or pressurized connection is leaking and you cannot safely isolate the water, contact a plumber.
4. How do I know whether my faucet needs a new cartridge?
A cartridge may be faulty if the faucet drips when closed, leaks around the handle, or has difficulty controlling water flow or temperature. These symptoms can have other causes, so confirm the faucet type and inspect the relevant components before ordering a replacement.
5. Should I turn off the water before fixing a leaking faucet?
Yes. Close both hot and cold water supply valves beneath the sink and open the faucet to release pressure. Confirm that the water has stopped before removing the handle or internal components. If the shutoff valves fail to isolate the supply, do not disassemble the faucet until the water can be shut off safely.
6. Why is my kitchen faucet still leaking after replacing the cartridge?
The cartridge may be incompatible, incorrectly aligned, or improperly seated. The leak could also come from a damaged valve seat, another seal, a loose connection, or a cracked faucet body. Turn off the water before inspecting the assembly again. If the source remains unclear, seek professional assistance.
Conclusion
Fixing a leaking kitchen faucet starts with identifying where the water is coming from. A dripping spout may need a new cartridge or washer, while a leak around the handle, faucet base, or beneath the sink may require a different repair.
Turn off the water supply before disassembling the faucet, use compatible replacement parts, and test every connection after reassembly. If the shutoff valves fail, plumbing components are badly corroded, or the leak continues after a careful repair, contact a qualified plumber rather than risking further damage.

Engineer Ali Hasan is a garage door expert and the founder of FixFasty. With over 16 years of experience in mechanical systems and home maintenance, he provides practical, step-by-step guides on garage door installation, repairs, and maintenance, helping homeowners keep their garage doors safe, reliable, and long-lasting.