
A toilet that won’t flush can quickly become a frustrating household problem, especially when the bowl is full or the handle suddenly stops working. The cause may be something simple, such as a disconnected chain, a low tank water level, a clogged drain, or a faulty flapper.
The best way to fix a toilet that won’t flush is to identify which part of the flushing system is failing before replacing anything. A toilet that makes no sound when you press the handle may have a tank mechanism problem, while a toilet that fills with water but does not drain properly may be clogged.
This guide explains how to diagnose common toilet flushing problems, perform safe DIY repairs, identify when a blockage requires professional help, and prevent the problem from returning.
How to Fix a Toilet That Won’t Flush: Quick Answer
Start by removing the toilet tank lid, if your toilet has an accessible tank, and observing what happens when you press the handle. Do not flush repeatedly if the bowl is already full or the water level is rising.
Use these checks to narrow down the cause:
The handle moves loosely: The lift chain may be disconnected or broken.
The handle works, but nothing happens: The chain, flapper, or flush lever may not be operating correctly.
The tank contains too little water: The water supply may be off, or the fill valve may not be working properly.
The tank empties, but the bowl does not drain: A clogged toilet trap or drain may be preventing water from flowing away.
The bowl drains slowly: A partial blockage or restricted drain may be responsible.
The toilet flushes weakly: The tank water level, flapper operation, or flush openings may need attention.
Important: If the bowl is close to overflowing, turn off the toilet’s water supply using the shutoff valve behind or beside the toilet, if it is accessible and operates normally. Avoid flushing again until you have identified the problem.
Common Reasons a Toilet Won’t Flush
Several components must work together for a toilet to flush properly. The handle activates the tank mechanism, the flapper releases water into the bowl, and the waste travels through the toilet trap and drain.
A failure in any of these areas can prevent a normal flush.
1. A Clogged Toilet
A blockage is one of the most common explanations for a toilet that will not flush correctly.
Excessive toilet paper, sanitary products, wipes, foreign objects, or other unsuitable materials can obstruct the toilet trap or drainpipe.
Common symptoms include:
Water rising unusually high in the bowl.
Water draining slowly after a flush.
Gurgling sounds.
Water backing up into the bowl.
The toilet failing to clear waste despite the tank releasing water.
A plunger may clear a minor blockage. However, a persistent clog may require a toilet auger or professional drain service.
2. A Disconnected or Broken Lift Chain
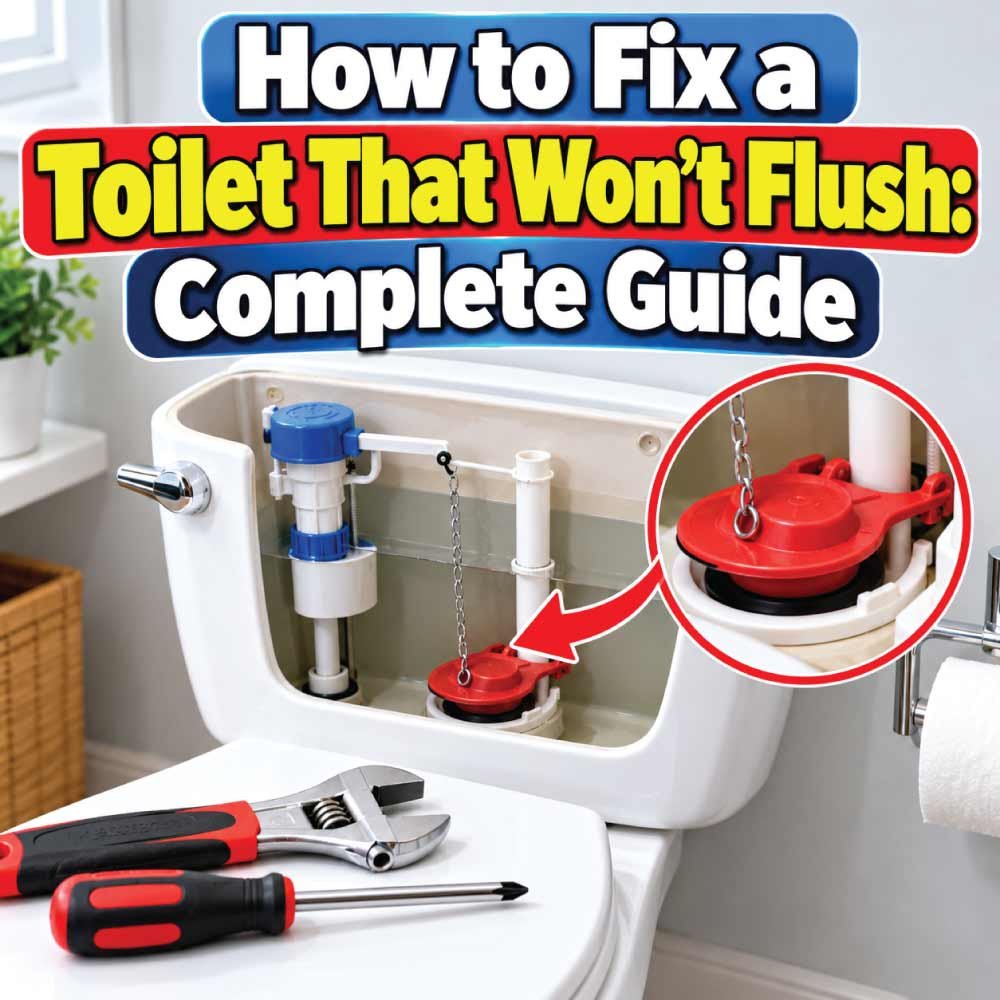
Inside a typical tank-style toilet, a small chain connects the flush handle lever to the flapper or another flush valve mechanism.
When you press the handle, the chain lifts the flapper, allowing water to enter the bowl.
If the chain becomes disconnected, breaks, or has too much slack, the flapper may not lift properly.
You may notice that the handle moves without producing a flush.
3. A Faulty Toilet Flapper
The flapper is a rubber or flexible sealing component at the bottom of many toilet tanks. It holds water in the tank until the toilet is flushed.
A damaged, warped, or deteriorated flapper may fail to open correctly or seal properly afterward.
Possible symptoms include:
A weak or incomplete flush.
Water continually running into the bowl.
The tank repeatedly refilling.
A flapper that does not lift or settle correctly.
Replacing a worn flapper can often restore normal operation, provided the replacement matches the toilet’s flush valve.
4. A Low Water Level in the Tank
The toilet tank must contain enough water to provide the intended flushing action.
If the water level is too low, the toilet may produce a weak flush or fail to clear the bowl.
Possible causes include a partially closed supply valve, an incorrectly adjusted fill valve, or a malfunctioning float.
Check the water level against the manufacturer’s recommended mark, which may be indicated inside the tank or on the overflow tube. Do not assume every toilet uses the same water level.
5. A Faulty Fill Valve
The fill valve controls the flow of water into the tank after a flush.
If it becomes blocked, worn, or defective, the tank may fill slowly or fail to refill.
Look for symptoms such as:
- A tank that remains nearly empty.
- A weak flush because the tank has not refilled.
- Unusual hissing or filling noises.
- A float that sticks or fails to move freely.
A fill valve adjustment may solve a minor water-level problem. A damaged valve may need replacement.
6. A Broken Flush Handle or Lever
A loose or broken handle may not lift the internal chain.
If the handle moves freely without engaging the mechanism, inspect the connection between the handle, lever arm, and chain.
The handle assembly may need adjustment or replacement. Avoid forcing a handle that is stuck because doing so can break the lever or damage the tank.
7. A Blocked or Restricted Toilet Trap
The toilet trap is the curved passage built into the toilet that carries waste toward the drain while helping prevent sewer gases from entering the bathroom.
A blockage in this passage can prevent the bowl from emptying properly even when the tank mechanism works.
If a properly used plunger does not clear the problem, a toilet auger may be appropriate. A blockage farther down the drain may require professional equipment.
Tools and Materials Needed
The tools you need depend on the cause of the problem.
- Toilet plunger with a flange designed for toilets.
- Toilet auger, if a plunger does not clear the blockage.
- Rubber gloves.
- Towels and a small bucket.
- Flashlight.
- Replacement flapper, if needed.
- Replacement lift chain or handle assembly, if needed.
- Compatible fill valve, if required.
- Adjustable wrench for appropriate plumbing connections.
Use a toilet-specific auger rather than an improvised metal tool that could scratch the porcelain.
You usually do not need to buy replacement parts before diagnosing the problem. Begin with a visual inspection and the simplest checks.
Safety Precautions Before Repairing a Toilet
Toilet repairs are generally manageable for beginners when they involve accessible tank components or a minor clog. However, overflowing water and unsuitable drain chemicals can create additional problems.
Follow these precautions:
Prevent an overflow: Do not repeatedly flush a toilet when the bowl is full or rising.
Shut off the water if necessary: Turn the toilet’s supply valve clockwise only if it is accessible and operates normally. Do not force a stuck or corroded valve.
Wear gloves: Toilet water and internal components may contain germs.
Avoid mixing chemicals: Never combine drain cleaners, bleach, acids, or other cleaning products. Dangerous fumes or reactions can occur.
Be cautious with chemical drain cleaners: Products intended for sinks may be unsuitable for toilets and can create splash or exposure hazards during plunging.
Handle the tank lid carefully: Porcelain lids can break if dropped.
Stop if the tank is cracked: A cracked tank or bowl can leak or fail further and may need replacement.
Protect the floor: Keep towels nearby and clean up spilled water promptly.
If you have already poured a chemical drain cleaner into the toilet, do not plunge or use an auger in a way that could splash the chemical. Follow the product’s safety instructions and contact a professional if the blockage remains.
Step-by-Step: How to Fix a Toilet That Won’t Flush
Work through the following checks in order. Stop when you identify the problem and apply the appropriate repair.
Step 1: Check Whether the Toilet Is Clogged
First, look at the water level in the bowl.
If the bowl is full, unusually high, or rising, do not flush again. Shut off the water supply if necessary and allow the water level to settle before attempting to clear the blockage.
To use a toilet plunger:
Put on rubber gloves and protect the surrounding floor.
Position a toilet plunger over the drain opening at the bottom of the bowl.
Ensure the rubber cup forms a good seal around the opening.
Push down gently at first to avoid splashing, then use controlled, firm plunging strokes.
Maintain the seal while moving the plunger.
Remove it carefully and observe whether the water begins to drain.
If the water drains normally, the blockage may have cleared. Once the bowl returns to its normal level, perform a single test flush while watching the water level.
If the water rises again, stop immediately. The blockage may still be present or may be located farther down the drain.
If plunging does not work, a toilet auger may help remove a blockage within the toilet trap. Follow the tool’s instructions, and do not force it if it becomes stuck.
Step 2: Inspect the Toilet Handle and Lift Chain
If the bowl is not clogged but pressing the handle does not produce a flush, inspect the tank mechanism.
- Carefully remove the tank lid and place it on a stable, protected surface.
- Locate the handle lever and the chain attached to the flapper or flush valve.
- Press the handle gently while watching the mechanism.
- Check whether the lever moves and whether the chain lifts the flapper.
If the chain has come loose, reconnect it to the correct attachment point.
If the chain is broken, replace it with a suitable chain or compatible handle assembly.
If the chain has excessive slack, adjust its attachment so the flapper can lift when the handle is pressed but still close fully afterward.
Do not make the chain so tight that it holds the flapper open. That can cause continuous water flow and prevent the tank from filling correctly.
After adjustment, check that the handle moves freely and the flapper returns to its closed position.
Step 3: Check the Flapper
If the chain moves but the toilet still does not flush properly, inspect the flapper.
Look for:
- Cracks or visible deterioration.
- Warping or deformation.
- Mineral deposits around the sealing surface.
- A flapper that fails to lift.
- A flapper that does not close properly after releasing the handle.
If the flapper is visibly damaged, replace it with one compatible with the toilet’s flush valve.
To replace a typical flapper:
- Turn off the water supply if the repair instructions require it.
- Flush the toilet to lower the tank water level, provided the bowl is not clogged.
- Disconnect the chain from the handle lever.
- Release the flapper from its mounting points according to the toilet design.
- Install the compatible replacement.
- Reconnect and adjust the chain.
- Restore the water supply and allow the tank to refill.
- Test the handle and observe whether the flapper opens and closes properly.
Some toilets use canister-style flush valves or other mechanisms rather than a traditional flapper. Follow the instructions for your specific model instead of forcing a universal part into place.
Step 4: Check the Tank Water Level
If the toilet flushes weakly, inspect the tank water level.
- Remove the tank lid carefully.
- Compare the water level with the manufacturer’s fill mark or instructions.
- Observe whether the tank refills after the water supply is restored.
- Check whether the float moves freely as the tank fills.
If the water level is too low, a float adjustment may help if the fill valve is functioning correctly. Make adjustments according to the valve manufacturer’s instructions.
If the float is stuck, carefully check for an obvious obstruction. Do not force the float or dismantle a pressurized valve.
If the tank does not refill, move on to the water supply and fill valve checks.
Step 5: Check the Water Supply Valve
The shutoff valve is usually located behind or beside the toilet near the floor or wall.
- Confirm that the valve is not closed.
- If it operates normally, open it fully by turning it counterclockwise.
- Wait for the tank to refill.
- Observe whether water enters the tank and whether the water level reaches the appropriate mark.
If the tank begins filling normally, the valve may simply have been closed or partially closed.
If no water enters the tank despite an open valve, the supply line or fill valve may be obstructed or defective.
Do not force a stuck valve. An old or corroded valve can break and cause a water leak. If the valve leaks, will not turn, or fails to supply water, contact a plumber.
Step 6: Inspect the Fill Valve
If the water supply is available but the tank fills slowly or not at all, the fill valve may be the problem.
Check for visible debris, a stuck float, or an obvious obstruction that prevents normal operation.
Some fill valves allow limited cleaning or adjustment according to the manufacturer’s instructions. If the valve is damaged or continues to malfunction, replacement may be necessary.
Before removing or replacing a fill valve:
- Shut off the water supply.
- Flush the toilet to lower the tank water level, if the bowl is draining normally.
- Use a sponge or small container to remove remaining tank water as needed.
- Follow the instructions for the specific fill valve and toilet.
- Reconnect the water supply carefully and check for leaks after refilling.
If the supply valve cannot stop the water completely, do not disconnect the fill valve. Have the water isolated safely first.
Step 7: Test the Toilet After the Repair
Once the repair is complete, restore the water supply slowly and allow the tank to refill.
Check that:
- The tank reaches its proper fill level.
- The handle lifts the flush mechanism correctly.
- The flapper or flush valve opens and closes normally.
- The bowl drains without rising excessively.
- The tank stops filling when it should.
- No water leaks around the supply connection or beneath the toilet.
If the toilet still does not flush correctly, avoid repeatedly testing it. The remaining problem may involve a deeper blockage, an incompatible replacement part, or a faulty flush mechanism.
Also Read:
How to Identify the Cause Based on the Symptoms
The following table can help you choose the next troubleshooting step without replacing parts unnecessarily.
| Symptom | Possible Cause | What to Check Next |
|---|---|---|
| Handle moves but nothing happens | Disconnected chain or broken lever | Inspect the handle and chain |
| Tank is nearly empty | Supply problem or faulty fill valve | Check the shutoff valve and refill mechanism |
| Tank empties but bowl does not drain | Clogged toilet trap or drain | Stop flushing and try a suitable plunger |
| Weak flush with a full tank | Flapper issue or restricted flush openings | Inspect the flush mechanism and follow model instructions |
| Toilet runs continuously | Flapper not sealing or fill valve problem | Check the flapper and water level |
| Water rises close to the rim | Significant blockage | Stop flushing and clear the blockage safely |
| Several drains are backing up | Possible main drain blockage | Contact a qualified plumber |
These symptoms provide clues rather than definitive diagnoses. More than one fault can occur at the same time.
Common Mistakes to Avoid
Avoid these mistakes when troubleshooting a toilet that will not flush:
Flushing repeatedly: This can cause an overflow when the drain is blocked.
Using the wrong plunger: A toilet plunger with a suitable flange is generally better suited to the toilet’s drain opening.
Replacing the fill valve too soon: Check the water supply, float, and visible obstructions first.
Installing an incompatible flapper: Replacement parts must match the toilet’s flush valve.
Adjusting the chain incorrectly: Too much slack can prevent flushing, while too little can keep the flapper open.
Using unsuitable chemicals: Drain cleaners can create chemical exposure risks and may damage components.
Forcing stuck parts: Old plastic components and corroded fittings can break under excessive pressure.
Ignoring recurring clogs: Repeated blockages may indicate a deeper plumbing issue rather than a problem with the tank mechanism alone.
Also Read:
When to Call a Professional Plumber
Some toilet problems require more than a basic DIY repair.
Contact a plumber if:
- The toilet repeatedly clogs despite proper plunging.
- An auger cannot clear the blockage.
- Multiple drains in the home back up or gurgle.
- Wastewater comes up through another drain.
- The toilet leaks around its base or the floor becomes soft or damaged.
- The tank or bowl is cracked.
- The shutoff valve is stuck, damaged, or leaking.
- The tank mechanism is unfamiliar or difficult to access.
- You suspect a blockage in the main sewer line.
If sewage is backing up into the home, stop using the affected plumbing fixtures and arrange for prompt professional assistance.
A plumber can determine whether the problem is inside the toilet, in the branch drain, or farther along the home’s drainage system.
Should You Repair or Replace a Toilet That Won’t Flush?
Repair is usually worth considering when the toilet itself is in good condition and the problem involves a replaceable component or a removable blockage.
Repair may be the better choice when:
- The chain or handle is disconnected or broken.
- The flapper needs replacement.
- The fill valve is faulty but the toilet is otherwise sound.
- A minor blockage can be safely removed.
- The toilet bowl and tank are intact.
Replacement may be worth considering when:
- The porcelain tank or bowl is cracked.
- The toilet has recurring mechanical problems and compatible parts are difficult to obtain.
- Persistent blockages result from a damaged or unsuitable toilet installation.
- The toilet has significant damage that makes a reliable repair impractical.
A toilet that will not flush does not automatically need replacement. Diagnose the mechanism and drainage system first so you do not replace a functioning toilet to solve a problem elsewhere in the plumbing.
How to Prevent Future Toilet Flushing Problems
Simple maintenance can reduce the risk of clogs and mechanical failures.
Flush only toilet paper and human waste. Do not flush wipes, sanitary products, cotton swabs, paper towels, or other unsuitable materials.
Inspect the tank mechanism occasionally. Look for a disconnected chain, deteriorated flapper, or sticking float.
Address slow flushing early. A partial blockage may become more difficult to clear if ignored.
Avoid excessive toilet paper. Large amounts can contribute to blockages, particularly in toilets with existing drainage problems.
Keep the handle in good condition. Replace a loose or damaged handle before it fails completely.
Watch for continuous running. A leaking flapper or malfunctioning fill valve can waste water and indicate a developing problem.
Avoid harsh chemical treatments. Use appropriate mechanical methods for toilet clogs and follow product safety instructions.
Investigate recurring blockages. Frequent clogs may indicate a deeper drain issue that needs professional attention.
Frequently Asked Questions
1. Why won’t my toilet flush when I press the handle?
A disconnected chain, broken handle lever, or faulty flush mechanism may prevent the toilet from flushing. Remove the tank lid carefully and observe the mechanism while pressing the handle. If the chain does not lift the flapper or flush valve, inspect the connection and replace damaged parts as needed.
2. What should I do if my toilet won’t flush and the bowl is full?
Do not flush again. If the water is rising, shut off the toilet’s water supply if the valve is accessible and operates normally. Use a suitable toilet plunger only when it is safe to do so. If the water level does not fall or the blockage remains, contact a plumber.
3. Why does my toilet tank fill but the toilet won’t flush?
If the tank fills but the bowl does not clear, the cause may be a disconnected chain, a flapper that does not lift, a restricted flush mechanism, or a clogged toilet trap. Observe the tank mechanism first, then investigate the drain if the tank releases water normally.
4. Can I fix a toilet that won’t flush without calling a plumber?
Many simple problems can be fixed at home, including a disconnected chain, an incorrectly adjusted float, a worn flapper, or a minor clog. However, recurring blockages, damaged plumbing, leaking shutoff valves, and suspected main drain problems may require professional service.
5. Why does my toilet flush weakly even when the tank is full?
A weak flush may result from a flapper that closes too soon, a problem with the flush valve, restricted flush openings, or a partial drain blockage. Check the flapper’s operation and inspect accessible components according to the toilet manufacturer’s instructions.
6. How can I tell whether my toilet is clogged or the tank mechanism is broken?
Observe what happens when you press the handle. If the handle does not lift the flapper or flush valve, the problem may be in the tank mechanism. If water leaves the tank but rises in the bowl or drains slowly, a blockage is more likely. Stop flushing if the bowl begins to overflow.
Conclusion
A toilet that won’t flush usually has a problem with the handle, lift chain, flapper, tank water level, fill valve, or drainage system. Start by checking the tank mechanism and water supply, then investigate a possible clog if the bowl does not drain properly.
Avoid repeated flushing when the bowl is full, use compatible replacement parts, and stop if a valve is stuck or a blockage cannot be cleared safely. If basic troubleshooting does not restore normal flushing, a qualified plumber can identify the underlying problem and help prevent further damage.

Engineer Ali Hasan is a garage door expert and the founder of FixFasty. With over 16 years of experience in mechanical systems and home maintenance, he provides practical, step-by-step guides on garage door installation, repairs, and maintenance, helping homeowners keep their garage doors safe, reliable, and long-lasting.