
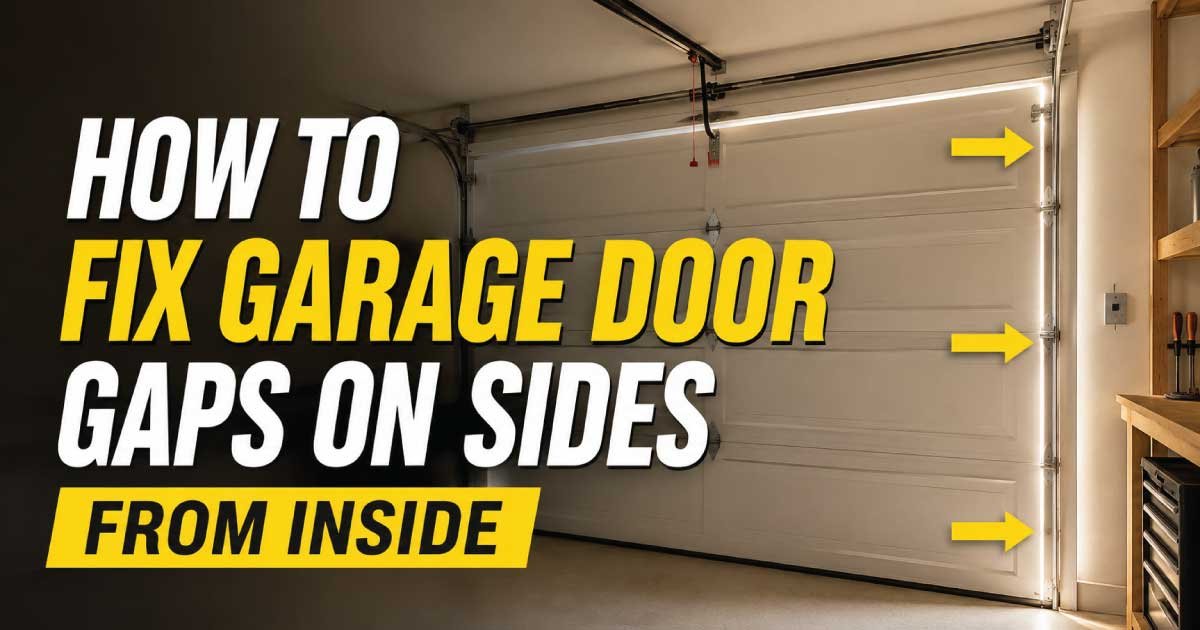
Garage door side gaps are a common problem in homes of all ages. You may notice daylight creeping in along the edges, cold air entering during winter, hot air in summer, or even insects and rodents finding their way inside. While the issue may look minor, side gaps can seriously affect insulation, security, and energy efficiency.
The good news is that many garage door side gap problems can be fixed from the inside, often without replacing the entire door. This guide explains why side gaps happen, how to diagnose the cause, and step-by-step methods to fix them effectively.
Why Garage Door Side Gaps Are a Problem
Garage door side gaps may seem minor, but they can lead to several serious issues if ignored. These openings affect your home’s energy efficiency, safety, and overall comfort. Understanding the problems caused by side gaps helps highlight why timely inspection and repair are so important.
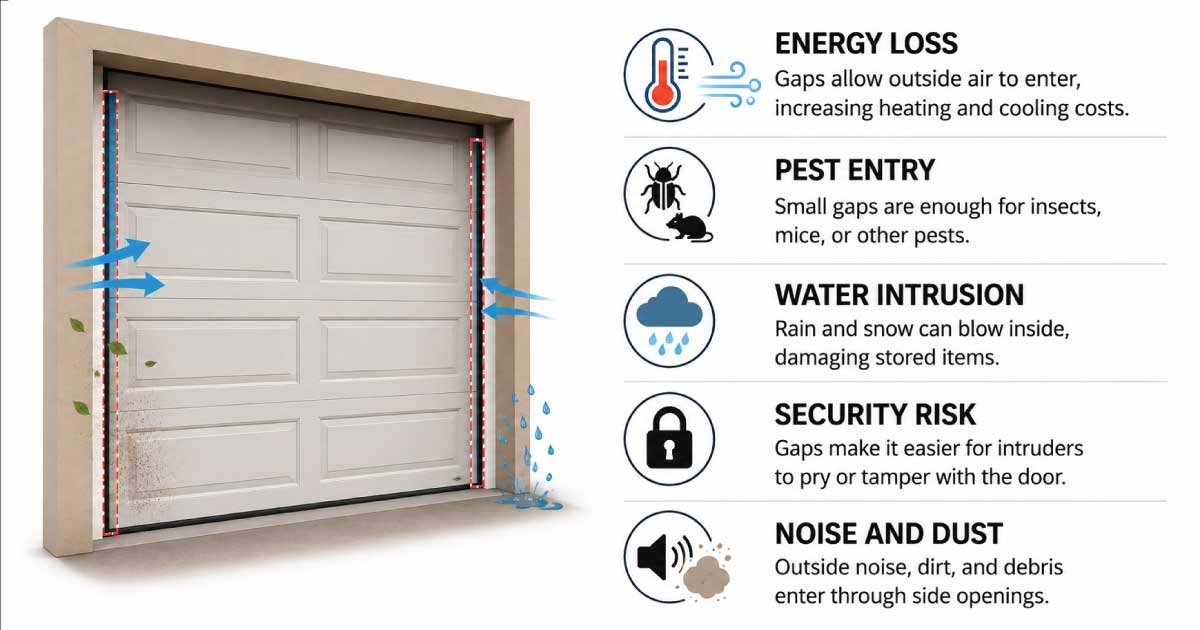
Before fixing the issue, it’s important to understand why garage door gaps matter:
- Energy loss: Gaps allow outside air to enter, increasing heating and cooling costs.
- Pest entry: Small gaps are enough for insects, mice, or other pests.
- Water intrusion: Rain and snow can blow inside, damaging stored items.
- Security risk: Gaps make it easier for intruders to pry or tamper with the door.
- Noise and dust: Outside noise, dirt, and debris enter through side openings.
Fixing these gaps improves comfort, safety, and durability.
Common Causes of Garage Door Side Gaps
Garage door side gaps can develop for a variety of reasons, often related to wear, alignment, or structural changes over time. Since not all gaps come from the same problem, identifying the exact cause is essential to applying the right repair method and preventing future issues.
Garage door gaps are not always caused by the same issue. Identifying the root cause helps you choose the correct fix.
1. Uneven Garage Door Tracks
Garage door tracks guide the door as it opens and closes, so even slight misalignment can affect how the door sits in the frame. Over time, settling foundations, impacts, or improper installation can cause tracks to shift, resulting in uneven sealing along the sides.
If the vertical tracks are not perfectly plumb (straight up and down), the door may not seal evenly against the frame.
2. Worn or Missing Side Weatherstripping
Side weatherstripping plays a critical role in sealing the gap between the garage door and the frame. Exposure to sunlight, temperature changes, and moisture gradually degrades these materials, reducing their flexibility and effectiveness and allowing gaps to form along the edges.
Over time, vinyl or rubber seals harden, crack, or shrink, leaving visible gaps.
3. Door Panels Are Warped
Garage door panels must remain straight to maintain a tight seal. Environmental factors, physical stress, or age-related wear can cause panels to lose their original shape. Even slight warping can prevent the door from closing flush against the sides.
Wood doors can warp due to moisture, and metal doors may bend slightly from impact or age.
4. Garage Door Not Level
A level garage door is essential for even contact with the frame on both sides. Shifting foundations, uneven garage floors, or improper installation can cause the door to sit unevenly, creating gaps on one side while the other side appears properly sealed.
If the door or floor is uneven, one side may seal while the other remains open.
5. Loose Hardware
Garage doors rely on tightly secured hardware to stay aligned during operation. Vibrations from daily use can loosen bolts, brackets, and screws over time. When hardware shifts, the door can move out of position, creating unwanted gaps along the sides.
Loose track brackets or mounting screws can allow the door to shift out of alignment.
Tools and Materials You May Need
Before starting any garage door side gap repair, gathering the right tools and materials helps ensure the job goes smoothly and safely. Most adjustments and sealing tasks are straightforward and can be completed using common household tools and readily available replacement materials.
Most fixes can be done with basic tools:
- Adjustable wrench or socket set
- Screwdriver (Phillips and flathead)
- Level (2–4 feet recommended)
- Utility knife
- Measuring tape
- Replacement garage door side weatherstripping
- Foam or rubber seal strips
- Shims (wood or composite)
- Silicone or exterior-grade caulk
- Safety gloves and eye protection
Step 1: Inspect the Garage Door From Inside
A detailed interior inspection helps you clearly see where and why side gaps are forming. Checking the door while it is fully closed allows you to spot light leaks, uneven spacing, and movement issues that may not be obvious from outside.
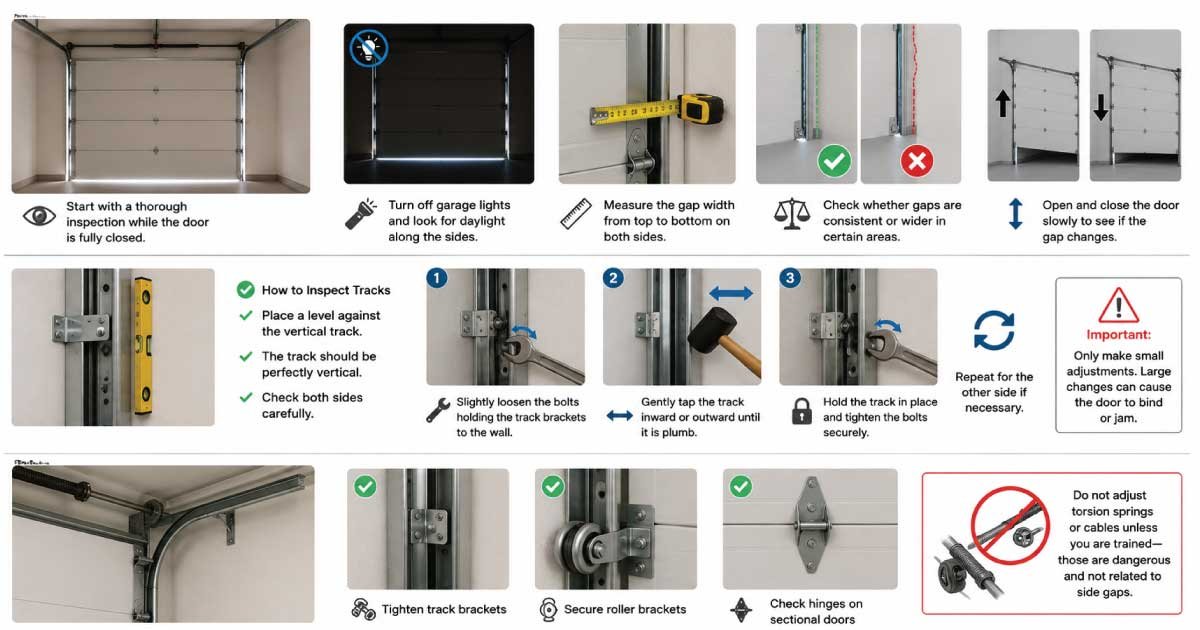
Start with a thorough inspection while the door is fully closed.
- Turn off garage lights and look for daylight along the sides.
- Measure the gap width from top to bottom on both sides.
- Check whether gaps are consistent or wider in certain areas.
- Open and close the door slowly to see if the gap changes.
This inspection will tell you whether the issue is sealing, alignment, or structural.
Step 2: Check Track Alignment
Garage door tracks control how smoothly and evenly the door moves. Even minor misalignment can prevent the door from sealing properly against the frame. Carefully inspecting and correcting track alignment can often eliminate side gaps without replacing parts.
Misaligned tracks are one of the most common causes of side gaps.
How to Inspect Tracks
- Place a level against the vertical track.
- The track should be perfectly vertical.
- Check both sides carefully.
How to Fix Track Alignment
- Slightly loosen the bolts holding the track brackets to the wall.
- Gently tap the track inward or outward until it is plumb.
- Hold the track in place and tighten the bolts securely.
- Repeat for the other side if necessary.
Important: Only make small adjustments. Large changes can cause the door to bind or jam.
Step 3: Tighten All Garage Door Hardware
Garage doors experience constant vibration from daily operation, which can slowly loosen hardware over time. Tightening key components helps keep the door properly aligned, reduces movement, and prevents gaps from getting worse as the door opens and closes.
Loose hardware can allow the door to shift over time.
- Tighten track brackets
- Secure roller brackets
- Check hinges on sectional doors
Do not adjust torsion springs or cables unless you are trained—those are dangerous and not related to side gaps.
Step 4: Replace or Add Side Weatherstripping (Most Effective Fix)
Side weatherstripping is often the main reason garage door gaps appear, even when the door and tracks are properly aligned. Because seals wear out faster than other components, replacing or adding new weatherstripping is usually the most effective and affordable way to eliminate side gaps.
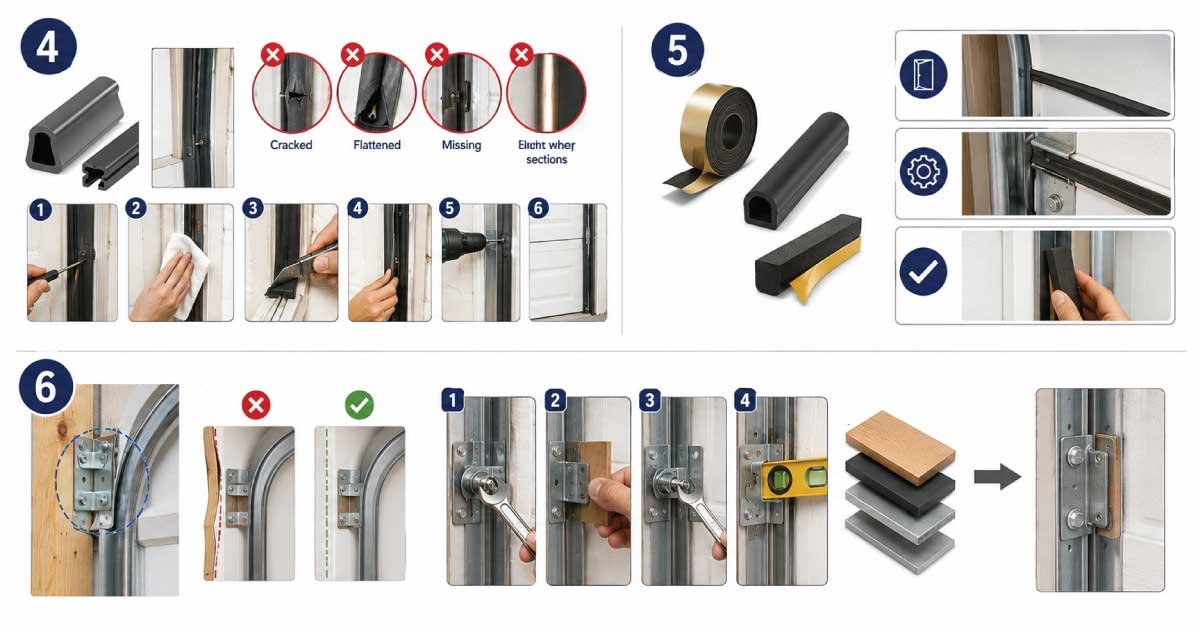
In many cases, the door itself is fine—the seal is the problem.
What Is Side Weather stripping?
Side weather stripping is the flexible vinyl or rubber trim mounted to the door frame that presses against the door when closed.
Signs It Needs Replacement
- Cracks or brittleness
- Flattened or stiff edges
- Missing sections
- Light visible even when the door is aligned
How to Replace Side Weather stripping From Inside
- Remove old weather stripping by pulling nails or unscrewing fasteners.
- Clean the door frame thoroughly.
- Measure and cut new weather stripping to length.
- Position it so the flexible flap lightly presses against the closed door.
- Fasten using screws or nails, starting at the top and working down.
- Test the door to ensure smooth operation.
Properly installed weather stripping should seal the gap without bending the door inward.
💡 Helpful Resource: Garage Door Troubleshooting Guide ➜ How to Reset a Garage Door Opener Quickly and Safely
Step 5: Add Inside Foam or Rubber Seal Strips
For gaps that remain after replacing side weather stripping, adding an interior seal provides an extra layer of protection. This step helps block airflow, dust, and noise while improving insulation, especially in older garages where minor framing or door irregularities exist.
If weather stripping alone doesn’t eliminate the gap, adding an interior seal can help.
Best Materials
- Closed-cell foam tape
- Rubber adhesive seal strips
- EPDM weather sealing
Installation Tips
- Apply seals along the inside edge of the door frame
- Avoid interfering with door movement
- Use adhesive-backed strips for easy installation
This method works well for small to moderate gaps and adds extra insulation.
Step 6: Shim the Track Brackets (For Uneven Walls)
In some garages, side gaps are caused by uneven wall surfaces rather than track installation errors. When the wall bows or shifts, the track follows that contour, preventing proper sealing. Shimming the track brackets allows you to correct alignment without forcing or damaging the tracks.
Sometimes the wall itself is uneven, not the track.
How to Shim Tracks
- Loosen the track bracket bolts.
- Insert shims behind the bracket to move the track inward.
- Tighten bolts securely.
- Recheck alignment with a level.
Shimming allows precise adjustments without stressing the track.
Step 7: Address Warped or Bent Door Panels
Garage door panels must remain straight to seal evenly along the frame. If the side gap changes width from top to bottom, warped or bent panels are often the cause. Identifying whether the damage is minor or severe helps determine the correct repair approach.
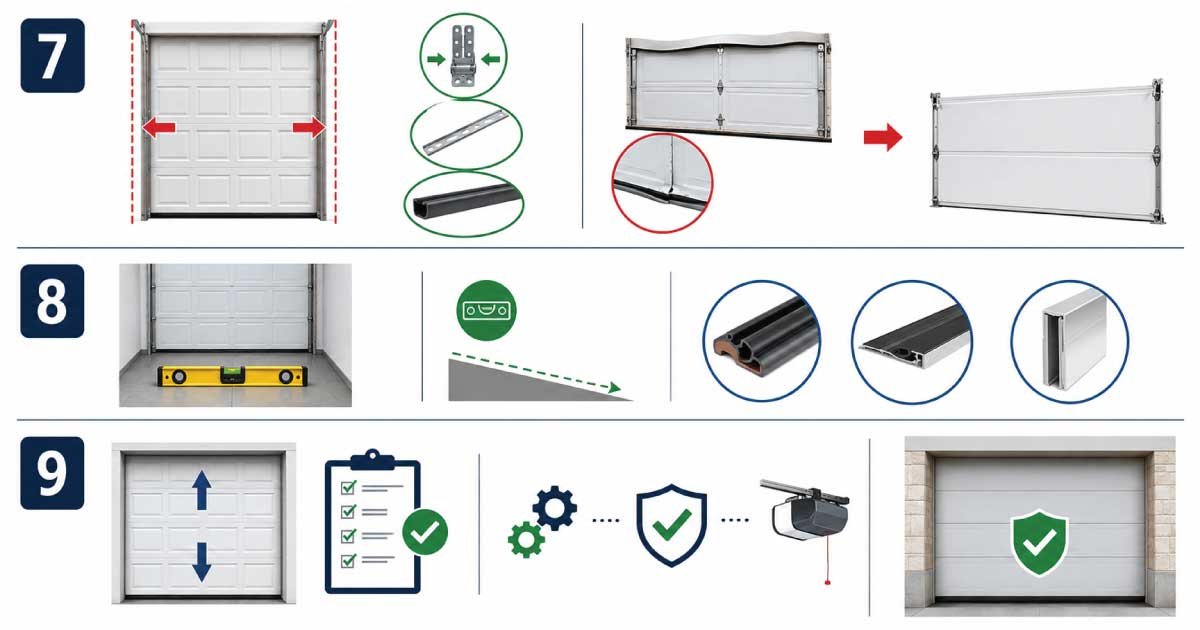
If the gap changes shape along the height of the door, panel warping may be the cause.
Minor Warping Fixes
- Tighten hinges to pull panels closer together
- Add reinforcement braces (for metal doors)
- Use thicker weatherstripping to compensate
Severe Warping
If panels are severely warped or cracked, replacement may be the only permanent solution.
Step 8: Check the Garage Floor Level
An uneven garage floor can create the illusion of side gaps even when the door and tracks are properly aligned. Floor settlement or sloping concrete can prevent the door from sealing evenly at the bottom, affecting how the sides contact the frame.
Sometimes the gap appears to be on the side, but the real issue is the floor.
- Place a level across the garage floor near the door.
- If the floor slopes, the door may seal unevenly.
Solutions
- Install a thicker bottom seal on the low side
- Add a garage door threshold seal
- Use adjustable side seals to compensate
💡 Helpful Resource: Garage Door Troubleshooting Guide ➜ How to Replace Garage Door Rollers Easily (DIY Guide)
Step 9: Test the Door After Each Adjustment
Testing the garage door after every adjustment ensures that repairs are effective and nothing has been accidentally thrown out of alignment. This step helps catch binding, resistance, or sealing problems early before they cause damage to the door, tracks, or opener system.
After making changes:
- Open and close the door several times
- Check for smooth movement
- Ensure the door seals evenly
- Confirm the opener is not straining
A properly sealed door should close firmly without resistance.
Common Mistakes to Avoid
Even simple garage door adjustments can create new problems if done incorrectly. Avoiding common mistakes helps protect the door, tracks, and opener from damage while ensuring the door continues to operate smoothly and safely after sealing side gaps.
- Over-tightening track bolts (can warp tracks)
- Using rigid materials instead of flexible seals
- Forcing the door inward to close gaps
- Ignoring safety warnings on springs and cables
- Sealing gaps so tightly that the door cannot move freely
When to Call a Professional
Some garage door issues go beyond basic adjustments and DIY repairs. Structural damage, shifting foundations, or problems involving high-tension components require professional tools and experience. Knowing when to stop prevents injury and ensures the door is repaired safely and correctly.
You should consider professional help if:
- The door is badly warped or damaged
- The gap is caused by foundation shifting
- The door won’t stay aligned after adjustments
- Springs, cables, or drums are involved
Professionals can realign or replace components safely and correctly.
💡 Helpful Resource: Garage Door Troubleshooting Guide ➜ How to Program a Garage Door Opener: Step-by-Step Guide
Final Thoughts
Fixing garage door side gaps from inside is a practical DIY project for many homeowners. In most cases, the solution involves realigning tracks, replacing worn weatherstripping, or adding interior seals rather than replacing the entire door.
Taking the time to inspect carefully and make gradual adjustments will save money, improve energy efficiency, and protect your garage from pests, weather, and security issues.
A well-sealed garage door doesn’t just look better—it works better.

Engineer Ali Usman is a professional garage door expert and author at FixFasty, with over 10 years of hands-on experience in garage door systems and mechanical maintenance. He writes clear, step-by-step guides on garage door repairs, parts, and safety practices, helping homeowners fix problems correctly and maintain smooth, secure, and long-lasting garage door performance.