
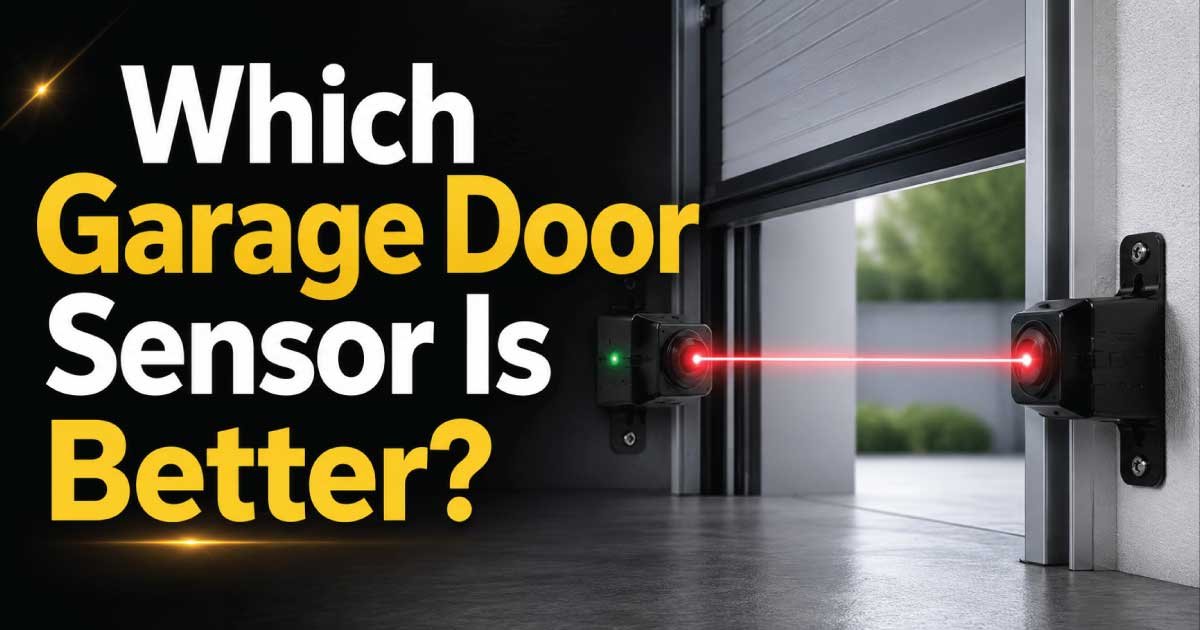
Choosing the right garage door sensor is more important than many homeowners realize. Garage door safety sensors prevent the door from closing when a person, pet, vehicle, or object is in the way. If the wrong sensor is installed, poorly maintained, or incompatible with your garage door opener, it can lead to frustrating malfunctions, frequent false alarms, or even serious safety risks. Many homeowners also wonder whether universal replacement sensors are as reliable as original manufacturer sensors or whether newer technologies offer better performance.
This guide explains which garage door sensor is better for different situations by comparing common sensor types, explaining how they work, and helping you diagnose common problems before spending money on unnecessary replacements. You’ll also learn how to identify warning signs, perform a safe inspection, and troubleshoot sensor-related issues step by step. Whether you’re replacing a faulty sensor or deciding between OEM and universal options, this repair guide provides practical advice based on real-world troubleshooting experience so you can make an informed decision.
Common Signs and Symptoms
Garage door sensor problems often appear gradually before they completely prevent the door from operating. Understanding these warning signs makes troubleshooting easier and helps you determine whether the sensors need adjustment, cleaning, repair, or replacement.
Common symptoms include:
- The garage door starts closing but immediately reverses.
- The opener lights blink repeatedly after attempting to close.
- The garage door will only close while holding the wall button.
- One or both sensor indicator lights are off.
- Sensor LEDs flicker instead of staying solid.
- The door closes inconsistently depending on weather or sunlight.
- The opener reports a safety sensor error code.
- Pets, bicycles, or boxes trigger unexpected reversals.
- The door refuses to close even though nothing blocks the opening.
- The system works after adjusting the sensors but fails again later.
These symptoms do not always mean the sensors themselves have failed. In many cases, dirty lenses, loose wiring, poor alignment, vibration, or damaged brackets are responsible. A careful inspection can often solve the problem without replacing any parts.
How the Appliance or System Normally Works
Before deciding which garage door sensor is better, it helps to understand how these safety devices normally operate. Once you know what each component should do, identifying the actual fault becomes much simpler and prevents replacing parts that still work correctly.
Most modern garage door openers use a photoelectric safety sensor system consisting of two small units mounted near the bottom of each side of the garage door track.
One sensor acts as the transmitter, sending an invisible infrared beam across the doorway. The second sensor receives that beam.
When the beam reaches the receiving sensor without interruption:
- The opener recognizes the doorway is clear.
- The garage door is allowed to close normally.
- Both sensor indicator lights usually remain solid.
If something interrupts the beam:
- The opener immediately stops closing.
- The door reverses direction.
- The opener may flash its lights as a warning.
This simple design has dramatically improved garage door safety over the past several decades.
Today’s homeowners generally encounter three sensor categories:
- Original Equipment Manufacturer (OEM) sensors
- Universal replacement sensors
- Smart-compatible sensors integrated with modern garage systems
Each has advantages depending on compatibility, reliability, installation quality, and long-term maintenance rather than simply being “better” in every situation.
Most Common Reasons This Problem Happens
Garage door sensor problems usually have a logical cause rather than occurring randomly. Understanding why failures happen helps you determine whether cleaning, adjustment, repair, or replacement is the most appropriate solution.
Dirty sensor lenses
Dust, spider webs, pollen, mud, or grease can partially block the infrared beam.
Why it happens
Garage door sensors sit only a few inches above the floor where dirt naturally accumulates.
Symptoms
- Door reverses unexpectedly.
- LED flickers.
- Intermittent operation.
How to identify it
Inspect both lenses with a flashlight. Even a thin layer of dirt can weaken the beam.
Sensor misalignment
This is one of the most common garage door sensor issues.
Why it happens
Vibration from daily door operation, accidental bumps, or loose mounting brackets gradually move the sensors out of alignment.
Symptoms
- Blinking sensor lights.
- Door refuses to close.
- Problem temporarily disappears after adjusting the sensors.
How to identify it
Compare both sensor LEDs. A blinking receiver often indicates the beam is no longer properly aligned.
Damaged wiring
Garage door sensor wires are exposed to moisture, pests, lawn equipment, and accidental impacts.
Why it happens
Staples can pinch wires, insulation can crack, or rodents may chew the cable.
Symptoms
- One sensor has no indicator light.
- Intermittent failures.
- Error codes from the opener.
How to identify it
Inspect the wiring along the wall and track for cuts, crushed sections, or loose connections.
Sunlight interference
Bright afternoon sunlight can overwhelm some older receiving sensors.
Why it happens
Direct sunlight contains infrared energy similar to the sensor beam.
Symptoms
- Problems occur only during certain hours.
- Door works normally in cloudy weather or after sunset.
How to identify it
Observe whether failures happen only when sunlight shines directly onto the receiving sensor.
Faulty mounting brackets
Loose brackets create constant alignment changes.
Why it happens
Repeated door vibration loosens screws over time.
Symptoms
- Sensors appear straight but move when touched.
- Frequent need for realignment.
How to identify it
Gently move each sensor by hand. They should remain firmly mounted.
Aging sensors
Electronic components gradually wear out after years of service.
Why it happens
Heat, moisture, vibration, and electrical surges shorten component life.
Symptoms
- Random failures.
- Weak indicator lights.
- Frequent false obstruction readings.
How to identify it
If cleaning, alignment, and wiring inspections reveal no problems, aging electronics become a likely cause.
Incompatible replacement sensors
Not every universal sensor works perfectly with every opener.
Why it happens
Manufacturers use different communication methods, voltage requirements, and wiring configurations.
Symptoms
- New sensors never work correctly.
- LEDs behave differently than expected.
- Persistent error codes.
How to identify it
Verify the replacement sensor specifically lists your opener model as compatible.
Safety Precautions Before Troubleshooting
Garage door systems contain moving parts, electrical components, and powerful springs. Although inspecting sensors is usually a beginner-friendly DIY repair, following proper safety procedures reduces the risk of injury and prevents accidental damage to the opener.
Before beginning any inspection, disconnect power to the garage door opener whenever you need to handle wiring. This prevents accidental electrical shorts and stops the opener from operating unexpectedly.
Never loosen, adjust, or remove garage door torsion springs or extension springs while diagnosing a sensor problem. These springs are under extreme tension and require specialized tools and training. Sensor troubleshooting does not require spring adjustments.
Keep children and pets away from the garage door during testing. Repeated opening and closing cycles create pinch points around the tracks, rollers, and door sections.
Use a stable step ladder if you need to inspect wiring above the opener. Avoid standing on boxes, buckets, or other unstable surfaces.
If you notice exposed wires, burned insulation, signs of overheating, or water damage inside the opener housing, stop troubleshooting and disconnect power before performing further inspection.
Wear safety glasses when working near metal tracks, brackets, or fasteners to protect your eyes from debris.
If the garage door feels unusually heavy, moves unevenly, or falls rapidly when disconnected from the opener, do not continue with DIY repairs. Those symptoms indicate mechanical problems beyond the sensors and should be addressed before further testing.
Also Read:
Tools Required
Before beginning troubleshooting, gather a few basic tools so you can inspect, clean, and test the sensor system efficiently. Most homeowners already have these items in a standard toolbox.
| Tool | Purpose |
|---|---|
| Microfiber cloth | Clean sensor lenses without scratching them |
| Flashlight | Inspect wiring, brackets, and sensor LEDs |
| Screwdriver set | Tighten brackets and terminal screws |
| Tape measure | Verify both sensors are mounted at equal height |
| Small level | Check sensor alignment |
| Multimeter | Test wiring continuity and voltage if needed |
| Replacement wire connectors | Repair damaged wire connections |
| Safety glasses | Protect eyes during inspection |
| Step ladder | Reach the opener safely |
| Owner’s manual | Confirm compatibility and diagnostic codes |
Step-by-Step Troubleshooting Guide
Many sensor problems can be diagnosed without replacing any parts. Following these steps in order helps eliminate simple issues first before moving on to more advanced inspections.
1. Inspect for obvious obstructions
Look across the sensor beam for boxes, bicycles, trash cans, garden tools, or other objects.
Why it matters
Any object interrupting the beam prevents the door from closing safely.
Expected result
The beam path should be completely clear.
What to do next
If nothing blocks the sensors, continue to the next inspection.
2. Clean both sensor lenses
Use a dry microfiber cloth to remove dust, cobwebs, and dirt.
Why it matters
Even light contamination weakens infrared transmission.
Expected result
The indicator lights should remain steady.
What to do next
Test the garage door after cleaning.
3. Check the sensor lights
Observe both LEDs while the door remains open.
Why it matters
The lights provide valuable diagnostic information.
Expected result
Most systems display a solid light on both sensors when aligned.
What to do next
If either light blinks or remains off, inspect alignment and wiring.
4. Verify alignment
Measure the sensor height and gently adjust both units until they face each other directly.
Why it matters
Proper alignment ensures the receiver detects the infrared beam consistently.
Expected result
Indicator lights become solid.
What to do next
Operate the door several times to confirm reliable performance.
5. Inspect the wiring
Look for loose terminals, damaged insulation, or disconnected wires.
Why it matters
Poor electrical connections interrupt communication between the sensors and opener.
Expected result
Wiring should appear secure and undamaged.
What to do next
Repair damaged connections before replacing the sensors.
6. Test sensor stability
Lightly press each sensor housing.
Why it matters
Loose brackets cause intermittent alignment failures.
Expected result
Sensors should remain firmly in position.
What to do next
Tighten loose mounting hardware.
7. Confirm compatibility
If the sensors were recently replaced, verify they match your opener model.
Why it matters
Compatible sensors provide more reliable performance than mismatched replacements.
Expected result
Model numbers should match the manufacturer’s compatibility list.
What to do next
If compatibility is uncertain, research the correct replacement before assuming the opener is faulty.
Quick Diagnosis Table
This table summarizes the most common symptoms homeowners encounter and the first solution to try before replacing parts.
| Symptom | Possible Cause | Recommended Solution |
|---|---|---|
| Door immediately reverses | Misaligned sensors | Realign both sensors |
| Sensor light blinking | Beam interruption | Clean lenses and adjust alignment |
| One sensor light off | Wiring issue or failed sensor | Inspect wiring and connections |
| Door closes only while holding wall button | Safety sensor fault | Diagnose sensors before replacing opener |
| Intermittent operation | Loose bracket | Tighten mounting hardware |
| Problem only during sunny afternoons | Sunlight interference | Shield receiver or improve alignment |
| New sensors do not work | Incompatible replacement | Install compatible OEM or verified universal sensors |
| LEDs solid but door still malfunctions | Possible opener control issue | Continue with advanced diagnostics and repair methods |
Also Read:
How to Fix Each Common Cause
Now that you’ve identified the likely cause of the problem, it’s time to apply the correct repair. Start with the simplest fixes before replacing any components. In many cases, homeowners discover that cleaning or adjusting the sensors restores normal operation without buying new parts. When replacement is necessary, choosing the right sensor can improve reliability and reduce future maintenance.
Clean dirty sensor lenses
Dust and debris are among the easiest problems to fix.
How to repair it
- Disconnect power to the garage door opener.
- Wipe both sensor lenses with a clean microfiber cloth.
- Avoid using abrasive cleaners or rough paper towels.
- If grease is present, lightly dampen the cloth with water and dry the lens afterward.
- Restore power and test the door several times.
If the indicator lights become solid and the door operates normally, no further repair is needed.
Realign the sensors
Misalignment is the most common cause of sensor failure.
How to repair it
- Loosen the mounting wing nut or bracket screw slightly.
- Aim both sensors directly at each other.
- Watch the indicator lights while adjusting.
- Tighten the mounting hardware once both lights remain solid.
- Open and close the door several times to confirm consistent operation.
A properly aligned sensor should not require frequent readjustment. If it does, inspect the brackets for damage or looseness.
Repair damaged wiring
Minor wire damage can often be repaired without replacing the entire cable.
How to repair it
- Disconnect power.
- Locate damaged insulation or broken conductors.
- Cut out damaged sections if necessary.
- Reconnect wires using approved wire connectors.
- Secure the wiring so it cannot rub against moving parts.
If damage extends through long sections of cable, replacing the complete wire is usually the better long-term solution.
Tighten loose brackets
Loose mounting hardware causes repeated alignment problems.
How to repair it
- Tighten all mounting screws.
- Replace bent brackets.
- Ensure both sensors remain at the same height.
- Check that vibration from door movement no longer shifts the sensors.
This simple repair often eliminates intermittent faults.
Reduce sunlight interference
Older sensors sometimes struggle in direct sunlight.
Possible solutions include:
- Installing a small shade above the receiving sensor.
- Repositioning the sensor slightly without affecting alignment.
- Upgrading to newer OEM sensors that better resist infrared interference.
If sunlight affects operation every afternoon, replacing outdated sensors may provide a permanent solution.
Replace failed sensors
If cleaning, alignment, wiring, and mounting inspections do not solve the problem, replacement is usually appropriate.
When deciding which garage door sensor is better, consider the following:
OEM sensors are usually the best choice when:
- Reliability is the top priority.
- The opener is still supported by the manufacturer.
- You want guaranteed compatibility.
- You prefer straightforward installation.
Universal sensors are a good option when:
- They specifically list your opener model.
- OEM parts are unavailable.
- You want a lower-cost replacement from a reputable brand.
Smart-compatible sensors are worth considering when:
- You’re upgrading an older opener.
- You want remote monitoring.
- Your opener already supports smart home integration.
For most homeowners, OEM sensors remain the most dependable option because they are designed specifically for the opener’s electronics and communication system.
Advanced Troubleshooting
If the basic repairs have not solved the problem, more detailed diagnosis may be necessary. These less common issues often appear similar to sensor failures but originate elsewhere in the garage door system.
Inspect the opener’s logic board for signs of burned components, corrosion, or damaged terminals. A failed control board may incorrectly report a sensor fault even when the sensors are functioning correctly.
Use a multimeter to verify the sensor voltage matches the manufacturer’s specifications. Low voltage can indicate damaged wiring or an internal opener problem.
Check the garage door tracks for twisting or movement. Excessive vibration can repeatedly knock sensors out of alignment.
Inspect the door itself. Bent panels, damaged rollers, or loose hinges may create excessive shaking during operation.
Look for moisture inside the sensor housing. Water intrusion can cause intermittent failures that are difficult to diagnose because they often occur only after rain or during periods of high humidity.
If replacing the sensors does not resolve the issue, the opener’s control board, wiring harness, or power supply should be tested before replacing the entire opener.
When Repair Is Not Worth It
Some garage door systems reach a point where replacing individual parts is no longer the most cost-effective solution. Spending money on repeated repairs can exceed the value of installing a newer, more reliable opener.
Replacement is usually the smarter choice when:
- The opener is more than 15 to 20 years old.
- Replacement sensors are no longer manufactured.
- Multiple electronic components have already failed.
- The control board is defective and expensive to replace.
- The motor shows signs of wear in addition to sensor problems.
- The opener lacks modern safety features.
New garage door openers typically include improved safety sensors, quieter operation, stronger security features, and better energy efficiency. If several major repairs are needed at once, replacing the complete system often provides better long-term value.
Preventive Maintenance Tips
Garage door sensors require very little maintenance, but regular inspections help prevent unexpected failures.
Follow these preventive maintenance practices:
- Clean both sensor lenses every few months.
- Check alignment after accidentally bumping the sensors.
- Tighten mounting brackets during routine garage maintenance.
- Inspect exposed wiring for damage twice each year.
- Keep storage items away from the sensor beam.
- Test the safety reverse system monthly using a solid object placed in the door’s path.
- Remove spider webs, leaves, and dust from around the sensors.
- Lubricate moving door hardware according to the opener manufacturer’s recommendations, but never spray lubricant directly on the sensors.
- Replace damaged brackets before they affect alignment.
- Inspect the entire garage door system annually for wear.
Regular preventive maintenance helps sensors last longer and reduces the likelihood of inconvenient breakdowns.
Common Mistakes to Avoid
Many homeowners unintentionally create new problems while trying to fix their garage door sensors. Avoiding these common mistakes saves time and prevents unnecessary repairs.
- Replacing sensors before checking alignment.
- Ignoring dirty lenses.
- Mixing incompatible sensor brands.
- Leaving loose wiring exposed.
- Mounting sensors at different heights.
- Overtightening brackets until they bend.
- Assuming every closing problem is caused by the sensors.
- Attempting to adjust garage door springs without proper training.
- Skipping the owner’s manual when installing replacement sensors.
- Testing the system only once instead of performing multiple open-and-close cycles.
A careful diagnosis almost always produces better results than replacing parts based on guesswork.
When to Call a Professional
Many garage door sensor issues are suitable for DIY repair, but some situations require professional service to ensure safe and reliable operation.
Contact a qualified technician if:
- The garage door springs need adjustment.
- The opener repeatedly reports sensor errors after replacement.
- Electrical testing indicates a failed control board.
- The wiring inside the opener has burned or melted.
- The garage door falls rapidly or feels unusually heavy.
- Structural damage affects the tracks or mounting points.
- You are uncomfortable working with electrical components.
- The opener requires programming beyond basic sensor installation.
Professional diagnosis can often identify hidden mechanical or electrical issues that are difficult to detect during a standard homeowner inspection.
Also Read:
Estimated Repair Costs
The table below provides general repair cost estimates. Actual pricing varies depending on location, garage door brand, and labor rates.
| Repair | Estimated Cost | DIY or Professional |
|---|---|---|
| Clean sensor lenses | $0–$10 | DIY |
| Realign sensors | $0–$25 | DIY |
| Tighten mounting brackets | $0–$20 | DIY |
| Repair damaged wiring | $10–$60 | DIY or Professional |
| Replace sensor brackets | $15–$50 | DIY |
| Replace OEM sensors | $40–$120 | DIY or Professional |
| Replace universal sensors | $25–$80 | DIY |
| Replace opener control board | $120–$300 | Professional |
| Replace complete garage door opener | $300–$800+ | Professional |
Frequently Asked Questions
1. Which garage door sensor is better: OEM or universal?
For most homeowners, OEM sensors are the better choice because they are designed specifically for the opener model. They typically provide the best compatibility, more consistent performance, and easier installation. A quality universal sensor can still work well when it is verified to support your exact opener.
2. Can I replace only one garage door sensor?
Usually, replacing both sensors is recommended. Even if only one has failed, the other sensor may be the same age and nearing the end of its service life. Installing a matched pair also helps ensure proper communication and reduces future troubleshooting.
3. Why does my garage door close only when I hold the wall button?
This usually indicates a safety sensor problem. The opener bypasses the sensor system when the wall button is continuously held on many models. Check for dirty lenses, misalignment, damaged wiring, or failed sensors before assuming the opener itself is defective.
4. How long do garage door sensors usually last?
Most garage door sensors last between 10 and 20 years with normal use. Their lifespan depends on environmental conditions, moisture exposure, power surges, and physical damage. Regular cleaning and proper alignment can help maximize their service life.
5. Are smart garage door sensors better than standard sensors?
Smart-compatible sensors offer additional convenience through remote monitoring and notifications, but they are not necessarily safer than standard photoelectric sensors. If your existing opener supports smart technology, upgrading may improve functionality without changing the basic safety system.
6. Can sunlight really affect garage door sensors?
Yes. Direct sunlight can interfere with some older receiving sensors by overwhelming the infrared beam. This often causes intermittent failures during certain times of day. Adjusting the sensor position or installing updated sensors usually resolves the issue.
7. How can I tell if my sensor is bad or just misaligned?
A blinking indicator light often points to misalignment, while a completely dark light may indicate wiring or sensor failure. Cleaning the lenses, checking the brackets, and confirming proper alignment should always be completed before replacing the sensors.
8. Are garage door sensors universal?
No. Although many universal replacement sensors are available, they are not compatible with every opener. Always verify that the replacement specifically supports your garage door opener model before purchasing or installing it.
9. Is replacing garage door sensors a good DIY repair?
Yes, replacing sensors is generally a beginner-friendly DIY repair if the work is limited to cleaning, alignment, mounting, and low-voltage wiring. However, repairs involving springs, internal opener electronics, or major wiring issues should be left to qualified professionals.
Final Thoughts
Choosing which garage door sensor is better depends on your specific garage door opener, budget, and long-term reliability goals. While universal sensors can be a practical and affordable solution when compatibility is confirmed, OEM sensors remain the preferred option for most homeowners because they provide dependable performance, straightforward installation, and manufacturer-tested compatibility.
Before purchasing new sensors, take time to inspect the existing system carefully. Many common problems result from dirty lenses, loose brackets, misalignment, or damaged wiring rather than failed electronics. Following a logical troubleshooting process can often restore normal operation in less than an hour without replacing any parts.
Regular preventive maintenance, monthly safety testing, and prompt attention to warning signs will help keep your garage door operating safely for years. When repairs involve high-tension springs, complex electrical faults, or repeated sensor failures that basic troubleshooting cannot resolve, contacting a qualified garage door technician is the safest and most cost-effective decision. By combining proper diagnosis with the right replacement parts, you can maintain a reliable garage door system that protects both your family and your property.

Engineer Ali Usman is a professional garage door expert and author at FixFasty, with over 10 years of hands-on experience in garage door systems and mechanical maintenance. He writes clear, step-by-step guides on garage door repairs, parts, and safety practices, helping homeowners fix problems correctly and maintain smooth, secure, and long-lasting garage door performance.