
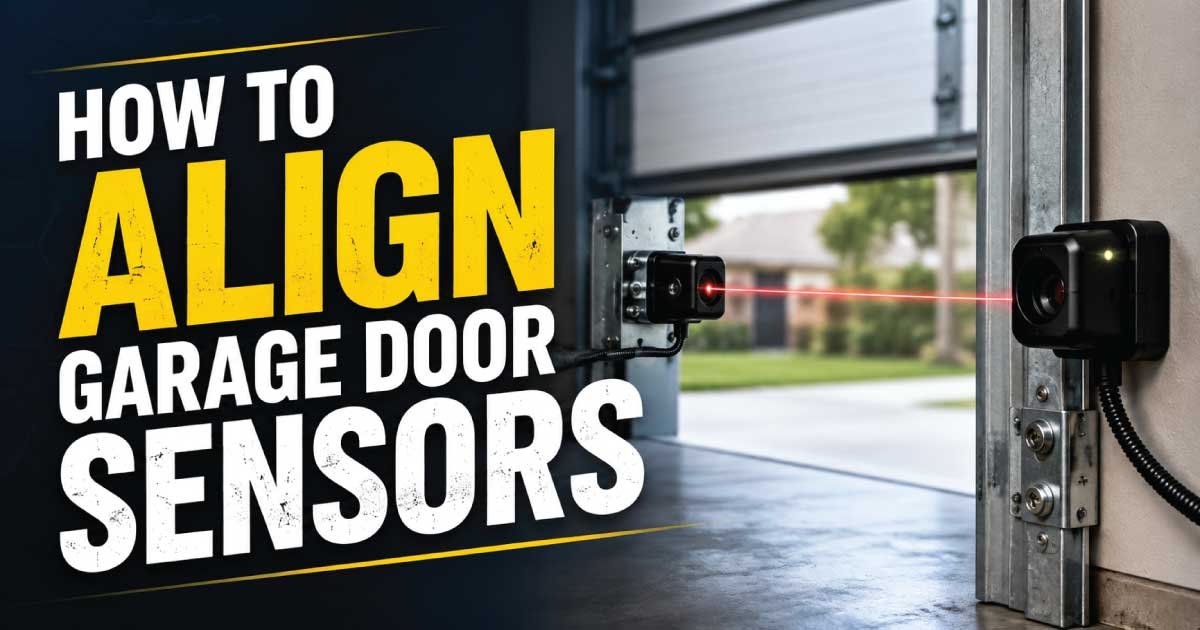
How to Align Garage Door Sensors

Garage door sensors are one of the most important safety features on a modern garage door system. They prevent the door from closing if something, someone, or a pet is in its path. When these sensors become misaligned, even by a small amount, your garage door may refuse to close, reverse unexpectedly, or flash warning lights. While this problem is frustrating, it is also one of the most common issues homeowners face with automatic garage doors.

The good news is that learning how to align garage door sensors is usually straightforward if you understand how the system works and follow the correct troubleshooting process. In many cases, you can restore normal operation without replacing expensive parts or calling a technician.

This repair guide explains the warning signs of sensor alignment problems, how garage door safety sensors normally operate, the most common causes of misalignment, essential safety precautions, the tools you’ll need, and a step-by-step troubleshooting process. By the end of this guide, you’ll know how to diagnose the problem confidently and determine whether it is a simple DIY repair or a situation that requires professional assistance.


Common Signs and Symptoms

Garage door sensor problems often appear suddenly, but the warning signs usually become more noticeable over time. Recognizing these symptoms early helps prevent unnecessary wear on your garage door opener and reduces the risk of damaging the door or its components.

Common symptoms include:

  • The garage door starts closing but immediately reverses.
  • The door refuses to close using the wall button or remote.
  • The opener lights blink repeatedly after a failed closing attempt.
  • One or both sensor indicator lights are off or blinking.
  • The garage door closes only when you hold the wall button down continuously.
  • The door operates inconsistently, working sometimes but not others.
  • Objects appear to trigger the sensors even when the doorway is clear.
  • The garage door opener makes normal motor sounds, but the door does not complete its closing cycle.

You may also notice that the problem becomes worse after:

  • Accidentally bumping a sensor with a bicycle, trash can, or lawn equipment.
  • Heavy rain or strong winds.
  • Seasonal temperature changes.
  • Garage cleaning or storage rearrangement.
  • Home improvement projects near the garage door.

A blinking sensor light usually indicates that the sensors cannot “see” each other properly. However, dirt, loose wiring, damaged brackets, or electrical issues can produce similar symptoms, making careful diagnosis important before replacing any parts.


How the Appliance or System Normally Works

Understanding how garage door safety sensors function makes troubleshooting much easier. These sensors are designed to create an invisible safety beam across the bottom of the garage door opening. When the beam remains uninterrupted, the opener knows the doorway is clear and allows the door to close.

A typical garage door safety system includes two sensors:

  • A sending sensor that emits an infrared beam.
  • A receiving sensor that detects the beam.

The sensors are normally mounted about six inches above the garage floor on opposite sides of the door track. Both units must face each other directly for the beam to remain uninterrupted.

During normal operation:

  1. You press the remote or wall control.
  2. The opener checks that the safety beam is complete.
  3. The motor begins lowering the garage door.
  4. If anything blocks the beam, the opener immediately stops and reverses the door.

This system protects children, pets, vehicles, and belongings from being trapped beneath a closing garage door.

Even a slight movement of one sensor bracket can interrupt the beam. Because the infrared light is invisible to the human eye, manufacturers include LED indicator lights to help homeowners confirm proper alignment. A steady light usually indicates correct alignment, while a blinking or unlit indicator often points to a problem requiring inspection.


Most Common Reasons This Problem Happens

Garage door sensors are durable, but they operate in an environment where dirt, vibration, moisture, and accidental impacts are common. Understanding the underlying causes makes diagnosis faster and helps prevent recurring issues.

Sensor Misalignment

The most common reason garage door sensors stop working is simple misalignment. The mounting brackets can shift over time due to vibration from repeated door operation or accidental bumps.

Why it happens

  • Objects strike the sensor.
  • Loose mounting hardware.
  • Door vibration gradually shifts the bracket.

Symptoms

  • Blinking LED light.
  • Door reverses before fully closing.
  • Intermittent operation.

How to identify it

Stand behind one sensor and visually check whether it points directly toward the opposite unit. If one appears angled slightly upward, downward, or sideways, alignment is likely the problem.

Dirty Sensor Lenses

Dust, spider webs, pollen, mud, and grease can build up on the sensor lenses.

Why it happens

Garages collect dust and debris throughout the year, especially near the floor where the sensors are installed.

Symptoms

  • Blinking sensor lights.
  • Inconsistent operation.
  • Door works after cleaning.

How to identify it

Inspect both lenses closely using a flashlight. Even a thin layer of dirt can weaken the infrared beam.

Loose Mounting Brackets

The brackets holding the sensors may become loose after years of use.

Why it happens

  • Vibration
  • Minor impacts
  • Aging hardware

Symptoms

  • Sensors wobble when touched.
  • Alignment changes frequently.

How to identify it

Gently move each sensor by hand. It should remain firmly in place.

Obstructions Between Sensors

The beam only needs a small interruption to trigger the safety system.

Why it happens

Common obstructions include:

  • Garden tools
  • Storage boxes
  • Trash bins
  • Children’s toys
  • Snow buildup
  • Tall weeds near exterior garages

Symptoms

  • Door reverses immediately.
  • Sensors appear properly aligned.

How to identify it

Inspect the entire area between the sensors from floor level.

Damaged Wiring

The wiring connecting the sensors to the opener may become damaged.

Why it happens

  • Rodents chewing insulation
  • Staples driven too tightly
  • Moisture damage
  • Aging wires

Symptoms

  • One sensor has no power.
  • Indicator light remains completely off.
  • Problem persists after alignment.

How to identify it

Look for:

  • Frayed insulation
  • Broken wires
  • Loose wire connections
  • Corrosion near terminals

Bright Sunlight Interference

Some garage door sensors are sensitive to direct sunlight.

Why it happens

Strong sunlight entering the garage at certain times of day can interfere with the receiving sensor.

Symptoms

  • Door works during the morning but not the afternoon.
  • Problem only occurs on sunny days.

How to identify it

Observe whether the issue appears only when sunlight shines directly onto one sensor.


Safety Precautions Before Troubleshooting

Garage door repairs often seem simple, but the system contains moving parts, electrical components, and high-tension springs. Although sensor alignment is generally a safe DIY repair, taking proper precautions reduces the risk of injury and prevents accidental damage.

Before beginning any inspection or adjustment:

  • Disconnect power to the garage door opener whenever working with electrical wiring.
  • Never loosen or remove garage door torsion or extension springs.
  • Keep children and pets away from the work area.
  • Wear safety glasses to protect against dust and debris.
  • Use a stable ladder if you need to inspect higher components.
  • Avoid placing fingers near rollers, hinges, or moving tracks.
  • Test the emergency release only when the door is fully closed whenever possible.
  • Do not bypass or permanently disable the safety sensors. They are required safety devices designed to prevent serious injuries.
  • If wiring appears burned, melted, or severely damaged, stop troubleshooting and arrange for professional repair.

A good rule is to perform only inspections, cleaning, and minor adjustments yourself. Repairs involving springs, opener motors, or electrical circuit boards require specialized knowledge and tools.


Tools Required

Most sensor alignment jobs require only basic household tools. Having everything ready before you begin makes the troubleshooting process faster and helps avoid unnecessary adjustments.

Tool Purpose
Soft microfiber cloth Clean sensor lenses
Step ladder Reach opener or higher components safely
Tape measure Verify both sensors are mounted at the same height
Phillips screwdriver Tighten mounting screws
Adjustable wrench Secure mounting brackets
Small level Confirm sensors are level
Flashlight Inspect wiring and brackets
Zip ties Secure loose sensor wires
Safety glasses Protect your eyes during inspection

Step-by-Step Troubleshooting Guide

Before adjusting the sensors, work through each troubleshooting step in order. This approach helps identify the actual cause instead of assuming the sensors simply need realignment. Skipping steps may result in unnecessary repairs or continued problems after adjustment.

1. Check the Sensor Indicator Lights

What to inspect

Look at both sensor LED lights.

Why it matters

The indicator lights provide the quickest diagnosis of alignment problems.

Expected result

Both lights should remain steady.

What to do next

If one light is blinking or off, continue with the following inspections.

2. Remove Any Obstructions

What to inspect

Check the entire doorway at floor level.

Why it matters

Even a small object can interrupt the infrared beam.

Expected result

The path between sensors should be completely clear.

What to do next

Retest the garage door after removing any obstruction.

3. Clean Both Sensor Lenses

What to inspect

Look for dirt, cobwebs, moisture, or grease.

Why it matters

A dirty lens weakens the infrared signal.

Expected result

Both lenses should be clean and transparent.

What to do next

Test the door again before making alignment adjustments.

4. Inspect Sensor Alignment

What to inspect

Compare both sensors from several angles.

Why it matters

Misaligned sensors cannot complete the safety beam.

Expected result

Both sensors should face each other directly at the same height.

What to do next

If one sensor has shifted, gently adjust it until the indicator light becomes steady.

5. Tighten the Mounting Hardware

What to inspect

Check each mounting bracket for movement.

Why it matters

Loose brackets allow the sensors to drift out of alignment repeatedly.

Expected result

Both sensors remain stable when lightly touched.

What to do next

If movement is gone, test the garage door several times to verify the adjustment holds.

6. Inspect the Wiring

What to inspect

Follow each wire from the sensor to the opener.

Why it matters

Broken or loose wires can mimic alignment problems.

Expected result

Wiring should be secure with no visible damage.

What to do next

If damaged wiring is found, avoid temporary splices unless you are comfortable with low-voltage electrical repairs. Otherwise, schedule professional service.


Quick Diagnosis Table

This quick-reference table summarizes the most common symptoms you’ll encounter while learning how to align garage door sensors. Use it to narrow down the likely cause before moving on to repairs.

Symptom Possible Cause Recommended Solution
Door immediately reverses Misaligned sensors Realign both sensors until LEDs remain steady
One sensor light is blinking Sensor out of alignment Adjust mounting bracket and tighten hardware
One sensor light is off Wiring issue or failed sensor Inspect wiring and power connections
Door only closes while holding wall button Safety beam interrupted Check alignment, clean lenses, inspect for obstructions
Sensors move when touched Loose mounting bracket Tighten mounting screws and verify alignment
Door works inconsistently Dirty lenses or loose hardware Clean sensors and inspect brackets
Problem occurs only in bright sunlight Sunlight interference Shield the receiving sensor or adjust its position
Door still fails after alignment Damaged sensor or electrical issue Perform further diagnosis or consult a professional technician

How to Fix Each Common Cause

Now that you’ve identified the likely source of the problem, it’s time to make the necessary repairs. Start with the simplest solutions before assuming a component has failed. In my experience servicing residential garage doors, most sensor problems are resolved by cleaning, realigning, or tightening hardware rather than replacing parts.

Fixing Misaligned Sensors

Misalignment is responsible for the majority of garage door sensor failures.

How to repair it

  1. Disconnect the garage door opener from power if you’ll be adjusting brackets with metal tools.
  2. Loosen the mounting screw just enough so the sensor can move.
  3. Slowly pivot the sensor toward the opposite unit.
  4. Watch the LED indicator while making small adjustments.
  5. Stop adjusting when the light changes from blinking to solid.
  6. Carefully tighten the mounting hardware without moving the sensor.
  7. Repeat the process for the opposite sensor if necessary.
  8. Restore power and test the garage door three to five times.

Tip: Small adjustments often make a big difference. Moving a sensor by only a few millimeters can restore proper alignment.

Cleaning Dirty Sensor Lenses

Dirty lenses reduce the strength of the infrared beam.

How to clean them

  • Use a clean microfiber cloth.
  • Wipe the lens gently without scratching it.
  • Remove cobwebs around the housing.
  • Avoid abrasive cleaners or solvents.
  • Dry any moisture before testing.

If the lenses are heavily scratched or cracked, cleaning alone may not restore reliable operation, and replacement may be necessary.

Securing Loose Brackets

If the sensors repeatedly fall out of alignment, loose hardware is often the real problem.

Repair steps

  • Tighten all mounting screws.
  • Replace stripped screws if they no longer hold securely.
  • Straighten slightly bent brackets.
  • Replace severely damaged brackets instead of trying to reshape them excessively.

A firmly mounted sensor should not shift when lightly touched.

Removing Beam Obstructions

This repair is simple but frequently overlooked.

Inspect the entire sensor path for:

  • Storage containers
  • Garbage bins
  • Garden tools
  • Extension cords
  • Children’s toys
  • Snow or ice
  • Leaves and debris

After removing the obstruction, test the door several times to ensure normal operation.

Repairing Minor Wiring Problems

If the sensor has no indicator light, inspect the wiring carefully.

You may find:

  • Loose terminal connections
  • Broken wire insulation
  • Wire pulled from the sensor
  • Rodent damage

Minor loose connections can usually be tightened.

Replace damaged low-voltage wire if:

  • Copper is exposed.
  • The wire has been crushed.
  • Corrosion is visible.
  • Multiple repairs have already been attempted.

If wiring disappears into finished walls or appears damaged near the opener’s control board, professional diagnosis is often the safest option.

Reducing Sunlight Interference

Direct sunlight can temporarily overwhelm some older sensor designs.

Possible solutions include:

  • Slightly repositioning the receiving sensor.
  • Installing a small shade above the sensor.
  • Keeping the lens clean.
  • Replacing older sensors with updated models designed to resist sunlight interference.

Always verify that any shield does not block the infrared beam itself.


Advanced Troubleshooting

If the basic troubleshooting steps don’t solve the problem, a less common issue may be preventing the sensors from communicating properly. These problems require more careful diagnosis but are still useful to understand before assuming the garage door opener must be replaced.

Consider investigating the following:

Faulty Sensor Electronics

Sensors can fail internally due to:

  • Age
  • Moisture intrusion
  • Electrical surges
  • Manufacturing defects

If wiring and alignment are correct but one sensor never displays a normal LED pattern, replacing the sensor pair is often the most reliable solution.

Damaged Garage Door Tracks

A bent track can create excessive vibration every time the door operates.

Signs include:

  • Loud operation
  • Uneven door movement
  • Sensors requiring frequent realignment

Repairing or replacing damaged track sections may permanently solve recurring sensor issues.

Opener Logic Board Problems

Although uncommon, the opener’s control board may fail to recognize properly functioning sensors.

Possible warning signs include:

  • Sensors test correctly.
  • Wiring is intact.
  • Door still refuses to close.
  • Other opener functions behave unpredictably.

Logic board diagnosis generally requires electrical testing beyond most DIY repairs.

Intermittent Electrical Connections

Some problems occur only occasionally.

Common causes include:

  • Loose wire terminals
  • Corroded connectors
  • Temperature-related wire expansion
  • Moisture inside electrical connections

If the issue appears randomly, gently inspecting each connection while the power is disconnected may reveal the fault.

Sensor Height Differences

Both sensors should be mounted at approximately the same height from the floor.

Use a tape measure to verify their positions. Even though the beam has some tolerance, significant height differences can reduce reliability.


When Repair Is Not Worth It

Garage door sensors are relatively inexpensive compared to other garage door components. In some situations, replacement is more practical than continued troubleshooting.

Consider replacing the sensors when:

  • The sensor housing is cracked.
  • Water has entered the electronics.
  • Internal components have failed.
  • Multiple wires are damaged.
  • The sensors repeatedly lose alignment despite secure brackets.
  • Replacement parts cost nearly as much as a complete new sensor kit.

If your garage door opener is more than 15 to 20 years old and replacement parts are difficult to find, upgrading the opener may be a better long-term investment. Newer systems often provide improved safety features, quieter operation, smartphone connectivity, and more reliable sensor technology.


Preventive Maintenance Tips

Routine maintenance greatly reduces the chances of future alignment problems. Most preventive tasks take only a few minutes and can be performed during regular garage cleaning.

Good preventive maintenance includes:

  • Wipe sensor lenses every month.
  • Keep storage items away from the sensor beam.
  • Check mounting brackets for looseness every few months.
  • Inspect wires for wear or rodent damage.
  • Test the auto-reverse safety system monthly.
  • Tighten loose hardware before vibration becomes a problem.
  • Avoid striking sensors with lawn equipment, bicycles, or garbage bins.
  • Keep the garage floor clean to prevent debris from blocking the beam.
  • Inspect after severe storms or accidental impacts.

Many homeowners only notice their sensors after the garage door stops working. A quick visual inspection every few months can prevent unexpected failures.


Common Mistakes to Avoid

Many garage door sensor problems become worse because of incorrect troubleshooting. Avoiding these common mistakes saves time and helps prevent unnecessary repairs.

Common mistakes include:

  • Assuming the sensors are defective before cleaning them.
  • Tightening brackets before confirming proper alignment.
  • Ignoring blinking indicator lights.
  • Attempting to bypass the safety sensors permanently.
  • Replacing the garage door opener before diagnosing the actual cause.
  • Using abrasive cleaners on the sensor lenses.
  • Pulling on sensor wires during inspection.
  • Forgetting to test the door several times after making adjustments.
  • Attempting spring repairs while troubleshooting sensor issues.
  • Leaving loose brackets that will quickly shift again.

Working methodically is usually faster than replacing parts at random.


When to Call a Professional

Most homeowners can safely clean and align garage door sensors, but some situations require specialized equipment or experience.

Contact a qualified garage door technician if:

  • The garage door springs require adjustment.
  • Wiring inside the opener appears burned.
  • The opener logic board is suspected to have failed.
  • The door comes off its tracks.
  • The door is unusually heavy or difficult to lift manually.
  • The sensors have been replaced but the problem remains.
  • Electrical testing is required beyond basic inspection.
  • Structural damage has occurred after a vehicle impact.

Professional diagnosis can often identify multiple issues during one service visit, preventing repeated breakdowns.


Estimated Repair Costs

The costs below represent typical residential garage door sensor repairs. Actual prices vary by location, garage door brand, and labor rates.

Repair Estimated Cost DIY or Professional
Clean sensor lenses $0–$10 DIY
Realign garage door sensors $0–$25 DIY
Tighten or replace mounting hardware $5–$30 DIY
Replace sensor brackets $10–$40 DIY
Repair low-voltage sensor wiring $20–$100 DIY or Professional
Replace garage door sensor pair $40–$120 DIY or Professional
Replace opener logic board $150–$350 Professional
Install new garage door opener $300–$800+ Professional

Frequently Asked Questions

1. How do I know if my garage door sensors are out of alignment?

A blinking sensor light is usually the clearest sign that the sensors are misaligned. You may also notice the garage door reversing before it closes completely or refusing to close unless you hold the wall button. Checking that both indicator lights remain solid is the quickest way to confirm proper alignment.

2. Can I align garage door sensors myself?

Yes, most homeowners can align garage door sensors themselves. The job typically involves cleaning the lenses, adjusting the sensor brackets, and tightening the mounting hardware. As long as you avoid working on springs or high-voltage components, this is generally considered a safe DIY repair.

3. Why does my garage door close only when I hold the wall button?

This usually means the opener has detected a safety sensor problem. Holding the wall button overrides the normal remote closing function on many systems, allowing the door to close while reminding you that the sensors need inspection, cleaning, or realignment.

4. Should both garage door sensor lights be solid?

Yes, in most systems both indicator lights should be illuminated normally, although their exact colors vary by manufacturer. A blinking or dark light often indicates a communication problem, poor alignment, damaged wiring, or a failed sensor requiring further diagnosis.

5. How often should garage door sensors be cleaned?

Cleaning the sensors every one to three months is a good preventive maintenance practice. Homes with dusty garages, nearby construction, or frequent vehicle traffic may benefit from more frequent cleaning to keep the infrared beam operating reliably throughout the year.

6. Can sunlight affect garage door sensors?

Yes, direct sunlight can interfere with certain garage door sensor models. If the problem occurs only during specific times of day, sunlight may be striking the receiving sensor. Repositioning the sensor or adding a small shade often improves reliability without affecting normal operation.

7. When should garage door sensors be replaced instead of repaired?

Replacement is recommended when the housing is cracked, moisture has damaged the electronics, the lenses are severely scratched, or internal components have failed. Replacing both sensors as a matched pair usually provides better reliability than replacing only one unit.

8. Why do my sensors keep going out of alignment?

Repeated misalignment usually indicates another underlying problem. Loose brackets, excessive vibration, bent tracks, accidental impacts, or worn hardware can cause sensors to shift repeatedly. Correcting the root cause is more effective than constantly readjusting the sensors.

9. Is it safe to bypass garage door safety sensors?

No, bypassing garage door safety sensors is not safe. These devices are designed to prevent the door from closing on people, pets, or objects. Disabling them creates a significant safety hazard and may violate local building or safety regulations.

10. How long does it take to align garage door sensors?

In most cases, aligning garage door sensors takes between 15 and 30 minutes. If the problem involves only minor misalignment or dirty lenses, the repair can often be completed even faster using basic household tools.


Final Thoughts

Learning how to align garage door sensors is one of the most valuable maintenance skills for any homeowner with an automatic garage door. Since sensor misalignment, dirty lenses, loose brackets, and minor wiring issues account for most failures, a careful inspection often restores normal operation without the expense of replacing parts.

Always begin with the simplest checks—clean the lenses, remove obstructions, inspect the indicator lights, and verify that both sensors face each other at the same height. Working through the troubleshooting steps in order reduces guesswork and helps you identify the real cause instead of replacing components unnecessarily.

Remember that garage door safety sensors are designed to protect people and property. Never disable or bypass them simply to keep the door operating. If troubleshooting points to damaged wiring, a faulty opener, structural damage, or spring-related issues, stop the DIY repair and contact a qualified technician.

With regular preventive maintenance and prompt attention to warning signs, your garage door safety system can continue operating reliably for many years while keeping your household safe.

Leave a Comment