
Why Are My Garage Door Sensors Blinking?

Garage door sensors are one of the most important safety features on a modern garage door system. When they start blinking, they are trying to tell you that something is wrong. In many cases, the problem is simple, such as a dirty sensor lens or a slight alignment issue. However, blinking sensors can also point to damaged wiring, power problems, or failing components that need closer inspection.

Ignoring blinking garage door sensors can leave your garage door unable to close properly or, even worse, reduce the effectiveness of an important safety system designed to prevent accidents. Fortunately, many sensor issues can be diagnosed and fixed without advanced technical knowledge.

In this comprehensive repair guide, you’ll learn why your garage door sensors are blinking, how the safety sensor system normally works, the most common causes of blinking lights, and how to troubleshoot the problem safely. Whether you’re dealing with an intermittent issue or a garage door that refuses to close, this guide will help you identify the cause before deciding whether a simple DIY repair or professional service is the best solution.


Common Signs and Symptoms

Blinking garage door sensors rarely occur without other noticeable warning signs. Paying attention to these symptoms can help narrow down the cause before you begin troubleshooting. Some issues appear suddenly after an impact, while others develop gradually because of dirt, moisture, loose wiring, or normal wear.

Common symptoms include:

  • The garage door starts closing but immediately reverses.
  • The garage door will only close when holding the wall control button.
  • One or both sensor LEDs are blinking continuously.
  • One sensor light is off while the other remains on.
  • The opener lights flash several times after a failed closing attempt.
  • The garage door stops halfway during operation.
  • The door closes inconsistently, working sometimes but not others.
  • The opener makes clicking sounds without moving the door.
  • The garage door refuses to close but opens normally.
  • The problem becomes worse after heavy rain, cleaning, or moving stored items.

You may also notice that the issue changes depending on the time of day. For example, direct sunlight shining into one sensor can interfere with the infrared beam, making the sensors blink only during certain hours.

Another common clue is recent activity inside the garage. Moving bicycles, lawn equipment, storage bins, or children’s toys can accidentally bump a sensor out of alignment without anyone realizing it.

Recognizing these symptoms early makes diagnosis faster and helps avoid replacing parts that are still working correctly.


How the Appliance or System Normally Works

Understanding how garage door safety sensors operate makes troubleshooting much easier. These small devices may seem simple, but they perform a critical job every time the door closes. Once you know what normal operation looks like, you’ll be able to recognize exactly what has failed.

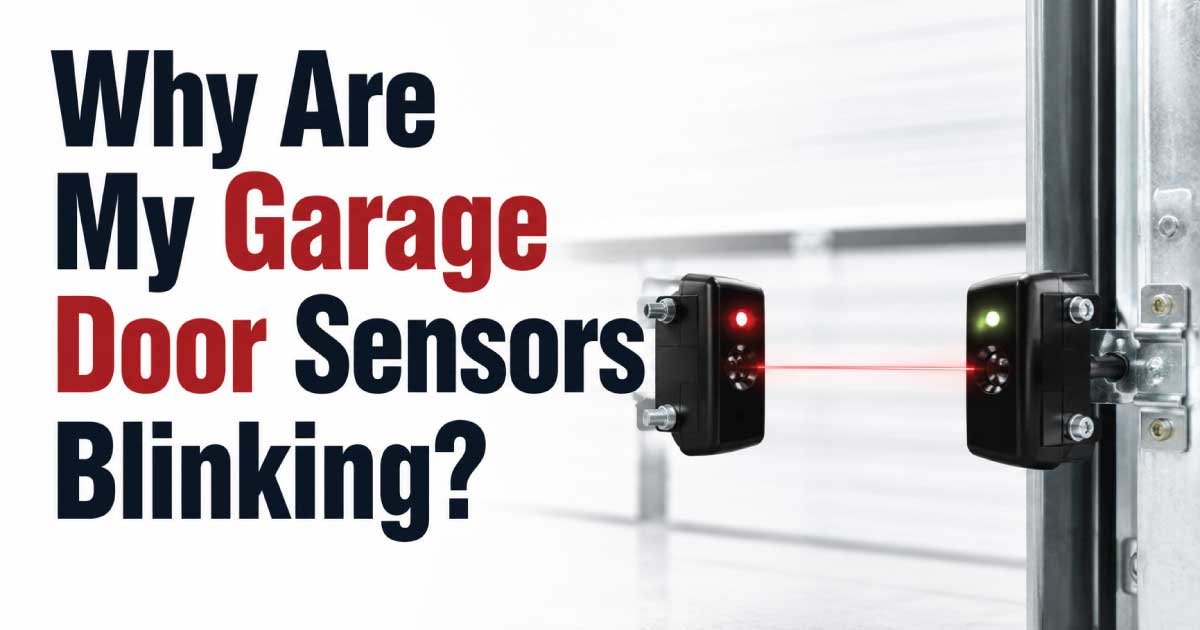
A typical garage door opener uses two photo-eye safety sensors mounted near the floor on opposite sides of the garage door opening.

One sensor acts as the transmitter, sending an invisible infrared beam across the doorway.

The other sensor acts as the receiver, detecting that beam.

When both sensors communicate correctly:

  • The receiver detects the infrared beam.
  • The opener confirms the doorway is clear.
  • The garage door closes normally.
  • The sensor indicator lights remain steady.

If anything interrupts that beam, the opener assumes something—or someone—is beneath the door.

Examples include:

  • A child
  • A pet
  • A bicycle
  • A trash can
  • A vehicle bumper
  • Even heavy debris

As a safety precaution, the opener immediately stops closing and reverses direction.

Blinking sensor lights usually mean the infrared beam is no longer reaching the receiving sensor. The interruption may be caused by an actual object, poor alignment, wiring problems, contamination, or an internal electrical issue.

This built-in safety system has prevented countless injuries and property damage, which is why manufacturers design it to stop the door whenever communication between the sensors becomes unreliable.


Most Common Reasons This Problem Happens

Garage door sensor problems often have straightforward causes, but several different faults can produce the same blinking lights. Inspecting the simplest possibilities first saves time and avoids unnecessary repairs. Below are the most common reasons homeowners encounter this issue, along with practical ways to identify each one.

Sensor Misalignment

This is the most common cause of blinking garage door sensors.

Why it happens

Even a slight bump from a garbage bin, bicycle tire, lawn mower, or storage box can shift a sensor enough to break the infrared beam.

Symptoms

  • One blinking sensor
  • Door reverses immediately
  • Door closes only while holding the wall button

How to identify it

  • Compare both sensors.
  • Check whether they point directly at one another.
  • A loose mounting bracket often allows the sensor to tilt downward or sideways.

Dirty Sensor Lenses

Dust, cobwebs, pollen, grease, and moisture gradually build up on the sensor lenses.

Why it happens

The infrared beam becomes weaker or scattered before reaching the receiving sensor.

Symptoms

  • Random blinking
  • Intermittent operation
  • Problem worsens in dusty garages

How to identify it

Inspect both lenses closely under good lighting. Even a thin film of dirt can interfere with sensor performance.

Obstruction in the Beam

Sometimes nothing is actually broken.

Why it happens

An object blocks the invisible beam between the sensors.

Symptoms

  • Door refuses to close
  • Sensors blink immediately
  • Problem disappears after moving the object

How to identify it

Walk through the beam area while checking for:

  • Boxes
  • Garden tools
  • Children’s toys
  • Vehicle tires
  • Hanging extension cords
  • Leaves or debris

Loose or Damaged Wiring

Garage environments expose wiring to vibration, moisture, pests, and accidental damage.

Why it happens

Broken or loose wires interrupt communication between the opener and the sensors.

Symptoms

  • One sensor completely off
  • Blinking starts after opening or closing the door
  • Intermittent electrical behavior

How to identify it

Look for:

  • Frayed insulation
  • Pinched wires
  • Loose wire nuts
  • Staples driven into the cable
  • Rodent damage

Sunlight Interference

Bright sunlight can overwhelm some older garage door sensors.

Why it happens

Direct sunlight shines into the receiving sensor, making it difficult to detect the infrared beam.

Symptoms

  • Problem only occurs during certain hours
  • Sensors work normally in the evening

How to identify it

Observe whether the blinking occurs only when sunlight reaches the garage opening.

Moisture or Condensation

Water affects sensor electronics more than many homeowners realize.

Why it happens

Condensation forms inside or outside the sensor housing after rain, humidity, or washing the garage floor.

Symptoms

  • Temporary blinking
  • Works after drying
  • Seasonal issues

How to identify it

Check for:

  • Water droplets
  • Foggy lenses
  • Rust around mounting hardware

Faulty Sensor

Although less common, sensors eventually wear out.

Why it happens

Electronic components fail due to age, power surges, or prolonged exposure to extreme temperatures.

Symptoms

  • Persistent blinking despite alignment
  • No response after cleaning
  • One indicator light never stabilizes

How to identify it

If wiring, alignment, cleaning, and power all check out, the sensor itself may require replacement.

Garage Door Opener Issues

Sometimes the sensors are functioning correctly, but the opener cannot interpret their signals.

Why it happens

Control board problems, electrical faults, or software issues interrupt normal communication.

Symptoms

  • Multiple unusual opener behaviors
  • Flashing diagnostic lights
  • Door operates unpredictably

How to identify it

Consult the opener’s indicator lights and owner’s manual to compare the blinking pattern with the manufacturer’s diagnostic codes.


Safety Precautions Before Troubleshooting

Although garage door sensor repairs are usually simple, safety should always come first. Garage door systems contain electrical components and heavy moving parts that can cause injury if handled carelessly. Taking a few precautions before beginning helps reduce unnecessary risks.

Before inspecting or repairing anything:

  • Disconnect power to the garage door opener whenever working with wiring.
  • Keep children and pets away from the garage during troubleshooting.
  • Never stand directly beneath a moving garage door.
  • Avoid forcing the door closed if the safety system is malfunctioning.
  • Wear safety glasses when inspecting damaged wiring or brackets.
  • Use a stable ladder if reaching higher components.
  • Keep fingers away from door rollers, hinges, and tracks.
  • Never bypass or permanently disable garage door safety sensors.
  • If you notice burned wiring, smoke, or signs of electrical damage, stop troubleshooting and contact a qualified technician.
  • If the torsion springs or lift cables appear damaged, do not attempt repairs. These components are under extreme tension and require specialized tools and training.

Following these precautions allows you to diagnose most sensor issues safely without creating additional problems.


Tools Required

Most garage door sensor inspections require only a few basic household tools. Having everything ready before you begin makes the troubleshooting process smoother and helps you complete each inspection step without unnecessary interruptions.

Tool Purpose
Microfiber cloth Clean sensor lenses without scratching them
Soft brush Remove dust and cobwebs
Tape measure Verify sensors are mounted at the same height
Level Check proper sensor alignment
Screwdriver set Tighten mounting brackets and terminals
Flashlight Inspect wiring and hard-to-see areas
Multimeter Check power and electrical continuity if needed
Adjustable wrench Tighten loose mounting hardware
Cable ties Secure loose sensor wiring

Step-by-Step Troubleshooting Guide

Working through these steps in order helps eliminate the simplest causes before moving to more complex electrical diagnosis. After completing each step, test the garage door to see whether the blinking has stopped before continuing.

  1. Inspect for obvious obstructions.
    Look across the entire sensor beam for boxes, tools, toys, or debris. Even a small object can interrupt the infrared beam. If the path is clear and the sensors stop blinking after removing an obstruction, the issue is resolved. If not, continue to the next step.
  2. Clean both sensor lenses.
    Wipe each lens gently with a dry microfiber cloth. Dirt, cobwebs, or moisture can weaken the beam. After cleaning, test the door. If the lights remain steady, no further repair is needed.
  3. Check sensor alignment.
    Make sure both sensors face each other directly and are mounted at the same height. Tighten any loose brackets. A steady indicator light usually confirms successful alignment. If blinking continues, proceed with wiring inspection.
  4. Inspect the wiring.
    Examine the wires from each sensor to the opener for cuts, loose connections, or crushed insulation. Secure any loose connections and replace visibly damaged wiring if necessary. If the problem remains, move on to the power check.
  5. Verify power to the opener.
    Confirm the opener is plugged in and the circuit breaker has not tripped. Some sensor problems result from inconsistent power rather than failed components. Restore power if needed and test the system again.
  6. Test in different lighting conditions.
    If the sensors work at night but blink during the day, direct sunlight may be interfering with the receiver. Shielding the sensor or slightly adjusting its angle may correct the issue. If the problem persists regardless of lighting, additional diagnosis is required.
  7. Review opener diagnostic indicators.
    Many modern garage door openers display blinking light codes that identify sensor communication faults. Compare the indicator pattern with your opener’s manual to determine whether the issue involves the sensors, wiring, or control board.

Quick Diagnosis Table

This quick reference table summarizes the most common symptoms, their likely causes, and the first repair step to try. It provides a fast starting point before moving into more detailed repair methods.

Symptom Possible Cause Recommended Solution
One sensor blinking Misalignment Realign and tighten the sensor bracket
One sensor light off Power or wiring issue Inspect wiring and electrical connections
Both sensors blinking Beam interrupted Remove obstruction and check alignment
Door reverses immediately Sensor communication failure Clean lenses and verify beam alignment
Door closes only with wall button held Safety sensor fault Inspect sensors, wiring, and opener diagnostics
Intermittent blinking Dirty lenses, vibration, or loose wiring Clean sensors and secure all connections
Problem only during sunny hours Sunlight interference Reposition or shade the receiving sensor
Blinking after rain or humidity Moisture inside sensors Allow sensors to dry and inspect for water damage

How to Fix Each Common Cause

Now that you’ve identified the most likely reason your garage door sensors are blinking, it’s time to make the appropriate repair. Start with the simplest fixes before replacing parts. After each repair, test the garage door several times to confirm the problem has been resolved. If the sensors continue blinking after completing these steps, move on to the next possible cause.

Fix Misaligned Sensors

Misaligned sensors are responsible for a large percentage of garage door sensor problems.

How to fix it:

  1. Disconnect power to the garage door opener.
  2. Loosen the mounting bracket just enough so the sensor can move.
  3. Point both sensors directly at each other.
  4. Use a level or tape measure to ensure they are mounted at the same height.
  5. Tighten the brackets without changing the alignment.
  6. Restore power and test the door.

Expected result:
Both indicator lights should remain solid, and the garage door should close normally.

Clean Dirty Sensor Lenses

Even a small amount of dirt can weaken the infrared beam.

How to fix it:

  • Use a clean microfiber cloth.
  • Remove dust, cobwebs, pollen, and fingerprints.
  • If necessary, lightly dampen the cloth with water.
  • Avoid abrasive cleaners or harsh chemicals.
  • Dry the lenses completely before testing.

Expected result:
Steady indicator lights and reliable door operation.

Remove Beam Obstructions

The safety beam must remain completely clear.

Inspect the area between both sensors and remove:

  • Storage bins
  • Sports equipment
  • Garden tools
  • Extension cords
  • Vehicle accessories
  • Seasonal decorations
  • Leaves and debris

After clearing the path, close the garage door using the remote to verify proper operation.

Repair Loose or Damaged Wiring

Loose wiring often causes intermittent problems that are difficult to diagnose.

Repair steps:

  1. Disconnect power.
  2. Inspect every wire from the opener to each sensor.
  3. Tighten loose terminal screws or connectors.
  4. Replace damaged wire sections using the same wire gauge recommended by the manufacturer.
  5. Secure wiring with cable clips or cable ties to prevent future movement.

If corrosion is present inside the connectors, replace the affected terminals rather than attempting to clean heavily damaged contacts.

Reduce Sunlight Interference

Direct sunlight can temporarily overwhelm older or lower-quality sensors.

Possible solutions include:

  • Slightly adjusting the sensor angle.
  • Installing a small sun shield above the receiving sensor.
  • Keeping nearby reflective surfaces clean and repositioned.
  • Replacing older sensors with updated models designed to resist sunlight interference.

Test the door during the same time of day when the issue normally occurs.

Dry Moisture-Affected Sensors

If moisture caused the blinking:

  • Dry the outside with a clean cloth.
  • Allow internal condensation to evaporate naturally.
  • Check for cracked housings that allow water inside.
  • Replace sensors that repeatedly collect moisture.

Persistent water intrusion usually indicates damaged seals or aging sensor housings.

Replace a Faulty Sensor

If every other troubleshooting step has failed, replacement may be necessary.

General replacement process:

  1. Turn off power.
  2. Disconnect the old sensor.
  3. Install the new sensor in the same position.
  4. Connect wiring according to the manufacturer’s instructions.
  5. Align both sensors.
  6. Restore power.
  7. Test the door several times.

Whenever possible, replace sensors with manufacturer-approved parts to ensure compatibility with your opener.

Address Garage Door Opener Problems

If the sensors are working correctly but blinking continues, the opener itself may be at fault.

Possible repairs include:

  • Resetting the opener.
  • Updating firmware (on smart openers).
  • Repairing loose control board connections.
  • Replacing a failed logic board.

Because opener control boards contain electrical components, homeowners without electrical experience should consider professional repair.


Advanced Troubleshooting

If the basic repairs do not solve the problem, a deeper diagnosis may be necessary. These less common issues often require additional testing but can still be identified systematically without replacing parts unnecessarily.

Test Sensor Voltage

Using a multimeter, verify that the opener is supplying the correct voltage to the sensors according to the manufacturer’s specifications.

Low or unstable voltage may indicate:

  • A failing control board
  • Damaged wiring
  • Poor electrical connections

Only perform electrical testing if you are comfortable using a multimeter safely.

Inspect Wire Continuity

Hidden wire breaks sometimes occur inside insulation.

A continuity test can identify:

  • Broken conductors
  • Loose crimp connections
  • Damaged splices

Replace any wire that fails continuity testing.

Check Mounting Stability

Sensors that vibrate when the garage door operates may drift slightly out of alignment.

Inspect:

  • Loose screws
  • Bent brackets
  • Damaged wall anchors
  • Rusted hardware

Replacing worn mounting hardware often prevents recurring alignment issues.

Look for Rodent Damage

Garages occasionally attract mice and other pests that chew wiring.

Signs include:

  • Small tooth marks
  • Missing insulation
  • Nesting material nearby
  • Random electrical failures

Replace damaged wiring rather than attempting temporary repairs with electrical tape alone.

Evaluate the Garage Door Tracks

Although sensor blinking usually points to a sensor problem, severe track issues can sometimes trigger unusual opener behavior.

Inspect for:

  • Bent tracks
  • Loose rollers
  • Excessive vibration
  • Obstructions preventing smooth movement

Correcting mechanical issues may eliminate intermittent sensor faults.

Review Diagnostic Codes

Many modern openers display fault codes through flashing LEDs or digital displays.

These codes can identify:

  • Sensor communication errors
  • Short circuits
  • Power supply faults
  • Internal control board failures

Consult your owner’s manual to interpret the specific code before replacing components.


When Repair Is Not Worth It

Not every garage door sensor problem deserves an extensive repair. In some situations, replacing components—or even the entire opener—is more practical and cost-effective.

Replacement is often the better choice when:

  • Multiple electronic components have failed.
  • The opener is over 15–20 years old.
  • Replacement parts are no longer available.
  • Water damage has affected several components.
  • Repair costs approach the price of a new opener.
  • The opener lacks modern safety or smart features.

Modern garage door openers are generally quieter, more energy-efficient, and equipped with improved safety systems. If your existing unit has experienced repeated failures, upgrading may save money over the long term.


Preventive Maintenance Tips

Regular maintenance greatly reduces the chance of blinking sensors and unexpected garage door failures. Most preventive tasks take only a few minutes and can be performed during routine home maintenance.

Follow these practices:

  • Clean both sensor lenses every few months.
  • Check sensor alignment after moving large objects in the garage.
  • Inspect wiring for wear or damage twice a year.
  • Tighten loose mounting brackets during seasonal maintenance.
  • Keep the beam path free of stored items.
  • Test the garage door safety reverse system monthly.
  • Protect sensors from direct water spray when washing the garage.
  • Lubricate moving door components according to the manufacturer’s recommendations.
  • Replace damaged wiring promptly.
  • Schedule a professional inspection every few years, especially for older systems.

Routine maintenance not only improves reliability but also helps extend the life of the entire garage door system.


Common Mistakes to Avoid

Many homeowners accidentally make the problem worse while trying to fix blinking sensors. Avoiding these common mistakes can save both time and repair costs.

Common mistakes include:

  • Ignoring blinking sensor lights.
  • Permanently bypassing the safety sensors.
  • Cleaning lenses with abrasive materials.
  • Overtightening brackets and changing sensor alignment.
  • Replacing sensors before checking for simple obstructions.
  • Forgetting to disconnect power before electrical work.
  • Mixing incompatible replacement parts.
  • Assuming the opener is faulty without inspecting the sensors first.
  • Leaving loose wiring unsecured after repairs.
  • Continuing to operate a malfunctioning garage door without identifying the cause.

Approaching troubleshooting methodically is usually faster than replacing parts through trial and error.


When to Call a Professional

Many sensor issues are suitable for DIY repair, but some situations require professional expertise. Attempting advanced repairs without the proper knowledge can create safety hazards or damage expensive components.

Contact a qualified garage door technician if:

  • Wiring inside the opener requires repair.
  • The control board appears damaged.
  • Torsion springs or lift cables are damaged.
  • The door is severely out of balance.
  • Multiple repairs have failed to solve the problem.
  • Electrical testing identifies voltage irregularities.
  • Water damage has reached the opener electronics.
  • The garage door unexpectedly drops, binds, or makes loud grinding noises.

A professional has specialized diagnostic tools and can identify less obvious faults while ensuring the entire garage door system remains safe.


Estimated Repair Costs

Repair costs vary depending on your location, the opener brand, and whether you perform the work yourself or hire a technician. The table below provides typical cost ranges for common repairs.

Repair Estimated Cost DIY or Professional
Clean sensor lenses Free DIY
Realign sensors Free–$20 DIY
Tighten mounting hardware Free–$15 DIY
Replace damaged wiring $15–$75 DIY or Professional
Replace one garage door sensor $30–$100 DIY or Professional
Replace both sensors $60–$180 DIY or Professional
Replace opener logic board $100–$300 Professional
Install a new garage door opener $300–$800+ Professional

Frequently Asked Questions

Why are my garage door sensors blinking but nothing is blocking them?

A blinking sensor usually means the sensors are not communicating correctly, even if the doorway is clear. Check for dirty lenses, slight misalignment, loose wiring, moisture, or sunlight interference. These issues can interrupt the infrared beam without an obvious physical obstruction.

Can I use my garage door if the sensors are blinking?

You should avoid normal operation until the issue is fixed. While many openers allow you to close the door by holding the wall control button, this bypasses the safety feature and should only be used temporarily when necessary and when the doorway is completely clear.

How do I know which garage door sensor is bad?

A faulty sensor often has no indicator light or continues blinking after alignment, cleaning, and wiring checks. Swapping sensors with compatible replacements or following the manufacturer’s diagnostic procedures can help confirm whether the sensor itself has failed.

Does sunlight really affect garage door sensors?

Yes. Direct sunlight can interfere with some photo-eye sensors by overwhelming the receiver. This usually causes problems only during certain times of the day. Repositioning the sensor or adding a small shade can often eliminate the issue.

Why does my garage door open normally but won’t close?

This commonly happens because the safety sensors are detecting an interruption or communication fault. The opening function typically does not rely on the sensor beam, but the closing function does for safety reasons.

Should both garage door sensor lights be solid?

In most systems, yes. A properly functioning pair of sensors usually displays steady indicator lights, although the exact colors vary by manufacturer. A blinking or unlit LED generally indicates an alignment, wiring, or sensor problem that requires attention.

Can I replace garage door sensors myself?

Yes, many homeowners can replace sensors if they follow the manufacturer’s instructions and disconnect power before starting. However, compatibility is important, so always use replacement sensors designed for your specific garage door opener model.

How often should I test my garage door safety sensors?

Testing the sensors once a month is a good maintenance practice. Place an object in the beam while closing the door to verify that it immediately stops and reverses. Regular testing helps ensure the safety system continues to protect people, pets, and property.

Are blinking sensors always caused by bad sensors?

No. In many cases, the sensors themselves are functioning correctly. Misalignment, dirty lenses, wiring damage, moisture, power interruptions, or opener control board issues are often responsible for the blinking lights.


Final Thoughts

Blinking garage door sensors are more than a minor inconvenience—they are a warning that your garage door’s safety system is not operating as intended. In many cases, the solution is surprisingly simple. Cleaning the sensor lenses, realigning the photo eyes, removing an obstruction, or tightening a loose wire can often restore normal operation within minutes.

The key to successful troubleshooting is following a logical process. Begin with the easiest inspections, test the system after each step, and only consider replacing parts after ruling out common causes. Taking this approach saves time, reduces unnecessary expenses, and prevents replacing components that are still working properly.

Remember that why are my garage door sensors blinking is a question with several possible answers, ranging from simple maintenance issues to electrical faults. By understanding how the sensor system works, recognizing early warning signs, and performing regular preventive maintenance, you can keep your garage door operating safely and reliably for years. If you encounter electrical problems, damaged springs, or persistent sensor failures, don’t hesitate to contact a qualified garage door professional to ensure the repair is completed safely and correctly.

Leave a Comment