
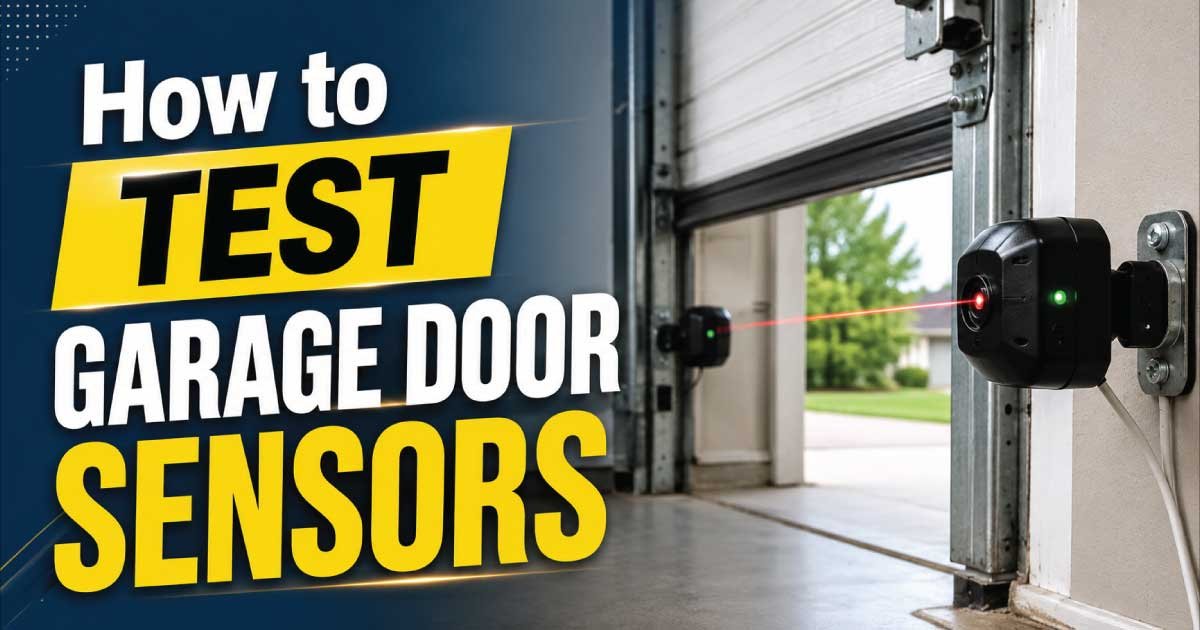
Garage door sensors are one of the most important safety features on any automatic garage door system. They prevent the door from closing if a person, pet, or object is in the way. When these sensors stop working correctly, the garage door may refuse to close, reverse unexpectedly, or flash warning lights instead of operating normally. While these problems can be frustrating, they are often caused by simple issues such as dirty sensor lenses, loose wiring, poor alignment, or blocked infrared beams rather than a major equipment failure.
Knowing how to test garage door sensors can save time, prevent unnecessary replacement of parts, and help you determine whether the issue is safe to fix yourself or requires professional repair. In this guide, you’ll learn how garage door safety sensors work, the warning signs of a failing system, the most common causes of sensor problems, essential safety precautions, the tools you’ll need, and a step-by-step troubleshooting process. By the end of this guide, you’ll be able to diagnose most garage door sensor issues with confidence while keeping safety as the top priority.
Common Signs and Symptoms
Garage door sensor problems rarely appear without warning. In many cases, the opener is still working correctly, but the safety system prevents the door from closing because it believes something is blocking the opening. Understanding these symptoms helps narrow down the cause before you begin troubleshooting.
Common signs include:
- The garage door starts to close but immediately reverses.
- The door will only close when you hold the wall control button.
- The opener light flashes repeatedly after a failed closing attempt.
- One or both sensor indicator lights are off.
- The sensor lights blink instead of staying solid.
- The garage door closes inconsistently.
- The remote control opens the door but cannot close it.
- The door stops a few inches above the floor.
- Error codes appear on newer smart garage door openers.
- The sensors appear loose, crooked, or damaged.
You may also notice that the problem changes depending on the weather. Bright sunlight, heavy rain, dust, or vibration from frequent door movement can temporarily affect sensor performance. These clues are valuable because they often point toward alignment or environmental issues rather than electrical failure.
How the Appliance or System Normally Works
Before testing the sensors, it helps to understand what they are designed to do. Knowing how the system normally operates makes it easier to recognize where the failure is occurring during diagnosis.
Most modern garage doors use two photo-eye safety sensors mounted near the bottom of each side of the door track, usually about six inches above the floor.
One sensor acts as the transmitter, sending an invisible infrared beam across the doorway. The other serves as the receiver, detecting that beam.
When everything works correctly:
- The transmitter continuously sends the infrared signal.
- The receiver detects the signal.
- The garage door opener confirms the beam is uninterrupted.
- The opener allows the door to close normally.
If the beam becomes blocked by a child, pet, bicycle, or other object, the opener immediately stops or reverses the door to prevent injury or property damage.
Most sensors also include LED indicator lights:
- A steady light usually indicates normal operation.
- A blinking light often means poor alignment.
- No light may indicate power loss, damaged wiring, or a failed sensor.
This simple safety system has been required on residential automatic garage doors for many years, making sensor testing one of the first troubleshooting steps whenever the door refuses to close.
Most Common Reasons This Problem Happens
Many homeowners assume faulty sensors need immediate replacement. In reality, replacement is often unnecessary because the problem is caused by dirt, movement, wiring, or environmental conditions. Identifying the true cause helps avoid unnecessary repair costs.
Dirty Sensor Lenses
Dust, cobwebs, pollen, grease, and road debris can collect on the sensor lenses over time.
Why it happens
Garage environments naturally collect dirt. Lawn equipment, vehicles, and woodworking projects all create airborne particles that settle on the sensors.
Symptoms
- Blinking sensor lights
- Door reverses before fully closing
- Inconsistent operation
How to identify it
Inspect both lenses closely. If they appear cloudy or dirty, gently wipe them with a soft microfiber cloth. Avoid abrasive cleaners that may scratch the lens.
Misaligned Sensors
Even a slight shift in alignment can interrupt the infrared beam.
Why it happens
Garage doors vibrate every time they open and close. Accidental bumps from bicycles, trash cans, or vehicles can also move the mounting brackets.
Symptoms
- One indicator light blinks continuously
- Door refuses to close
- Problem began after something hit the sensor
How to identify it
Stand behind one sensor and visually check whether it points directly toward the sensor on the opposite side.
Obstructed Sensor Beam
Objects don’t have to touch the sensors to interrupt their operation.
Why it happens
Anything crossing the invisible beam blocks communication.
Symptoms
- Door immediately reverses
- Problem disappears after moving an object
How to identify it
Look for:
- Boxes
- Garden tools
- Toys
- Pet bowls
- Leaves
- Snow buildup
- Ice
- Tall grass
Even hanging extension cords or decorations can interfere if they cross the beam.
Loose or Damaged Wiring
Garage door wiring is exposed to vibration, moisture, pests, and accidental damage.
Why it happens
Over time, wire connections may loosen or insulation may become damaged.
Symptoms
- Sensor lights randomly turn off
- Intermittent operation
- Door works only occasionally
How to identify it
Inspect visible wiring for:
- Cuts
- Pinched insulation
- Loose wire nuts
- Corrosion
- Rodent damage
Avoid handling exposed wires while power is connected.
Sunlight Interference
Although modern sensors are designed to resist interference, direct sunlight can still affect certain models.
Why it happens
Low-angle sunlight may shine directly into the receiving sensor.
Symptoms
- Garage door fails only during certain times of day
- Works normally after sunset
How to identify it
Notice whether the issue consistently occurs during morning or afternoon sunlight.
Moisture Damage
Water can affect both sensors and electrical connections.
Why it happens
Heavy rain, flooding, or condensation can enter damaged sensor housings.
Symptoms
- Sensor failure after storms
- Corrosion
- Flickering indicator lights
How to identify it
Check for water stains, rust, cracked housings, or moisture around connectors.
Faulty Sensor Components
Although less common, electronic components can eventually wear out.
Why it happens
Age, power surges, or manufacturing defects may cause internal failure.
Symptoms
- Proper alignment but no indicator lights
- All wiring appears intact
- Cleaning has no effect
How to identify it
After eliminating every other likely cause, the sensor itself may require replacement.
Safety Precautions Before Troubleshooting
Garage door systems combine electricity, moving mechanical parts, springs under extreme tension, and heavy doors. Even though testing sensors is usually a safe DIY task, following proper safety practices reduces the risk of injury and equipment damage.
Before beginning any troubleshooting:
- Disconnect electrical power to the opener before inspecting wiring.
- Never loosen or adjust garage door torsion springs or extension springs.
- Keep children and pets away from the work area.
- Avoid standing directly under a partially open garage door.
- Wear safety glasses when inspecting hardware.
- Use a stable ladder if you need to reach the opener.
- Do not touch bare electrical wires.
- Avoid spraying water directly onto the sensors.
- If the door feels unusually heavy or unbalanced, stop troubleshooting and arrange a professional inspection.
- Restore power only when you’re ready to test the system.
If you ever smell burning insulation, notice melted wiring, or hear unusual grinding noises from the opener, discontinue DIY troubleshooting until the electrical issue has been diagnosed.
Tools Required
Before starting the inspection, gather a few basic tools. Most homeowners already own everything needed to perform a complete sensor diagnosis.
| Tool | Purpose |
|---|---|
| Microfiber cloth | Clean sensor lenses without scratching them |
| Flashlight | Inspect sensors, wiring, and mounting brackets |
| Tape measure | Verify both sensors are mounted at the same height |
| Screwdriver set | Tighten loose mounting brackets or terminal screws |
| Small level | Check sensor alignment |
| Multimeter | Test electrical voltage and wiring continuity if needed |
| Soft brush | Remove cobwebs and debris |
| Safety glasses | Protect your eyes during inspection |
| Step ladder | Safely reach the garage door opener if necessary |
Step-by-Step Troubleshooting Guide
Testing garage door sensors is easiest when you follow a logical sequence. Starting with the simplest inspections often solves the problem before more advanced diagnosis becomes necessary.
Step 1: Inspect the Sensor Lights
What to inspect
Look at both sensor LED indicators.
Why it matters
The indicator lights immediately reveal whether the sensors have power and are communicating correctly.
Expected result
Both lights should be illuminated steadily.
What to do next
If one light is off or blinking, continue to the next step.
Step 2: Remove Any Obstructions
What to inspect
Check the entire space between the two sensors.
Why it matters
Even small objects can interrupt the infrared beam.
Expected result
Nothing blocks the path between the sensors.
What to do next
Remove any obstruction and test the door again.
Step 3: Clean Both Sensor Lenses
What to inspect
Look for dirt, fingerprints, cobwebs, or moisture.
Why it matters
A dirty lens weakens the infrared signal and causes false obstruction detection.
Expected result
The lenses should appear clean and clear.
What to do next
Test the garage door after cleaning.
Step 4: Check Sensor Alignment
What to inspect
Confirm both sensors face each other directly.
Why it matters
Even slight movement can prevent the receiver from detecting the beam.
Expected result
Both LEDs remain steadily lit.
What to do next
Carefully adjust the brackets until the lights stabilize.
Step 5: Examine the Mounting Brackets
What to inspect
Check whether either sensor is loose or tilted.
Why it matters
Vibration from repeated door movement can gradually shift the brackets.
Expected result
Both sensors remain firmly secured.
What to do next
Tighten loose hardware before retesting.
Step 6: Inspect Visible Wiring
What to inspect
Follow each wire from the sensor to the opener.
Why it matters
Loose or damaged wiring interrupts communication.
Expected result
No cuts, corrosion, or loose connections.
What to do next
If wiring damage is visible, disconnect power before making any repairs or replacing damaged sections.
Step 7: Perform a Functional Test
What to inspect
Close the garage door while intentionally placing a safe object, such as a cardboard box, in the sensor beam.
Why it matters
This confirms the safety reversal system still functions correctly.
Expected result
The door should immediately stop or reverse before contacting the object.
What to do next
If the door fails this test or behaves unpredictably despite all previous inspections, further diagnosis or component testing may be necessary.
Quick Diagnosis Table
The following table summarizes the most common symptoms homeowners encounter when learning how to test garage door sensors and provides a practical starting point for troubleshooting.
| Symptom | Possible Cause | Recommended Solution |
|---|---|---|
| Door reverses before closing | Dirty sensor lens | Clean both sensor lenses |
| One sensor light is blinking | Misaligned sensors | Realign both sensors until lights stay solid |
| One sensor light is off | Power or wiring issue | Inspect wiring and electrical connections |
| Door only closes while holding wall button | Sensor communication failure | Test alignment, wiring, and sensor operation |
| Door stops near the floor | Beam interruption | Remove obstacles and inspect alignment |
| Sensors work intermittently | Loose bracket or wiring | Tighten hardware and inspect cables |
| Problem occurs only during sunny hours | Sunlight interference | Shade the receiving sensor or adjust alignment |
| Sensors fail after heavy rain | Moisture damage | Dry components and inspect for corrosion |
| Sensors appear normal but door still won’t close | Faulty sensor or opener logic | Continue with advanced diagnosis and repair procedures |
How to Fix Each Common Cause
Once you have completed the inspection process, the next step is correcting the problem that caused the sensor failure. Many garage door sensor issues can be fixed with basic tools, but the repair method depends on the actual cause. Avoid replacing parts before confirming the diagnosis because a simple adjustment or cleaning often restores normal operation.
Always disconnect power before working on wiring or removing sensor components. The garage door opener uses low-voltage wiring for the sensors, but the opener itself connects to household electricity. Safe troubleshooting prevents accidental shocks and protects the equipment.
Cleaning and Restoring Dirty Sensors
Dirty sensor lenses are among the easiest problems to fix and one of the most common reasons a garage door refuses to close.
Repair method:
- Turn off power to the garage door opener.
- Wipe both sensor lenses using a clean microfiber cloth.
- Remove cobwebs, dust, and debris around the sensor brackets.
- Check that no cleaning residue remains on the lens.
- Restore power and test the garage door.
Avoid using harsh chemicals, window cleaners, or abrasive materials. These products can leave residue or damage the plastic lens surface.
Correcting Misaligned Sensors
Sensor alignment problems usually happen gradually because of vibration, accidental bumps, or loose mounting hardware.
Repair method:
- Check whether both sensors are mounted at the same height.
- Loosen the mounting screws slightly if adjustment is needed.
- Move the sensor slowly until the indicator light becomes steady.
- Tighten the bracket without moving the sensor.
- Test the door several times.
A common mistake is adjusting one sensor too quickly. Small movements make a big difference because the infrared beam is narrow. Make slow adjustments and check the indicator lights after each change.
Repairing Loose Sensor Brackets
A sensor can appear aligned but still fail because the bracket holding it is unstable.
Repair method:
- Tighten loose screws or wing nuts.
- Replace damaged brackets if they no longer hold the sensor securely.
- Make sure the bracket is not bent from impact.
- Confirm the sensor stays in position after several door cycles.
If the sensor moves every time the garage door operates, alignment problems will continue even after adjustment.
Fixing Wiring Problems
Sensor wiring issues require more caution because damaged wires can create unreliable operation.
Before working on wiring, disconnect power to the garage door opener.
Inspect the wires for:
- Cuts or cracks in the insulation
- Loose connections at the opener terminals
- Corrosion near sensor connections
- Signs of pests chewing the cable
For minor issues, reconnecting loose low-voltage wires may solve the problem. If wiring is damaged inside walls, severely corroded, or repeatedly failing, professional repair may be the better option.
Do not bypass safety sensors by connecting wires together or disabling the system. These sensors exist to prevent serious injuries and should always remain operational.
Protecting Sensors From Sunlight Problems
If the garage door only fails during certain hours of the day, sunlight interference may be affecting the receiver.
Possible solutions include:
- Adjusting sensor alignment slightly.
- Installing a small sun shield designed for garage door sensors.
- Checking whether nearby reflective surfaces are directing sunlight toward the receiver.
Avoid blocking the sensor permanently. The infrared beam must remain clear for the safety system to work properly.
Replacing Failed Sensors
If cleaning, alignment, and wiring checks do not solve the issue, the sensor itself may have failed.
Sensor replacement is often straightforward, but compatibility matters. Garage door opener manufacturers use different sensor designs, and older systems may require specific replacement parts.
A typical replacement involves:
- Disconnecting power.
- Removing the old sensor.
- Connecting the replacement sensor wires.
- Mounting the new sensor at the correct height.
- Aligning both sensors.
- Testing the safety reversal function.
If the replacement sensor does not communicate with the opener, the problem may be with the opener control board rather than the sensor.
Advanced Troubleshooting
Basic cleaning and alignment solve many garage door sensor problems, but some failures require deeper diagnosis. Advanced troubleshooting helps identify electrical problems, opener issues, and uncommon failures that are harder to detect.
Before performing advanced tests, disconnect power whenever handling wiring. If you are uncomfortable testing electrical components, contact a qualified garage door technician.
Testing Sensor Power With a Multimeter
A multimeter can help determine whether the sensors are receiving electrical power.
General process:
- Disconnect power before accessing wiring.
- Set the multimeter to the appropriate voltage setting.
- Check the sensor wiring according to the opener manufacturer’s instructions.
- Compare readings with the manufacturer’s specifications.
A power issue may indicate:
- Damaged wiring
- Loose terminal connections
- Opener circuit board problems
Do not assume the sensor is defective simply because it does not light up. A wiring or power supply problem can create the same symptom.
Checking the Garage Door Opener Control Board
The control board acts as the brain of the garage door opener. If it cannot interpret the sensor signal correctly, the door may behave as though the sensors are blocked.
Possible signs of a control board issue include:
- Sensors appear correctly aligned.
- Wiring tests correctly.
- Replacement sensors do not solve the problem.
- Multiple opener functions fail at the same time.
Control board replacement is usually more complex than sensor replacement and may not be practical for inexperienced homeowners.
Diagnosing Intermittent Sensor Failures
Intermittent problems are often the most difficult because the system works sometimes and fails at other times.
Common causes include:
- Loose wiring connections
- Vibrating sensor brackets
- Moisture entering sensor housings
- Aging electronic components
A useful troubleshooting technique is observing when the failure occurs:
- Only after rain? Suspect moisture.
- Only after the door shakes? Suspect mounting problems.
- Only in bright sunlight? Suspect interference.
- Randomly throughout the day? Suspect wiring or component failure.
Keeping notes about when the problem happens can make diagnosis much faster.
When Repair Is Not Worth It
Although many sensor problems are inexpensive to fix, there are situations where replacement or professional service makes more sense. Continuing to repair an aging system can cost more time and money than upgrading the equipment.
Consider replacing components or the entire opener when:
- The garage door opener is very old.
- Replacement parts are difficult to find.
- The control board has failed.
- Multiple electrical problems occur at the same time.
- The opener has repeated safety failures.
- The motor is noisy, weak, or unreliable.
- The system lacks modern safety features.
Older garage door openers may also use outdated technology with fewer diagnostic features. Newer models often include improved sensors, battery backup systems, smartphone controls, and better safety monitoring.
A professional evaluation can help determine whether repairing the existing system is financially sensible.
Preventive Maintenance Tips
Regular maintenance reduces the chance of unexpected garage door sensor failures. A few minutes of inspection every few months can prevent many common problems.
Follow these maintenance practices:
- Clean sensor lenses every few months.
- Check that sensors remain aligned.
- Inspect wiring for damage.
- Keep the area around sensors clear.
- Tighten loose mounting hardware.
- Test the auto-reverse safety feature regularly.
- Protect sensors from direct impacts.
- Keep garage areas dry to prevent corrosion.
A good maintenance schedule includes checking the sensors whenever you lubricate the garage door tracks, inspect rollers, or perform general garage door maintenance.
Never lubricate the sensor lenses or spray lubricant near electrical components. Garage door lubricant is designed for mechanical parts, not electronics.
Common Mistakes to Avoid
Many homeowners accidentally create bigger problems while trying to fix garage door sensors. Avoiding these mistakes makes troubleshooting safer and more effective.
Common mistakes include:
- Replacing sensors before checking alignment.
- Adjusting the door springs to solve a sensor problem.
- Covering sensors to force the door to close.
- Ignoring blinking warning lights.
- Using incorrect replacement sensors.
- Pulling wires aggressively during inspection.
- Testing the door without checking the safety reversal function.
- Working on electrical connections without disconnecting power.
One of the most dangerous mistakes is bypassing the sensor system. While it may temporarily allow the door to close, it removes an important safety feature and can create a serious accident risk.
When to Call a Professional
Many garage door sensor issues are suitable for DIY repair, but some situations require professional help. Knowing your limits prevents injuries and avoids unnecessary damage.
Call a garage door technician if:
- The door is damaged or off its tracks.
- The springs appear broken or unsafe.
- Electrical wiring problems extend beyond simple connections.
- The opener control board may have failed.
- Replacement sensors do not solve the issue.
- The door behaves unpredictably.
- The garage door will not stay open safely.
A professional repair technician has specialized testing equipment and experience diagnosing problems that may not be obvious during a visual inspection.
If the garage door itself is heavy, uneven, or making unusual mechanical noises, avoid focusing only on the sensors. The underlying problem may involve springs, cables, rollers, or opener components.
Estimated Repair Costs
Garage door sensor repair costs vary depending on whether the issue requires cleaning, adjustment, replacement parts, or professional service.
| Repair | Estimated Cost | DIY or Professional |
|---|---|---|
| Cleaning sensor lenses | $0–$10 | DIY |
| Sensor alignment adjustment | $0–$20 | DIY |
| Tightening brackets | $0–$10 | DIY |
| Replacing sensor brackets | $10–$30 | DIY |
| Replacing safety sensors | $30–$100 | DIY or Professional |
| Repairing damaged wiring | $50–$150 | Professional recommended |
| Replacing opener control board | $100–$300 | Professional recommended |
| Full garage door opener replacement | $300–$700+ | Professional recommended |
Prices vary based on location, opener brand, labor rates, and the complexity of the repair.
Frequently Asked Questions
How do I know if my garage door sensors are bad?
You can identify bad garage door sensors by checking for blinking or missing indicator lights, repeated door reversals, or a door that refuses to close. First clean the lenses, remove obstacles, and confirm alignment. If the sensors still fail after these checks and wiring appears intact, the sensor components may need replacement.
Can I test garage door sensors without special tools?
Yes, most garage door sensor tests require only visual inspection and basic cleaning. You can check indicator lights, remove obstacles, clean the lenses, and verify alignment without professional equipment. A multimeter is only needed for advanced electrical diagnosis when simple troubleshooting does not identify the problem.
Why does my garage door close only when I hold the button?
A garage door that closes only while holding the wall button usually indicates a safety sensor problem. The opener enters manual override mode because it is not receiving a proper sensor signal. Check for blocked beams, dirty lenses, misalignment, or damaged wiring before considering sensor replacement.
How often should garage door sensors be tested?
Garage door sensors should be tested every few months and whenever the door behaves differently. Regular testing confirms that the auto-reverse safety system works correctly. Homeowners should also test the sensors after storms, accidental impacts, garage renovations, or any work performed near the door tracks.
Will a garage door work if one sensor is broken?
A garage door opener usually will not close normally if one safety sensor is broken or disconnected. The opener is designed to prevent closing when it cannot verify that the infrared safety beam is working. This prevents the door from operating without a functioning safety system.
Can sunlight stop garage door sensors from working?
Yes, direct sunlight can interfere with some garage door sensors, especially when bright light enters the receiving sensor at certain angles. If the problem happens only during specific times of day, adjust the sensor alignment or add a proper sun shield rather than disabling the safety system.
Are all garage door sensors universal?
No, garage door sensors are not always universal. Many openers require sensors that match the manufacturer and model. Using incompatible sensors may cause communication problems even if the wiring connections appear correct. Always check compatibility before purchasing replacement parts.
How long do garage door sensors usually last?
Garage door sensors often last many years, but their lifespan depends on environmental conditions, installation quality, and maintenance. Moisture, physical damage, electrical surges, and extreme temperatures can shorten their useful life. Regular cleaning and inspection help extend sensor performance.
Should I replace both garage door sensors at the same time?
Replacing both sensors together is often recommended because they work as a matched pair. If one sensor fails due to age, the other may also be nearing the end of its service life. Replacing both can reduce future troubleshooting and ensure reliable operation.
Final Thoughts
Learning how to test garage door sensors allows homeowners to solve many common garage door problems safely and efficiently. In most cases, the issue comes from simple causes such as dirt buildup, sensor misalignment, blocked infrared beams, or loose wiring rather than a major mechanical failure.
A careful troubleshooting process starts with basic inspections before moving to advanced diagnosis. Cleaning the lenses, checking alignment, inspecting wiring, and testing the safety reversal function can often restore normal operation without expensive repairs.
However, garage doors are heavy systems with powerful moving parts and electrical components. Avoid bypassing safety features or attempting repairs beyond your experience level. When problems involve damaged wiring, opener electronics, broken springs, or unsafe door movement, professional repair is the safest choice.
Regular maintenance remains the best way to prevent future sensor failures. Keeping sensors clean, checking alignment, and testing the safety system periodically helps ensure your garage door continues working reliably while protecting everyone who uses it.

Engineer Ali Hasan is a garage door expert and the founder of FixFasty. With over 16 years of experience in mechanical systems and home maintenance, he provides practical, step-by-step guides on garage door installation, repairs, and maintenance, helping homeowners keep their garage doors safe, reliable, and long-lasting.