
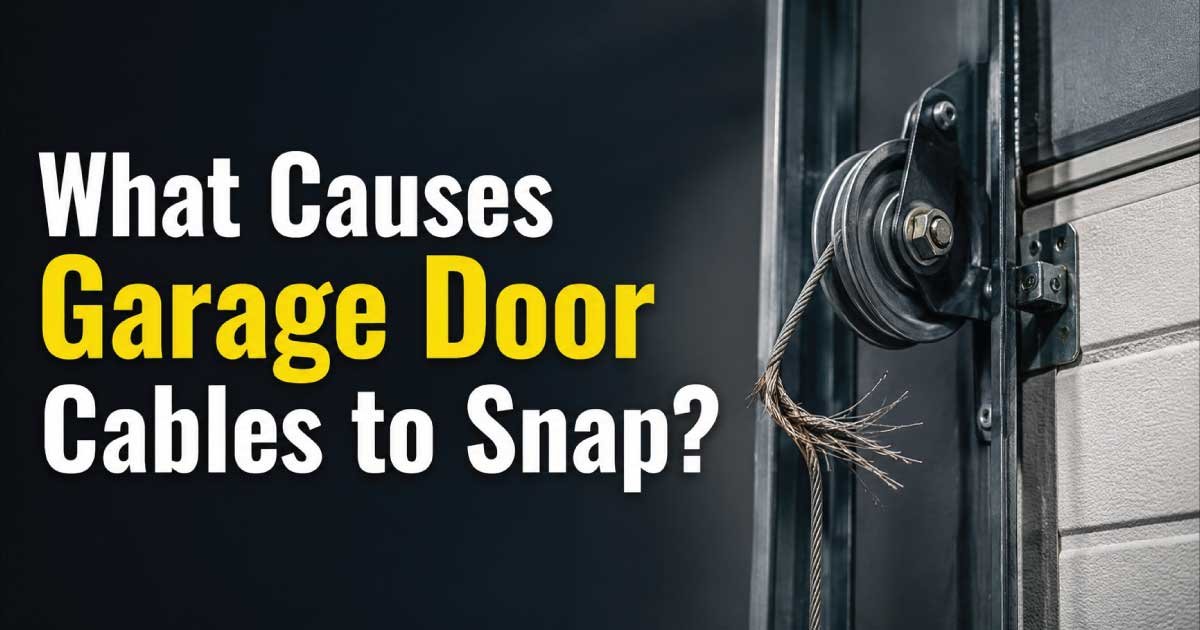
Garage door cables play a critical role in safely raising and lowering your garage door. Although they look like simple steel wires, they work under extremely high tension alongside the springs to support the full weight of the door. When a cable snaps, the garage door can become crooked, refuse to open, slam shut unexpectedly, or even create a serious safety hazard.
Garage door cables rarely break without warning. In most cases, gradual wear, rust, poor maintenance, damaged pulleys, aging springs, or improper installation weaken the cable over time until it eventually fails. Understanding these warning signs can help you prevent sudden breakdowns and avoid more expensive repairs.
This repair guide explains what causes garage door cables to snap, how the garage door lifting system normally works, the most common reasons cables fail, essential safety precautions before troubleshooting, the basic tools used during inspection, and a step-by-step troubleshooting process to help you diagnose the problem safely. By the end of this guide, you’ll know which inspections you can perform yourself and when professional repair is the safest choice.
Common Signs and Symptoms
A snapped garage door cable usually causes obvious problems, but early warning signs often appear weeks or even months before complete failure. Recognizing these symptoms early can help prevent additional damage to the garage door, tracks, rollers, and opener.
Common symptoms include:
- The garage door hangs unevenly or appears crooked.
- One side of the door rises while the other remains lower.
- Loose or dangling cable near the drum.
- Frayed or broken steel strands on the cable.
- Loud snapping or popping noise during operation.
- Garage door becomes unusually heavy to lift manually.
- Door stops halfway while opening or closing.
- Garage door opener strains or reverses unexpectedly.
- Cable has come off the drum.
- Visible rust or corrosion on the cable.
- Excessive vibration while the door moves.
- Rollers jump out of the track after the cable fails.
Other warning signs may include:
- Jerky door movement
- Grinding sounds from the cable drum
- Uneven gaps along the bottom of the closed door
- Slow door operation despite a functioning opener
Ignoring these symptoms often leads to additional repairs because the garage door system is designed to distribute weight evenly. Once one cable fails, extra stress is placed on the remaining cable, springs, and opener.
How the Garage Door System Normally Works
Understanding how the lifting system works makes it much easier to diagnose why a garage door cable snaps. The cables are not responsible for lifting the door by themselves. Instead, they work together with the springs to safely counterbalance the door’s weight.
In a typical residential garage door:
- Torsion or extension springs store mechanical energy.
- Steel cables connect the bottom brackets to the cable drums or pulleys.
- As the springs unwind or stretch, they pull the cables.
- The cables lift the door evenly on both sides.
- The garage door opener mainly guides movement rather than lifting the full weight.
Without properly functioning cables, the springs cannot transfer lifting force evenly. The result is an unbalanced door that may twist, bind in the tracks, or suddenly drop.
Because garage door springs remain under extremely high tension, cable problems should never be treated as isolated issues. A damaged cable often indicates another component in the lifting system also needs inspection.
Most Common Reasons This Problem Happens
Garage door cables usually fail because of gradual wear rather than a single event. Understanding the root cause helps prevent the replacement cable from failing prematurely.
Normal Wear and Tear
Steel cables naturally wear down after thousands of opening and closing cycles. Every time the garage door moves, the cable bends around the drum and experiences significant tension.
Why it happens
Repeated flexing slowly weakens the individual steel strands until they begin breaking.
Symptoms
- Frayed strands
- Rough cable surface
- Door operates normally before sudden failure
How to identify it
Inspect the full cable length. Broken wire strands, flattened sections, or fuzzy-looking areas usually indicate age-related wear.
Rust and Corrosion
Moisture is one of the biggest enemies of garage door cables. Garages exposed to humidity, coastal air, rain, or snow often experience corrosion much sooner.
Why it happens
Rust eats away at the steel, reducing the cable’s strength and flexibility.
Symptoms
- Orange or brown discoloration
- Stiff cable movement
- Rough texture
How to identify it
Look closely where the cable wraps around the drum. Rust often develops first in these high-friction areas.
Lack of Preventive Maintenance
Garage doors require periodic inspection even if they appear to work properly. Small problems often go unnoticed until a cable finally snaps.
Why it happens
Dust, debris, corrosion, and worn hardware increase friction throughout the lifting system.
Symptoms
- Squeaking noises
- Jerky movement
- Faster cable wear
How to identify it
Inspect rollers, hinges, drums, and cables for dirt buildup, rust, or signs of neglect.
Worn or Broken Springs
Many homeowners replace the cable without realizing the spring caused the problem.
Why it happens
Weak springs force the cables to carry more load than intended.
Symptoms
- Heavy garage door
- Door won’t stay halfway open manually
- Opener struggles
How to identify it
Look for visible spring gaps, stretched extension springs, or uneven torsion spring tension.
Misaligned Cable Drums
The cable drum keeps the cable winding evenly as the door moves.
Why it happens
Loose hardware or improper adjustment allows the cable to wind unevenly.
Symptoms
- Cable overlaps itself
- Door lifts unevenly
- Cable slips off the drum
How to identify it
Watch the cable while slowly raising the door manually. It should wrap smoothly without crossing itself.
Damaged Rollers or Tracks
Garage door cables depend on smooth door movement. Binding rollers increase cable tension.
Why it happens
Bent tracks or worn rollers force one side of the door to resist movement.
Symptoms
- Grinding noises
- Uneven lifting
- Door sticks during travel
How to identify it
Inspect the tracks for dents and confirm every roller turns freely.
Improper Installation
Incorrect cable installation can shorten cable life dramatically.
Why it happens
Improper cable routing, incorrect tension, or poor-quality replacement parts create uneven loading.
Symptoms
- Frequent cable derailment
- Uneven door travel
- Premature cable wear
How to identify it
Look for crossed cables, loose attachment points, or cables that do not sit fully inside the drum grooves.
Accidental Impact
Sometimes the cause is external rather than mechanical.
Why it happens
Vehicles, ladders, bicycles, or heavy tools can strike the lower section of the garage door, shifting the entire lifting system.
Symptoms
- Door suddenly becomes crooked
- Cable slips after impact
- Bent track or bottom bracket
How to identify it
Inspect the area for fresh dents, bent brackets, or signs of collision.
Safety Precautions Before Troubleshooting
Garage door systems contain components under enough stored energy to cause severe injury. Before inspecting any cable problem, take a few important precautions to reduce the risk of accidents.
Always disconnect the garage door opener from electrical power before beginning an inspection. This prevents someone from accidentally operating the door while you are working.
If the door is partially open, do not stand underneath it. A snapped cable can allow the door to fall without warning.
Avoid touching torsion springs, spring anchor brackets, or cable drums if the springs remain under tension. These components require specialized tools and training to adjust safely.
Wear appropriate personal protective equipment, including:
- Safety glasses
- Heavy-duty work gloves
- Closed-toe shoes
Keep children and pets away from the garage while troubleshooting.
Never attempt to:
- Loosen torsion spring set screws
- Remove bottom cable brackets
- Adjust spring tension without proper winding bars
- Operate the opener repeatedly if the cable has snapped
If both the spring and cable appear damaged, stop troubleshooting and arrange for professional repair. Attempting to release spring tension without experience is significantly more dangerous than replacing most other garage door components.
Also Read:
Tools Required
Before beginning a basic inspection, gather the tools needed for safe diagnosis. These tools are intended for inspection and light troubleshooting only—not for adjusting high-tension springs.
| Tool | Purpose |
|---|---|
| Flashlight | Inspect cables, drums, rollers, and tracks |
| Safety glasses | Protect eyes from broken wire strands |
| Work gloves | Prevent cuts from frayed cables |
| Stepladder | Reach upper components safely |
| Tape measure | Check cable alignment and door level |
| Adjustable wrench | Inspect accessible hardware if needed |
| Clean cloth | Wipe dirt from inspection areas |
| Camera or smartphone | Photograph damaged parts for comparison or professional evaluation |
Step-by-Step Troubleshooting Guide
Follow these steps in order to identify the most likely cause of the cable failure without disturbing high-tension components.
Inspect the overall position of the garage door.
Look for uneven gaps, tilted panels, or one side sitting lower than the other. This quickly indicates whether the lifting system has become unbalanced. If the door is badly crooked, stop using it and continue with a visual inspection only.
Examine both garage door cables.
Compare each cable carefully. Look for fraying, rust, broken strands, loose ends, or cables that have slipped off the drum. Matching wear on both sides often points to age, while damage on one side may indicate misalignment.
Check the cable drums.
Inspect whether each cable sits neatly inside the drum grooves. A cable wrapped incorrectly or overlapping itself usually indicates alignment problems that require correction before installing a replacement cable.
Inspect the springs from a safe distance.
Look for visible gaps, stretched coils, or obvious breakage without touching the springs. A failed spring often explains why the cable experienced excessive stress.
Check the rollers and tracks.
Examine rollers for damage and ensure the tracks are straight and free of major dents or obstructions. Smooth door movement reduces unnecessary strain on the cables.
Look for signs of corrosion or poor maintenance.
Check all visible metal components for rust, dirt buildup, or excessive wear. Identifying these issues helps prevent future cable failures after repairs are completed.
Determine the next step.
If the problem is limited to visible wear, document the damage and prepare for cable replacement by a qualified technician or experienced DIYer where appropriate. If spring damage, severe misalignment, or structural damage is present, avoid further operation and arrange professional service.
Quick Diagnosis Table
| Symptom | Possible Cause | Recommended Solution |
|---|---|---|
| Frayed cable | Normal wear | Replace cable and inspect springs |
| Rusty cable | Corrosion | Replace cable and improve preventive maintenance |
| Door lifts unevenly | Cable off drum | Stop operating door and inspect drum alignment |
| Door feels very heavy | Broken or weak spring | Have springs inspected and replaced if necessary |
| Loud snap during operation | Cable or spring failure | Perform visual inspection and avoid using the opener |
| Cable repeatedly slips | Misaligned drum or improper installation | Correct alignment before replacing the cable |
| Grinding or jerky movement | Damaged rollers or tracks | Repair or replace worn hardware |
| Door reverses unexpectedly | Unbalanced lifting system | Inspect cables, springs, and opener settings |
How to Fix Each Common Cause
Now that you’ve identified the likely cause of the problem, the next step is choosing the correct repair. Some issues involve simple maintenance that many homeowners can safely perform, while others involve high-tension components that should only be serviced by trained technicians. The goal is not only to restore normal operation but also to prevent another cable from snapping prematurely.
Replace a Worn or Frayed Cable
A cable with broken strands cannot be repaired and must be replaced.
How to fix it:
- Confirm that the cable—not the spring—is the primary failure.
- Purchase the correct replacement cable designed for your door’s size and weight.
- Replace both cables at the same time, even if only one has broken. They usually wear at a similar rate.
- Verify the cable is routed correctly around the drum or pulley.
- Test door balance after installation.
DIY or professional?
- DIY: Only if you’re experienced and the spring tension has been safely released.
- Professional: Recommended for most homeowners because cable replacement usually requires working around high-tension springs.
Repair Spring Problems
A weak or broken spring places excessive load on the cables.
How to fix it:
- Replace broken springs with the correct size and cycle rating.
- Replace both springs if your door uses a pair and one has failed.
- Check cable condition after spring replacement because an overloaded cable may already be damaged.
Important safety note: Never attempt to unwind or tighten torsion springs without proper winding bars and training. These springs store enough energy to cause serious injury.
Correct Cable Drum Misalignment
A cable that winds unevenly will eventually wear against itself or jump out of the drum grooves.
Repair steps:
- Inspect the drum for cracks or excessive wear.
- Make sure the cable follows the correct groove.
- Tighten loose hardware if accessible without disturbing spring tension.
- Replace damaged drums rather than trying to reshape them.
Once properly aligned, the cable should wrap smoothly with no overlapping loops.
Replace Damaged Rollers
Worn rollers increase resistance throughout the lifting system.
Signs replacement is needed include:
- Cracked wheels
- Flat spots
- Excessive wobbling
- Grinding noises
High-quality nylon rollers generally operate more quietly than standard steel rollers and often require less maintenance.
Repair Bent Tracks
Minor track alignment issues can sometimes be corrected, while severely bent tracks usually require replacement.
Inspect for:
- Loose mounting brackets
- Twisted sections
- Large dents
- Misaligned joints
Never force the door through damaged tracks, as this places additional stress on the cables and opener.
Remove Rust and Improve Maintenance
Surface rust can often be cleaned before it weakens the cable.
Basic maintenance includes:
- Wiping away dirt and debris.
- Inspecting for moisture damage.
- Lubricating rollers, hinges, and bearings with a garage-door-specific lubricant.
Do not lubricate the lifting cables themselves unless the manufacturer specifically recommends it. Many cables are designed to operate dry, and excess lubricant can attract dirt that increases wear.
Replace Poor-Quality Components
Sometimes repeated cable failures are caused by low-quality replacement parts.
Choose replacement components that:
- Match the manufacturer’s specifications.
- Have the correct load rating.
- Are designed for your specific door type.
- Come from reputable suppliers.
Using the wrong cable diameter or length may create unsafe lifting conditions.
Also Read:
Advanced Troubleshooting
If replacing worn components does not solve the problem, the issue may involve a less obvious mechanical fault. Advanced diagnosis focuses on identifying underlying problems that continue placing abnormal stress on the cable system.
Check the following areas carefully.
Door Balance Test
Disconnect the opener using the emergency release cord.
Raise the door halfway manually.
Expected results:
- The door stays in place: spring balance is likely correct.
- The door falls quickly: springs may be weak.
- The door rises by itself: springs may be over-tensioned.
An improperly balanced door causes unnecessary cable strain during every operating cycle.
Inspect Bearing Plates
Worn center or end bearings increase friction on the torsion shaft.
Signs include:
- Grinding sounds
- Shaft wobble
- Uneven cable winding
Replacing worn bearings often improves overall door operation and reduces cable wear.
Check Bottom Brackets
The bottom brackets anchor the lifting cables.
Inspect for:
- Cracks
- Rust
- Loose fasteners
- Bent mounting plates
Never remove bottom brackets while the springs remain under tension.
Examine the Garage Door Opener
Although the opener usually does not cause cable failure directly, incorrect force settings can contribute to premature wear.
Inspect for:
- Excessive opening force
- Improper closing force
- Travel limits set incorrectly
- Repeated reversal during operation
Modern garage door openers often include diagnostic LEDs or digital error codes that help identify operating problems.
Inspect Door Panels
A warped or damaged door may distribute weight unevenly across the lifting system.
Look for:
- Cracked sections
- Water damage
- Bent reinforcement struts
- Loose hinges
Structural damage should be repaired before replacing cables.
When Repair Is Not Worth It
Sometimes replacing a cable alone is only a temporary solution. If multiple major components are worn, replacing the entire garage door system may provide better long-term value and improved safety.
Replacement often makes more sense when:
- The garage door is over 20 years old.
- Multiple springs, cables, rollers, and tracks need replacement.
- The door has severe structural damage.
- Replacement parts are difficult to obtain.
- The repair cost approaches half the cost of a new door.
- The opener is also nearing the end of its service life.
Modern garage doors often provide better insulation, quieter operation, stronger security features, and longer-lasting hardware than older systems.
Preventive Maintenance Tips
Most garage door cable failures can be prevented through regular inspection and routine maintenance. A few minutes of preventive care several times each year can significantly extend the life of the entire lifting system.
Follow these maintenance practices:
- Visually inspect cables every three to six months.
- Look for broken wire strands.
- Watch for rust or corrosion.
- Keep tracks clean.
- Tighten accessible hardware when loose.
- Lubricate hinges, rollers, and bearings as recommended.
- Test door balance twice each year.
- Replace worn rollers before they damage cables.
- Schedule professional inspections every one to two years.
- Address unusual noises immediately instead of waiting for complete failure.
Preventive maintenance is almost always less expensive than emergency repairs after a cable snaps.
Also Read:
Common Mistakes to Avoid
Many homeowners accidentally create larger problems while trying to fix a broken garage door cable. Understanding these common mistakes can save money and reduce the risk of injury.
Avoid these errors:
- Continuing to use the garage door opener after a cable snaps.
- Replacing only one cable instead of both.
- Ignoring frayed strands because the door still works.
- Attempting torsion spring adjustments without proper tools.
- Purchasing cables that do not match the original specifications.
- Lubricating every component without checking manufacturer recommendations.
- Failing to inspect springs when replacing cables.
- Forcing a crooked garage door open or closed.
- Delaying repairs after noticing uneven movement.
- Using worn cables beyond their safe service life.
Correct diagnosis is just as important as replacing damaged parts.
When to Call a Professional
Some garage door repairs are well within the abilities of experienced DIY homeowners, but cable failures often involve high-tension components that require specialized equipment and training. Knowing when to stop troubleshooting protects both your safety and your garage door system.
Professional repair is recommended when:
- A torsion spring has broken.
- The cable has come off the drum under tension.
- The garage door is stuck partially open.
- Both cables have failed.
- The door has fallen off its tracks.
- The shaft or cable drum requires adjustment.
- Structural damage is present.
- You are uncertain about the cause of the problem.
- Specialized tools are required.
- The repair involves releasing or resetting spring tension.
An experienced technician can also inspect the entire lifting system and identify hidden problems that may lead to future failures.
Estimated Repair Costs
Repair costs vary depending on your location, the type of garage door, and whether additional parts require replacement. The following estimates provide a general idea of what homeowners can expect.
| Repair | Estimated Cost | DIY or Professional |
|---|---|---|
| Replace garage door cables | $150–$300 | Professional recommended |
| Replace torsion springs | $200–$450 | Professional |
| Replace extension springs | $150–$300 | Professional |
| Replace rollers | $100–$250 | DIY (some cases) or Professional |
| Track alignment | $125–$300 | Professional |
| Replace cable drums | $150–$350 | Professional |
| Bearing replacement | $100–$250 | Professional |
| Full garage door tune-up | $100–$200 | Professional |
| Garage door replacement | $900–$2,500+ | Professional |
Final Thoughts
Understanding what causes garage door cables to snap helps you respond quickly and prevent small problems from turning into major repairs. In most cases, cable failure results from gradual wear, corrosion, aging springs, misaligned hardware, or poor maintenance rather than a sudden defect. Paying attention to early warning signs—such as frayed strands, uneven door movement, or unusual noises—can help you address issues before the cable breaks completely.
Routine inspections, timely maintenance, and replacing worn components before they fail are the most effective ways to extend the life of your garage door system. While homeowners can safely perform visual inspections and basic maintenance, repairs involving cables, torsion springs, or other high-tension components should be approached with caution. When in doubt, choosing professional repair is often the safest and most cost-effective decision.
By combining regular preventive maintenance with prompt troubleshooting, you can keep your garage door operating smoothly, reduce unexpected breakdowns, and improve the safety and reliability of one of the most frequently used systems in your home.

Engineer Ali Usman is a professional garage door expert and author at FixFasty, with over 10 years of hands-on experience in garage door systems and mechanical maintenance. He writes clear, step-by-step guides on garage door repairs, parts, and safety practices, helping homeowners fix problems correctly and maintain smooth, secure, and long-lasting garage door performance.