
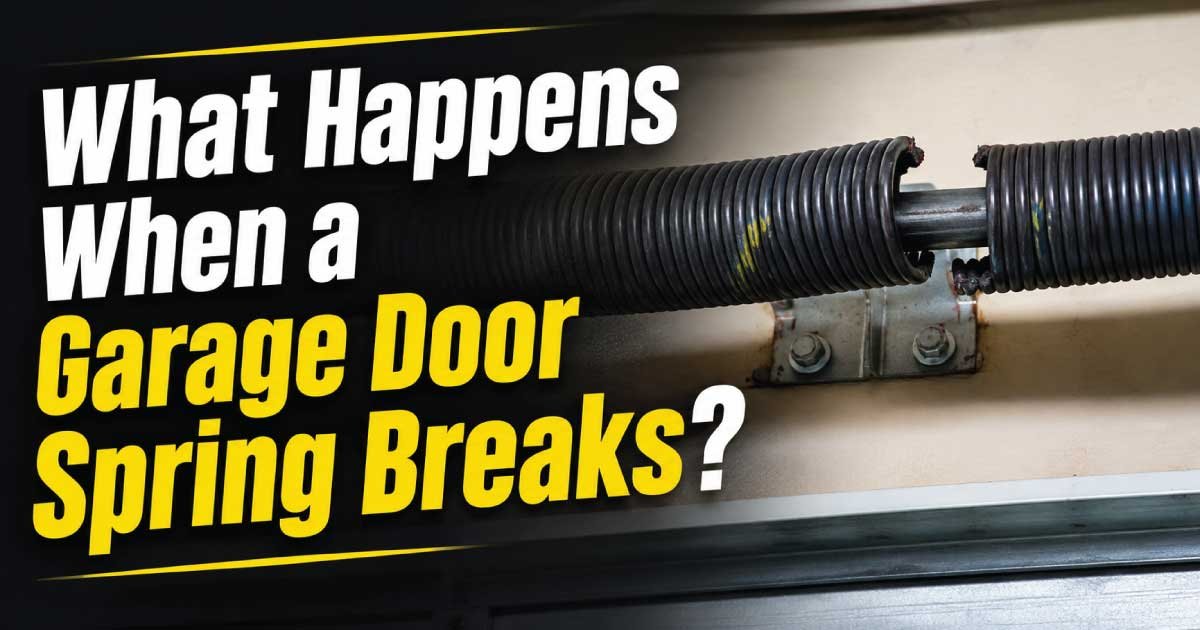
A broken garage door spring is one of the most common and disruptive garage door problems homeowners face. When the spring fails, your garage door may become extremely heavy, refuse to open, slam shut unexpectedly, or leave your vehicle trapped inside. Since garage door springs are responsible for supporting most of the door’s weight, even a high-quality automatic opener cannot safely compensate for a failed spring.
Understanding what happens when a garage door spring breaks is important because continuing to operate the door can damage other components, create expensive repairs, and expose you to serious safety risks. In many cases, homeowners first notice unusual noises, uneven movement, or difficulty lifting the door before the spring completely fails.
This repair guide explains how garage door springs work, the warning signs of failure, the most common reasons springs break, and the safest way to diagnose the problem. You’ll also learn which troubleshooting steps are safe for homeowners, when to stop a DIY inspection, and how to recognize situations that require professional repair. By the end of this guide, you’ll know how to identify the problem quickly while protecting both your garage door system and your personal safety.
Common Signs and Symptoms
Before attempting any troubleshooting, it helps to recognize the symptoms of a broken garage door spring. Many homeowners mistake spring failure for an electrical issue, a faulty garage door opener, or a remote control problem. Knowing the difference can save time and prevent unnecessary repairs.
Common warning signs include:
- A loud bang from the garage. Many homeowners describe it as sounding like a gunshot or firecracker. This is often the spring snapping under tension.
- The garage door will not open. The opener may hum or strain, but the door barely moves.
- The door feels extremely heavy. If you disconnect the opener and try lifting the door manually, it may feel nearly impossible.
- The door opens only a few inches before stopping. Modern openers often detect the excessive weight and stop automatically to prevent damage.
- The garage door closes too quickly. Without spring tension, gravity pulls the door down much faster than normal.
- Visible gap in the torsion spring. A broken torsion spring usually shows a noticeable separation of several inches.
- Crooked or uneven door movement. If one spring breaks on a two-spring system, one side may rise higher than the other.
- Straining garage door opener. The motor may sound louder than usual or reverse unexpectedly.
- Loose or hanging cables. Cables often lose tension after a spring breaks.
These symptoms may appear suddenly after complete spring failure or gradually as the spring weakens from age and repeated use.
How the Appliance or System Normally Works
Understanding how a garage door system normally operates makes it much easier to identify what has failed. While the electric opener receives most of the attention, the springs actually perform the hardest part of lifting the door.
Garage doors commonly weigh between 130 and 300 pounds, while larger insulated or custom wood doors may weigh even more. The opener is not designed to lift all of that weight by itself.
Instead, the springs store mechanical energy whenever the door closes.
The two most common spring systems are:
- Torsion springs, mounted above the garage door on a steel shaft.
- Extension springs, installed alongside the horizontal tracks.
As the door closes:
- The springs become loaded with energy.
- That stored energy helps lift the door during the next opening cycle.
- The opener simply guides the movement rather than carrying the full weight.
When a spring breaks:
- The counterbalance system immediately fails.
- Nearly all of the door’s weight shifts to the opener or anyone attempting manual lifting.
- The opener may stop working correctly because of overload protection.
- Other components, including cables, rollers, and hinges, experience additional stress.
A useful way to think about the system is as a balanced scale. When both springs function properly, the door feels surprisingly light. Once one spring fails, that balance disappears almost instantly.
Most Common Reasons This Problem Happens
Garage door springs rarely fail without a reason. Most eventually wear out from normal use, while others break because of environmental conditions, poor maintenance, or installation issues. Identifying the underlying cause helps prevent the same problem from happening again after replacement.
Normal Wear and Cycle Fatigue
Every garage door spring has a limited service life measured in opening and closing cycles. A standard spring is commonly rated for around 10,000 cycles, while premium springs may last 20,000 cycles or more.
Why it happens
Each opening and closing cycle slightly weakens the steel. Over thousands of cycles, tiny cracks develop until the spring finally snaps.
Symptoms
- Door becomes harder to lift over time.
- Springs appear stretched or worn.
- Sudden loud snapping noise.
How to identify it
If your garage door is 7 to 10 years old and used several times daily, normal wear is often the most likely cause.
Rust and Corrosion
Moisture is one of the biggest enemies of garage door springs. Homes in humid climates or coastal regions often experience faster spring deterioration.
Why it happens
Rust increases friction between the coils and weakens the steel, causing premature failure.
Symptoms
- Visible rust buildup.
- Squeaking during operation.
- Rough spring movement.
How to identify it
Inspect the spring surface using a flashlight. Orange or brown corrosion indicates rust is contributing to wear.
Poor Maintenance
Garage door systems need occasional inspection and lubrication. Skipping maintenance shortens spring life considerably.
Why it happens
Dry coils create additional friction, increasing stress every time the door operates.
Symptoms
- Noisy door movement.
- Jerky opening.
- Increased vibration.
How to identify it
If the springs appear dry and have not been lubricated in years, poor maintenance is likely a contributing factor.
Incorrect Spring Size
Not every spring fits every garage door. Using the wrong size places excessive stress on the system.
Why it happens
An undersized spring works beyond its intended capacity every time the door moves.
Symptoms
- Opener strains.
- Door feels unusually heavy.
- Repeated spring failures.
How to identify it
A technician can measure spring dimensions and compare them with the door’s weight specifications.
Temperature Changes
Steel naturally expands and contracts as temperatures change.
Why it happens
Cold weather makes metal less flexible, increasing the likelihood that an aging spring will finally snap.
Symptoms
- Failure during winter.
- Sudden break after a cold night.
How to identify it
Many homeowners experience spring failure immediately following freezing temperatures, especially if the spring was already near the end of its lifespan.
Accidental Impact or System Damage
Occasionally, another problem damages the spring indirectly.
Why it happens
Vehicle impacts, bent tracks, seized rollers, or damaged cables increase resistance, forcing the springs to absorb extra stress.
Symptoms
- Misaligned tracks.
- Uneven movement.
- Visible hardware damage.
How to identify it
Inspect the entire door system rather than focusing only on the broken spring.
Safety Precautions Before Troubleshooting
Garage door springs store tremendous mechanical energy even when the door appears stationary. While homeowners can safely perform a visual inspection, certain repairs present serious injury risks and should never be attempted without proper training and specialized tools.
Before inspecting your garage door:
- Do not operate the opener repeatedly if you suspect a broken spring. This can burn out the motor or damage internal gears.
- Keep children and pets away from the garage until the problem is diagnosed.
- Avoid standing directly beneath the door, especially if it is partially open.
- Never loosen spring hardware. Torsion springs remain under high tension and can release force violently.
- Disconnect electrical power to the opener before performing any inspection around moving components.
- Wear safety glasses and work gloves to protect against sharp metal edges and debris.
- Do not remove lifting cables. Loose cables can suddenly whip or become tangled.
- Use a sturdy ladder positioned on stable ground if inspecting overhead components.
- Only perform visual inspections unless the manufacturer specifically recommends a homeowner maintenance procedure.
A good rule is simple: if the inspection requires touching the spring itself or adjusting tension, stop and arrange professional repair.
Also Read:
Tools Required
Before beginning diagnosis, gather a few basic tools. These are intended for safe inspection and troubleshooting—not for replacing or adjusting garage door springs.
| Tool | Purpose |
|---|---|
| Flashlight | Inspect springs, cables, rollers, and tracks |
| Safety glasses | Protect eyes during inspection |
| Work gloves | Prevent cuts from sharp metal edges |
| Step ladder | Reach overhead components safely |
| Tape measure | Measure visible spring gaps or door movement if needed |
| Silicone-based garage door lubricant | Lubricate approved moving parts after inspection (not for repairing broken springs) |
| Camera or smartphone | Take photos of damaged parts for comparison or professional consultation |
| Owner’s manual | Confirm manufacturer recommendations and safety procedures |
Step-by-Step Troubleshooting Guide
Diagnosing a broken garage door spring is safest when performed in a logical sequence. These steps help identify the source of the problem without exposing yourself to unnecessary risk or causing additional damage.
- Inspect the door from a distance.
Look for obvious signs such as a crooked door, loose cables, or a visible gap in the spring. This initial inspection helps determine whether a spring failure is likely before touching anything. If you notice major damage, avoid operating the door and continue with a visual assessment only. - Listen for unusual sounds.
Think back to when the problem started. A loud bang often indicates a spring has snapped. This clue can quickly narrow your diagnosis, especially if the opener was working normally beforehand. If you heard a sharp cracking noise, inspect the spring carefully for separation. - Check the torsion or extension springs.
Using a flashlight, examine the springs without standing directly beneath them. A broken torsion spring usually has a clear gap between the coils, while an extension spring may hang loosely. If either spring appears damaged, discontinue troubleshooting and plan for replacement by a qualified technician. - Test the opener’s response.
Press the wall control once and observe what happens. If the motor runs but the door barely moves or reverses immediately, the opener may be reacting to the extra weight caused by a failed spring. Avoid repeated attempts, as they can overheat or damage the opener. - Disconnect the opener only if the door is fully closed.
Pull the emergency release cord only when the door is completely shut. Then try lifting the door a few inches by hand. A properly balanced door should move with moderate effort. If it feels extremely heavy or will not lift, a broken spring is the most likely cause. Reconnect the opener after testing if the door remains safely closed. - Inspect related components.
Examine rollers, tracks, hinges, and lift cables for signs of wear or damage. While these parts may not have caused the spring failure, identifying additional problems now can prevent future breakdowns. If you notice bent tracks or frayed cables, include them in your repair plan.
Quick Diagnosis Table
The following table summarizes common symptoms, their most likely causes, and the next recommended action to help you identify the issue quickly.
| Symptom | Possible Cause | Recommended Solution |
|---|---|---|
| Loud bang from garage | Broken torsion or extension spring | Perform a visual inspection and arrange spring replacement |
| Door will not open | Broken spring or overloaded opener | Inspect springs before operating the opener again |
| Door feels extremely heavy | Loss of spring tension | Stop manual lifting and schedule professional repair |
| Door opens a few inches then stops | Opener detects excessive weight | Check for a broken spring and avoid repeated opener use |
| Garage door closes too fast | Spring no longer supporting door weight | Keep the door closed until repairs are completed |
| Visible gap in torsion spring | Spring has snapped | Replace the damaged spring; do not attempt to rewind it |
| Loose lifting cables | Spring failure reducing cable tension | Do not reconnect cables until the spring is repaired |
| Crooked or uneven door | One spring broken or cable issue | Inspect both springs and the cable system before further operation |
How to Fix Each Common Cause
Now that you’ve identified the likely reason your garage door spring failed, the next step is choosing the safest and most effective repair. Some maintenance tasks are suitable for homeowners, while spring replacement almost always requires specialized tools and training. Knowing the difference can prevent injuries and avoid costly damage to your garage door system.
Replace Worn-Out Springs
A spring that has reached the end of its service life cannot be repaired. Once the metal breaks, replacement is the only safe solution.
How to fix it
- Confirm whether your door uses torsion or extension springs.
- Replace the broken spring with one that matches the door’s weight and dimensions.
- If your system has two springs, replace both whenever possible. Springs installed at the same time usually wear at similar rates.
- After replacement, balance and test the door before reconnecting the opener.
DIY or professional?
- DIY: Not recommended for torsion springs due to the extreme stored tension.
- Professional: Strongly recommended for nearly all spring replacements.
Remove Rust and Prevent Corrosion
Rust shortens spring life, but early corrosion can often be managed before it causes failure.
How to fix it
- Clean light surface rust using a soft cloth.
- Apply a silicone-based garage door lubricant designed for moving metal parts.
- Avoid heavy grease that attracts dust and dirt.
- Keep the garage as dry as possible by improving ventilation if humidity is a problem.
If corrosion is severe or the spring has visible pitting, replacement is the safer choice.
Correct Poor Maintenance
Many spring failures are accelerated by neglected maintenance rather than manufacturing defects.
How to fix it
Perform a basic inspection every three to six months:
- Listen for unusual noises.
- Check for loose hardware.
- Inspect rollers and hinges.
- Lubricate approved moving parts.
- Clean debris from the tracks.
Regular preventive maintenance reduces stress on the entire door system and often extends spring life.
Replace Incorrectly Sized Springs
If springs fail repeatedly after only a few years, incorrect sizing may be the real problem.
A technician should:
- Measure the spring wire diameter.
- Measure spring length and inside diameter.
- Weigh the garage door.
- Install springs designed specifically for that door.
Installing correctly matched springs improves balance, reduces opener strain, and increases overall reliability.
Repair Related Component Damage
Sometimes the spring is only one part of the problem.
Additional repairs may include:
- Replacing worn rollers.
- Repairing bent tracks.
- Replacing frayed lifting cables.
- Tightening loose brackets.
- Adjusting door alignment.
Fixing these issues prevents excessive stress on the new springs.
Also Read:
Advanced Troubleshooting
If the obvious causes have been ruled out, a more detailed inspection may uncover less common problems. These issues often develop slowly and can mimic the symptoms of a broken spring.
Garage Door Opener Failure
A failed opener can make it seem like the spring has broken.
Signs include:
- No motor sound.
- Flashing diagnostic lights.
- Remote controls stop working.
- Wall button does not respond.
Disconnect the opener (only if the door is fully closed) and test manual operation. If the door lifts normally, the opener may be the actual problem.
Damaged Bearings
The center bearing or end bearings help the torsion shaft rotate smoothly.
Symptoms include:
- Grinding noises.
- Jerky movement.
- Uneven lifting.
Worn bearings increase resistance, causing springs to work harder than intended.
Bent Tracks
Even a slightly bent track can create significant resistance.
Inspect for:
- Visible dents.
- Loose mounting brackets.
- Track separation.
- Misalignment.
Minor adjustments may be possible, but severely bent tracks should usually be replaced.
Roller Problems
Rollers that no longer rotate smoothly increase friction throughout the system.
Look for:
- Cracked nylon wheels.
- Rusted steel rollers.
- Flat spots.
- Loose stems.
Replacing worn rollers often restores quieter and smoother operation.
Cable Problems
Lift cables transfer spring force to the door.
Inspect for:
- Fraying.
- Broken strands.
- Loose attachment points.
- Uneven cable tension.
Never attempt to reinstall cables while the spring system is under tension.
Door Balance Test
One of the best overall diagnostic methods is checking door balance.
Only perform this test if:
- The door is fully closed before disconnecting the opener.
- No spring appears broken.
- The cables remain properly attached.
Lift the door halfway.
A properly balanced door should remain nearly stationary.
If it rapidly falls or rises on its own, spring adjustment or replacement is needed.
When Repair Is Not Worth It
Not every garage door problem should end with another repair. Sometimes replacing major components—or even the entire garage door system—is the more practical long-term investment.
Replacement may be the better option when:
- Springs have failed multiple times in recent years.
- The garage door is over 20 years old.
- Tracks are badly damaged.
- Panels are cracked or severely bent.
- The opener is also nearing the end of its lifespan.
- Multiple major parts need replacement simultaneously.
For example, replacing springs, cables, rollers, bearings, and an aging opener on a very old door can cost nearly as much as installing a new system with updated safety features and warranty coverage.
A professional inspection can help determine whether repair or replacement offers better long-term value.
Also Read:
Preventive Maintenance Tips
Garage door springs eventually wear out, but proper maintenance can significantly extend their service life and reduce unexpected failures.
Follow these maintenance practices:
- Inspect the springs every few months for rust, gaps, or visible damage.
- Lubricate springs and hinges with a garage door lubricant two to four times each year.
- Keep the tracks clean and free of debris.
- Tighten loose bolts and brackets when appropriate.
- Listen for new squeaks, grinding, or popping sounds.
- Test the automatic reverse feature monthly.
- Schedule a professional inspection every one to two years.
- Avoid repeatedly opening and closing the door unnecessarily.
- Replace worn rollers before they increase system resistance.
- Address small problems before they become expensive repairs.
Routine maintenance often costs very little but can prevent emergency service calls and unexpected breakdowns.
Common Mistakes to Avoid
Many homeowners unintentionally make a minor garage door problem much worse. Avoiding these common mistakes can protect both your safety and your garage door system.
- Continuing to use the opener after a spring breaks.
- Trying to lift a heavy door without assistance.
- Attempting to rewind torsion springs without proper tools.
- Replacing only one spring when both have similar wear.
- Ignoring unusual noises.
- Using household grease instead of garage door lubricant.
- Failing to inspect cables after spring failure.
- Purchasing replacement springs based only on appearance.
- Skipping routine maintenance.
- Working beneath a partially open garage door.
Avoiding these mistakes often prevents additional repairs and reduces the risk of serious injury.
When to Call a Professional
While homeowners can safely inspect many garage door problems, spring replacement is one of the repairs that usually belongs in the hands of an experienced technician.
Call a professional if:
- A torsion spring has broken.
- Lift cables have come off the drum.
- The door is stuck partially open.
- The door has fallen suddenly.
- Tracks are bent.
- Multiple components are damaged.
- The opener has been overloaded after spring failure.
- You are unsure which spring type your system uses.
- The replacement spring size cannot be verified.
- The garage door feels unsafe to operate.
Professional technicians have specialized winding bars, tensioning equipment, and experience that greatly reduce the risk of injury during spring replacement.
Estimated Repair Costs
The following estimates represent typical price ranges. Actual costs vary depending on your location, garage door size, spring type, and labor rates.
| Repair | Estimated Cost | DIY or Professional |
|---|---|---|
| Lubrication and maintenance | $10–$30 | DIY |
| Roller replacement | $50–$150 | DIY or Professional |
| Lift cable replacement | $100–$250 | Professional |
| Extension spring replacement | $150–$300 | Professional Recommended |
| Torsion spring replacement | $200–$450 | Professional |
| Garage door balance adjustment | $75–$150 | Professional |
| Track repair | $125–$300 | Professional |
| Garage door opener repair | $100–$350 | DIY (minor) or Professional |
| Garage door opener replacement | $300–$800 | Professional |
| Complete garage door replacement | $800–$3,000+ | Professional |
Final Thoughts
Knowing what happens when a garage door spring breaks helps you respond quickly, safely, and confidently. Although the symptoms often appear suddenly—a loud bang, a heavy door, or an opener that refuses to lift—the underlying causes usually develop gradually through normal wear, corrosion, poor maintenance, or improper component sizing.
The most important takeaway is that a broken spring is more than an inconvenience. It affects the balance of the entire garage door system and can place dangerous stress on cables, rollers, tracks, and the opener. While homeowners can safely perform visual inspections, routine maintenance, and basic troubleshooting, spring replacement is generally a job best left to trained professionals because of the high tension involved.
Regular inspections, proper lubrication, and prompt attention to unusual noises or movement can greatly extend the life of your garage door system and reduce the chance of unexpected breakdowns. By following safe troubleshooting practices and addressing problems early, you can minimize repair costs, improve reliability, and keep your garage door operating smoothly for years to come.

Engineer Ali Usman is a professional garage door expert and author at FixFasty, with over 10 years of hands-on experience in garage door systems and mechanical maintenance. He writes clear, step-by-step guides on garage door repairs, parts, and safety practices, helping homeowners fix problems correctly and maintain smooth, secure, and long-lasting garage door performance.