
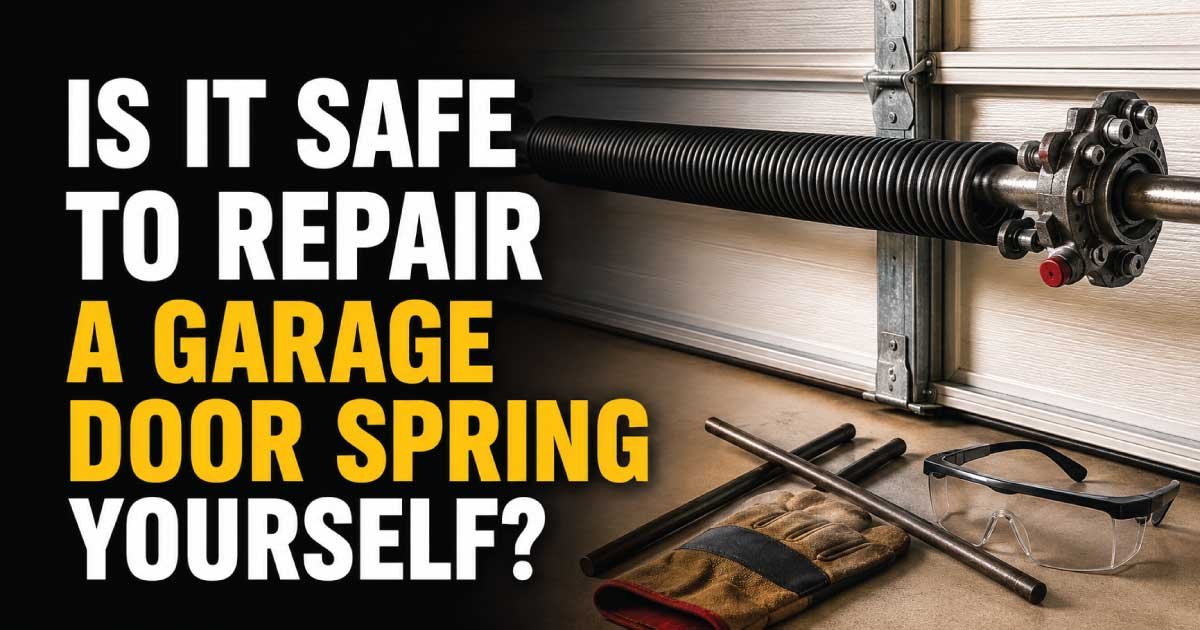
A broken garage door spring is one of the most common reasons a garage door suddenly stops working. Many homeowners are tempted to fix the problem themselves after watching online tutorials or reading a quick repair guide. While some garage door maintenance tasks are safe for DIY repair, spring replacement is different because the springs are under extreme tension. A single mistake can cause serious injury or expensive property damage.
Understanding how garage door springs work and recognizing the warning signs of failure can help you decide whether the repair is within your skill level or whether it’s safer to hire a professional. In many cases, proper diagnosis is just as important as the repair itself because a garage door that appears to have a broken spring may actually have another mechanical issue.
This guide explains whether it is safe to repair a garage door spring yourself, how to identify common causes of spring failure, the safety precautions every homeowner should follow, the tools used during inspection, and a step-by-step troubleshooting process. By the end, you’ll know which tasks are safe to perform yourself and which repairs should never be attempted without proper training.
Common Signs and Symptoms
Before attempting any troubleshooting, it’s important to recognize the symptoms of a failing or broken garage door spring. Many homeowners first notice the problem when the garage door refuses to open, but several warning signs often appear long before complete failure.
A damaged spring affects the balance of the entire garage door system. Because the opener is designed to guide the door rather than lift its full weight, spring problems often place excessive strain on other components.
Common signs include:
- The garage door only opens a few inches before stopping.
- The door feels unusually heavy when lifting manually.
- A loud bang was heard from the garage, similar to a firecracker.
- One side of the door rises faster than the other.
- The garage door opener struggles or reverses unexpectedly.
- The door closes much faster than normal.
- A visible gap appears in the torsion spring.
- Extension springs appear stretched or hang loosely.
- Cables become loose or fall off the drums.
- The opener motor runs, but the door barely moves.
For example, many homeowners report hearing a loud noise during the night without realizing the spring has snapped. Since garage door springs store a large amount of energy, they often break with enough force to sound like something heavy falling inside the garage.
Ignoring these symptoms can lead to additional damage. A struggling opener may burn out, cables may become misaligned, and rollers or hinges may wear out prematurely if the spring problem is not addressed.
How the Appliance or System Normally Works
Understanding how a garage door system normally operates makes it much easier to diagnose problems accurately. Although garage doors appear simple, several components work together to safely lift hundreds of pounds with surprisingly little effort.
Most residential garage doors use one of two spring systems:
- Torsion springs, mounted above the garage door.
- Extension springs, mounted alongside the horizontal tracks.
When the garage door closes, the springs store mechanical energy. As the door opens, that stored energy helps lift the weight of the door, making it feel much lighter.
The garage door opener is not designed to lift the entire door by itself. Instead, it controls movement while the springs carry most of the load. If a spring breaks, the opener suddenly has to lift far more weight than it was designed to handle.
The system also includes several supporting components:
- Lift cables
- Drums
- Rollers
- Hinges
- Tracks
- Center bearing
- End bearings
- Safety cables (for extension spring systems)
When all parts work correctly, the door opens smoothly, remains balanced halfway open, and closes at a controlled speed. If any major component fails, the balance changes immediately, making operation difficult or unsafe.
Understanding this relationship is essential because replacing a spring without checking the rest of the system may leave hidden problems unresolved.
Most Common Reasons This Problem Happens
Garage door springs are designed to last thousands of operating cycles, but they eventually wear out like any other mechanical component. Several factors can shorten their lifespan or cause unexpected failure.
Normal Wear and Tear
The most common cause of spring failure is simple age and repeated use. Every time the garage door opens and closes, the spring completes one cycle.
Most standard springs are rated for approximately:
- 10,000 cycles
- 15,000 cycles
- 20,000 cycles for premium models
Families that use the garage door multiple times each day may reach the spring’s expected lifespan much sooner than expected.
Symptoms
- Door gradually becomes heavier
- Opening becomes less smooth
- Spring eventually snaps
How to identify it
Inspect the spring for a visible break or gap, especially in torsion springs.
Rust and Corrosion
Rust increases friction between the coils, forcing the spring to work harder during every cycle. Moisture inside the garage, coastal environments, or poor ventilation often accelerate corrosion.
Symptoms
- Squeaking during operation
- Visible rust
- Reduced spring flexibility
How to identify it
Look closely for rust patches, pitting, or flaking metal along the coils.
Poor Maintenance
Garage door springs require occasional lubrication and routine inspection. Neglecting preventive maintenance increases wear and shortens service life.
Symptoms
- Noisy operation
- Jerky movement
- Uneven lifting
How to identify it
Dry-looking springs or obvious friction marks usually indicate inadequate lubrication.
Incorrect Spring Size
Installing the wrong replacement spring creates balance problems. A spring that is too weak forces the opener to work harder, while an oversized spring may lift the door too aggressively.
Symptoms
- Door won’t stay halfway open
- Opener strains
- Door rises too quickly
How to identify it
The garage door feels unbalanced during manual operation even though the spring appears intact.
Extreme Temperature Changes
Metal expands and contracts with temperature fluctuations. Cold weather can make aging springs more brittle, increasing the likelihood of sudden failure.
Symptoms
- Spring breaks during winter
- Door becomes noisy in cold weather
How to identify it
Failures occurring immediately after significant temperature drops often point to weakened metal reaching its breaking point.
Previous Improper Repairs
A garage door that has been repaired incorrectly may develop recurring problems. Improper spring winding, mismatched springs, or incorrectly installed cables can place uneven stress on the system.
Symptoms
- Door tilts while opening
- Uneven cable tension
- Repeated hardware failures
How to identify it
Look for mismatched springs, loose hardware, or signs of previous modifications.
Safety Precautions Before Troubleshooting
Before inspecting any garage door spring, homeowners should understand that this is one of the most hazardous components in the entire garage door system. The stored energy inside a torsion spring can cause severe injuries if released unexpectedly.
Even if you only plan to inspect the problem rather than perform a repair, following proper safety procedures reduces unnecessary risk.
Before beginning any troubleshooting:
- Disconnect electrical power to the garage door opener.
- Pull the emergency release only if the door is fully closed.
- Never stand directly beneath a partially open garage door.
- Keep children and pets away from the work area.
- Wear safety glasses to protect against flying debris.
- Use sturdy work gloves when inspecting metal components.
- Avoid loose clothing that could become caught in moving parts.
- Never loosen spring set screws without proper winding bars.
- Do not use screwdrivers instead of winding bars.
- Never attempt to repair a broken torsion spring without specialized training.
If the garage door is stuck in the open position, do not attempt to force it closed by removing hardware. A failed spring can allow the door to fall unexpectedly.
It is also important to recognize the difference between safe inspection tasks and dangerous repair work. Cleaning tracks, checking rollers, tightening loose bolts, and lubricating hinges are generally safe maintenance tasks. Adjusting spring tension or replacing springs requires specialized knowledge, proper tools, and careful safety procedures.
Also Read:
Tools Required
Although replacing a garage door spring requires specialized equipment, basic troubleshooting can often be completed with common household tools.
| Tool | Purpose |
|---|---|
| Safety glasses | Protect eyes during inspection |
| Work gloves | Prevent cuts from sharp metal edges |
| Flashlight | Inspect springs, cables, and tracks |
| Step ladder | Reach upper garage door components safely |
| Adjustable wrench | Check accessible fasteners |
| Socket set | Inspect mounting hardware |
| Tape measure | Measure spring dimensions if needed |
| Silicone-based garage door lubricant | Lubricate moving parts during maintenance |
| Notepad or phone camera | Record damaged components for comparison or professional evaluation |
Avoid using improvised tools when inspecting spring hardware. Specialized spring adjustments require properly sized winding bars, which should only be used by trained individuals.
Step-by-Step Troubleshooting Guide
Before deciding whether a DIY repair is appropriate, work through these inspection steps in order. They help identify whether the problem is truly a broken spring or another garage door issue.
1. Inspect the Garage Door Springs
What to inspect: Look for visible gaps, cracks, stretching, or broken coils.
Why it matters: A broken spring is the most common cause of a garage door that won’t lift properly.
Expected result: Springs should appear continuous without separation.
What to do next: If a spring is visibly broken, stop troubleshooting and avoid operating the door.
2. Check the Lift Cables
What to inspect: Examine both cables for fraying, slack, or damage.
Why it matters: Damaged cables often accompany spring failure.
Expected result: Cables should remain tight and evenly wrapped around the drums.
What to do next: Loose or damaged cables require professional attention before the door is used again.
3. Test Door Balance
What to inspect: Disconnect the opener only with the door fully closed, then carefully lift the door manually a short distance if the springs appear intact.
Why it matters: Proper balance indicates healthy spring tension.
Expected result: The door should lift smoothly without feeling excessively heavy.
What to do next: If the door feels extremely heavy, discontinue testing and inspect for spring failure.
4. Inspect Rollers and Tracks
What to inspect: Look for bent tracks, damaged rollers, or debris.
Why it matters: Track problems can mimic spring issues.
Expected result: Rollers should move freely without binding.
What to do next: Clean debris and replace damaged rollers if necessary, but do not assume track issues explain every lifting problem.
5. Examine the Garage Door Opener
What to inspect: Check for flashing lights, unusual motor sounds, or travel limit problems.
Why it matters: Sometimes the opener is malfunctioning rather than the spring.
Expected result: The opener should operate normally without excessive strain.
What to do next: Consult the opener’s manual if diagnostic indicators appear, especially after confirming the springs are intact.
Quick Diagnosis Table
| Symptom | Possible Cause | Recommended Solution |
|---|---|---|
| Loud bang from garage | Broken torsion spring | Stop using the door and arrange spring replacement |
| Door feels extremely heavy | Broken or weakened spring | Inspect springs and avoid forcing the opener |
| Door opens unevenly | Damaged spring or cable | Inspect cables and schedule professional repair if damaged |
| Opener struggles to lift door | Failed spring or incorrect spring tension | Verify spring condition before troubleshooting the opener |
| Visible gap in torsion spring | Complete spring break | Do not attempt to operate the door until repaired |
| Door closes too quickly | Loss of spring tension | Keep the door closed and replace the failed spring |
| Loose hanging extension spring | Broken extension spring | Do not use the door until the spring system is repaired |
| Door sticks during movement | Roller, track, or spring issue | Inspect tracks first, then evaluate spring condition |
How to Fix Each Common Cause
Now that you’ve identified the likely cause of the problem, the next step is deciding whether it is a safe DIY repair or one that should be left to a trained garage door technician. The answer depends on the component involved. While routine maintenance and minor adjustments are suitable for most homeowners, garage door springs require extra caution because they store enough energy to cause severe injuries if handled incorrectly.
Broken Torsion Spring
A broken torsion spring is not considered a safe DIY repair for most homeowners.
Why it happens
After thousands of opening and closing cycles, the steel weakens until the spring eventually snaps.
Repair method
- Confirm the spring has failed by locating the visible gap.
- Leave the garage door in the closed position if possible.
- Disconnect power to the opener.
- Do not loosen the winding cones or set screws.
- Contact a qualified garage door technician for replacement.
Why professionals handle it
Replacing a torsion spring requires:
- Properly sized replacement springs
- Professional winding bars
- Correct spring tension calculations
- Safe cable adjustment
- Door balance testing
Even experienced DIYers recognize this repair as one of the highest-risk jobs around the home.
Broken Extension Spring
Extension springs are generally less dangerous than torsion springs, but they can still release significant force if handled improperly.
Repair method
- Verify which spring has failed.
- Inspect the safety cable running through the spring.
- If the safety cable is missing or damaged, stop using the door immediately.
- Replace both extension springs at the same time to maintain balanced lifting.
Many homeowners underestimate extension spring repairs. Incorrect installation can create uneven lifting that damages cables, rollers, and the opener.
Rusted Springs
Light surface rust does not always require replacement.
Repair method
- Close the garage door.
- Disconnect the opener.
- Wipe away dirt with a clean cloth.
- Apply a silicone-based garage door lubricant along the coils.
- Open and close the door several times to distribute the lubricant.
If rust has deeply pitted the metal or weakened the coils, replacement is the safest option.
Dry or Noisy Springs
Squeaking springs are usually one of the easiest maintenance issues to correct.
Repair method
- Use only lubricant designed for garage doors.
- Spray lightly across the coils.
- Avoid heavy grease that attracts dust.
- Repeat lubrication every six months.
If the noise continues after lubrication, inspect the rollers, hinges, and bearings rather than assuming the spring is failing.
Incorrect Spring Size
An improperly sized spring creates ongoing balance problems.
Signs include:
- Door won’t stay halfway open
- Opener struggles
- Door rises too quickly
- Door slams shut
Unfortunately, there is no adjustment that permanently fixes the wrong spring.
The correct repair is replacing both springs with properly matched replacements based on:
- Door height
- Door weight
- Drum size
- Cable size
- Shaft diameter
Spring sizing mistakes are one reason many homeowners choose professional installation.
Worn Rollers or Hinges
Sometimes the spring appears to be the problem when worn hardware is actually causing resistance.
Repair method
- Replace cracked nylon rollers.
- Tighten loose hinge bolts.
- Lubricate moving joints.
- Replace bent hinges.
These repairs are generally safe DIY maintenance tasks and often improve overall door performance.
Also Read:
Advanced Troubleshooting
If the obvious causes have been ruled out, the problem may involve another part of the garage door system. A thorough diagnosis prevents replacing expensive parts unnecessarily.
Check Door Balance
Disconnect the opener with the door closed.
Lift the door halfway.
Results:
- Stays in place: Springs are likely balanced.
- Falls quickly: Springs have lost tension.
- Rises by itself: Springs may be over-tensioned.
Never attempt to correct torsion spring tension without proper equipment.
Inspect Bearing Plates
Worn bearings create extra friction that feels similar to weak springs.
Look for:
- Grinding noises
- Metal dust
- Shaft movement
- Rough rotation
Replacing bearings is often safer than replacing springs, although some bearing replacements still require spring removal.
Examine Cable Drums
Cable drums guide the lifting cables evenly.
Check for:
- Cracks
- Bent edges
- Loose set screws
- Uneven cable wrapping
A damaged drum can place uneven stress on otherwise healthy springs.
Look for Track Misalignment
Bent tracks increase lifting resistance.
Inspect for:
- Visible bends
- Loose mounting brackets
- Rollers leaving the track
- Debris buildup
Minor cleaning is a DIY job, but significant track realignment should be performed carefully to avoid creating additional alignment problems.
Test the Garage Door Opener
Sometimes the spring is functioning correctly while the opener has developed an electrical issue.
Check:
- Travel limits
- Force settings
- Safety sensors
- Drive belt or chain
- Error codes
Always verify the mechanical components before replacing the opener.
When Repair Is Not Worth It
Not every garage door is worth repairing. In some situations, replacing the entire system provides better value, improved safety, and fewer future repairs.
Replacement is often the smarter choice when:
- Multiple springs have failed repeatedly.
- The door is more than 20 years old.
- Panels are badly damaged.
- Tracks are bent in several locations.
- Replacement parts are difficult to find.
- The opener is also nearing the end of its lifespan.
- Extensive rust affects multiple components.
For example, replacing springs on an aging wooden garage door with failing panels and worn hardware may cost nearly as much as installing a new insulated door with modern safety features.
A professional inspection can help determine whether repairs remain cost-effective.
Also Read:
Preventive Maintenance Tips
Garage door springs cannot last forever, but proper maintenance can significantly extend their service life and reduce unexpected breakdowns.
Good preventive maintenance includes:
- Lubricate springs every six months.
- Inspect cables for fraying.
- Tighten loose bolts annually.
- Keep tracks clean.
- Remove dirt from rollers.
- Listen for new noises during operation.
- Test door balance several times each year.
- Avoid slamming the garage door.
- Replace worn rollers promptly.
- Schedule professional inspections every few years.
If your garage door is used as the primary entrance to your home, consider upgrading to high-cycle springs. Although they cost more initially, they generally last much longer than standard springs.
Common Mistakes to Avoid
Many garage door repairs become more expensive because of avoidable mistakes made during diagnosis or repair.
Common mistakes include:
- Attempting torsion spring replacement without training.
- Using screwdrivers instead of winding bars.
- Replacing only one spring when both have similar wear.
- Continuing to use the opener after a spring breaks.
- Ignoring unusual noises.
- Purchasing replacement springs based only on appearance.
- Forgetting to inspect cables after spring failure.
- Over-lubricating moving parts.
- Standing directly beneath an unbalanced door.
- Skipping routine maintenance.
One of the biggest misconceptions is believing the garage door opener can safely compensate for a broken spring. Doing so often leads to an expensive opener replacement in addition to the spring repair.
When to Call a Professional
Although homeowners can safely perform many garage door maintenance tasks, some repairs carry enough risk that professional service is the safest choice.
Call a professional if:
- A torsion spring has broken.
- Spring tension needs adjustment.
- Lift cables have come off the drums.
- The garage door is stuck halfway open.
- The door has fallen off its tracks.
- The shaft, drums, or bearings require removal.
- Multiple components have failed simultaneously.
- You are uncertain about the diagnosis.
- Specialized tools are required.
- The door weighs too much to move safely.
Professional technicians have the equipment to safely release spring tension, install correctly matched replacement springs, balance the door, and verify safe operation before completing the repair.
When personal safety is involved, professional repair is usually the better investment.
Estimated Repair Costs
The actual cost varies by location, garage door size, and the type of spring system installed, but the following estimates provide a general idea.
| Repair | Estimated Cost | DIY or Professional |
|---|---|---|
| Lubricate springs and hardware | $10–$25 | DIY |
| Replace garage door rollers | $50–$150 | DIY or Professional |
| Replace extension springs | $150–$300 | Professional Recommended |
| Replace torsion springs | $200–$450 | Professional |
| Replace lift cables | $150–$250 | Professional |
| Replace bearing plates | $150–$300 | Professional |
| Track alignment | $125–$250 | Professional |
| Garage door opener adjustment | $75–$150 | DIY or Professional |
| Complete garage door replacement | $800–$2,500+ | Professional |
Final Thoughts
Repairing a garage door spring yourself may seem like a way to save money, but the risks often outweigh the potential savings. While homeowners can safely perform inspections, lubrication, basic troubleshooting, and preventive maintenance, spring replacement is one repair that demands specialized tools, technical knowledge, and strict safety procedures. Attempting it without proper training can lead to severe injuries, damaged property, or additional repair costs.
The safest approach is to first identify the symptoms, inspect the system carefully, and determine whether the issue involves routine maintenance or a failed spring. Many garage door problems, such as noisy rollers, dirty tracks, or loose hardware, can be resolved through simple DIY maintenance. However, when a torsion or extension spring has broken, professional repair is usually the smartest and safest choice.
Regular inspections, timely maintenance, and replacing worn components before they fail will help your garage door operate smoothly for years. If you’re ever uncertain during diagnosis, prioritize safety over convenience. A properly repaired and balanced garage door protects both your home and everyone who uses it, making expert service a worthwhile investment when spring repairs are involved.

Engineer Ali Hasan is a garage door expert and the founder of FixFasty. With over 16 years of experience in mechanical systems and home maintenance, he provides practical, step-by-step guides on garage door installation, repairs, and maintenance, helping homeowners keep their garage doors safe, reliable, and long-lasting.