
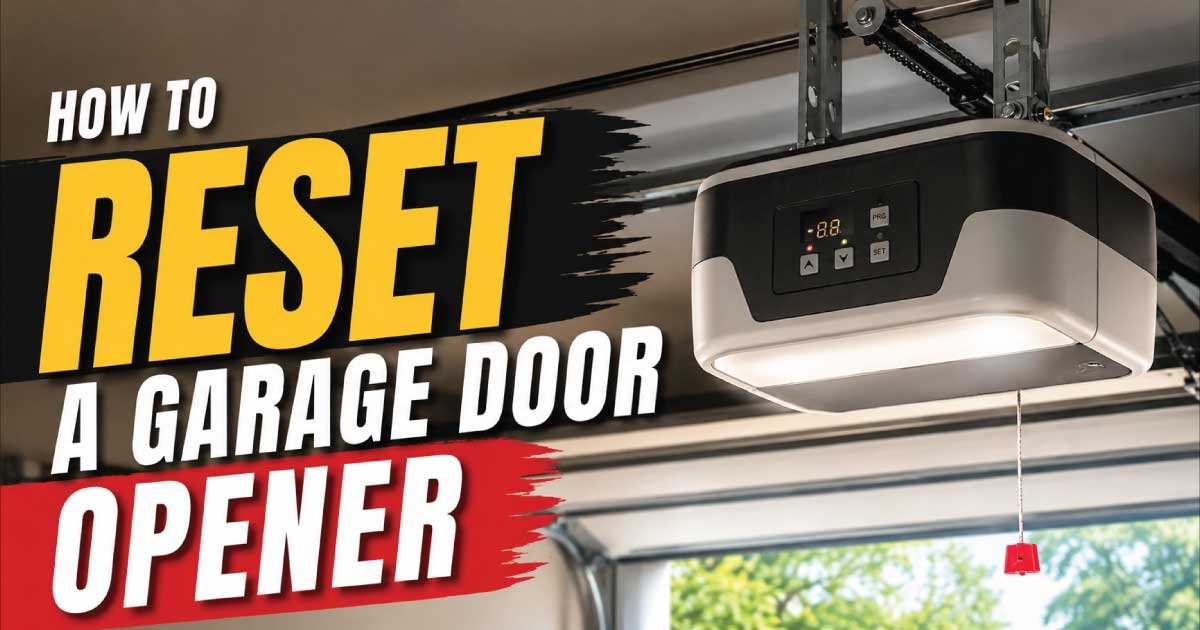
A garage door opener is one of those household devices you rarely think about until it stops working. You press the remote, expect the door to open, and nothing happens. In other cases, the opener may flash its lights, refuse to respond after a power outage, lose connection with the remote, or behave unpredictably. These problems often lead homeowners to wonder whether the entire opener has failed when, in many cases, a simple reset is all that’s needed.
Knowing how to reset a garage door opener can save time, prevent unnecessary replacement costs, and restore normal operation within minutes. However, resetting the opener is only one part of proper troubleshooting. If an underlying electrical issue, damaged sensor, worn component, or programming problem exists, simply pressing the reset button may not solve the problem.
This repair guide explains how garage door openers normally work, the warning signs that indicate a reset may be necessary, the most common causes of reset-related issues, essential safety precautions, the tools you may need, and a logical troubleshooting process that helps you identify the real problem before making repairs.
Common Signs and Symptoms
Before attempting any reset procedure, it’s important to recognize the symptoms your garage door opener is showing. Different warning signs often point to different causes, and understanding them helps you avoid unnecessary repairs.
Some symptoms appear suddenly after a storm or power outage, while others develop gradually as components wear out. Paying attention to these details makes diagnosis much easier.
Common signs include:
- The garage door opener does not respond to the wall button or remote.
- The remote control suddenly stops working.
- The opener motor runs, but the door does not move.
- The opener lights blink repeatedly.
- The opener loses all programmed remotes.
- The keypad no longer accepts the access code.
- The garage door starts moving but reverses immediately.
- The opener works from the wall control but not from the remote.
- The system behaves normally after unplugging and reconnecting power but fails again later.
- The opener displays flashing LED error codes.
You may also notice intermittent problems. For example, the remote works only when you’re standing close to the garage, or the opener responds only every few attempts. These symptoms often indicate that a reset alone will not solve the problem and that further diagnosis is needed.
How the Appliance or System Normally Works
Understanding how a garage door opener operates makes troubleshooting much easier because you’ll know which part of the system may have failed.
A typical garage door opener consists of several connected components that communicate with one another. The wall control, remote controls, wireless keypad, safety sensors, motor unit, drive mechanism, and internal control board all work together to open and close the door safely.
Here’s the normal sequence:
- You press the wall button or remote.
- The control board receives the signal.
- The opener verifies that the safety sensors are aligned.
- The motor starts turning.
- The drive chain, belt, or screw moves the trolley.
- The trolley raises or lowers the garage door.
- Limit switches stop the motor once the fully open or closed position is reached.
Modern garage door openers also store programming information inside electronic memory. This memory keeps track of paired remotes, wireless keypads, travel limits, and other settings.
When memory becomes corrupted due to a power surge, electrical interruption, accidental programming, or software glitch, the opener may require a reset before normal communication resumes.
Understanding this process helps explain why one symptom may involve the remote while another affects only travel limits or keypad operation.
Most Common Reasons This Problem Happens
A garage door opener may require a reset for several different reasons. Identifying the actual cause prevents repeated problems and helps determine whether a simple reset is enough or if additional repair is necessary.
Power interruption or electrical outage
Power failures are among the most common reasons homeowners need to reset a garage door opener.
Why it happens:
- Electrical outages interrupt power.
- Circuit breakers trip.
- Surge protectors activate.
- Voltage fluctuations temporarily confuse the control board.
Symptoms:
- Opener appears completely dead.
- Lights flash unexpectedly.
- Remote programming disappears.
- Door refuses to operate after electricity returns.
How to identify it:
Check whether other garage outlets have power. Inspect the circuit breaker and verify that the opener is plugged into a working outlet.
Accidental memory reset
Many homeowners unknowingly erase programmed remotes by pressing the Learn button too long.
Why it happens:
Holding the Learn button for several seconds clears stored remote codes.
Symptoms:
- Every remote stops working.
- Wall control still operates the door.
- Wireless keypad also stops functioning.
How to identify it:
If all wireless devices fail simultaneously while the wall button still works, the opener’s memory has likely been erased.
Remote control problems
Sometimes the opener isn’t the problem at all.
Why it happens:
- Dead batteries
- Damaged remote
- Signal interference
- Worn buttons
- Internal circuit failure
Symptoms:
- One remote fails while another works normally.
- Limited operating range.
- Delayed response.
How to identify it:
Replace the battery first. Test another remote or use the wall button for comparison.
Safety sensor issues
Modern openers will not close the door if they believe something is blocking the opening.
Why it happens:
- Dirty lenses
- Misaligned sensors
- Loose wiring
- Damaged brackets
Symptoms:
- Door reverses immediately.
- Lights blink repeatedly.
- Door closes only while holding the wall button.
How to identify it:
Inspect both sensor lights. Most systems display one solid light and one receiving light when properly aligned.
Control board malfunction
The electronic control board acts as the brain of the opener.
Why it happens:
- Power surges
- Age
- Moisture damage
- Component failure
Symptoms:
- Random operation
- Failure to save programming
- Inconsistent response
- Continuous flashing lights
How to identify it:
If every other component tests normally but programming repeatedly disappears, the control board may be failing.
Travel limit or force setting errors
Improper travel settings can make the opener appear defective.
Why it happens:
- Previous adjustments
- Mechanical changes
- Worn door components
Symptoms:
- Door won’t fully open.
- Door won’t fully close.
- Door reverses near the floor.
How to identify it:
Observe where the door stops or reverses. Consistent stopping at the same location usually indicates travel adjustment rather than the need for a complete reset.
Safety Precautions Before Troubleshooting
Garage door systems combine electricity, heavy moving parts, springs under extreme tension, and automated machinery. Even a routine reset should begin with proper safety practices to reduce the risk of injury or equipment damage.
Before starting any inspection:
- Disconnect electrical power before opening the motor housing.
- Never touch exposed wiring unless power is confirmed off.
- Keep children and pets away from the garage during testing.
- Wear safety glasses while inspecting overhead equipment.
- Use a stable ladder positioned on level ground.
- Keep hands away from moving rails, chains, belts, and trolleys.
- Test the emergency release only when the door is fully closed whenever possible.
- Never loosen or adjust torsion or extension springs yourself.
- Avoid standing directly beneath a moving garage door.
- If the door feels unusually heavy when disconnected from the opener, stop troubleshooting and have the spring system inspected professionally.
A reset procedure is generally safe, but repairs involving springs, cables, or major electrical components require additional expertise and specialized tools.
Also Read:
Tools Required
Most garage door opener reset procedures require only basic household tools. Having them ready before you begin makes troubleshooting more efficient and reduces unnecessary interruptions.
| Tool | Purpose |
|---|---|
| Step ladder | Safely reach the opener unit |
| Flashlight | Inspect wiring, sensors, and controls |
| Clean microfiber cloth | Wipe safety sensor lenses |
| Screwdriver set | Remove covers or tighten terminals |
| Replacement remote batteries | Test remote-related problems |
| Voltage tester | Verify electrical power safely |
| Owner’s manual (if available) | Locate reset procedures and programming instructions |
| Notebook or phone | Record error codes or programming steps |
Step-by-Step Troubleshooting Guide
Instead of immediately performing a factory reset, work through the following diagnostic process. This approach helps identify the real cause of the problem and prevents unnecessary reprogramming of remotes and keypads.
Step 1: Confirm electrical power
What to inspect
Check whether the opener has power by looking for indicator lights and testing the outlet.
Why it matters
An unplugged opener or tripped breaker can mimic more serious electrical problems.
Expected result
The opener should receive consistent power without flickering lights.
What to do next
If power is restored and the opener works normally, no reset may be necessary.
Step 2: Test the wall control
What to inspect
Press the interior wall button.
Why it matters
This separates opener problems from remote control issues.
Expected result
The door should operate normally.
What to do next
If the wall control works but the remote does not, inspect batteries and remote programming before resetting the opener.
Step 3: Inspect the safety sensors
What to inspect
Check both photo-eye sensors for dirt, damage, and proper alignment.
Why it matters
Misaligned sensors often prevent normal operation and can be mistaken for opener failure.
Expected result
Both indicator lights should appear normal according to the manufacturer’s design.
What to do next
Clean and realign the sensors before attempting additional troubleshooting.
Step 4: Check the remote battery
What to inspect
Replace the battery even if it appears to have some power remaining.
Why it matters
Weak batteries commonly reduce transmission strength.
Expected result
The remote should communicate consistently.
What to do next
If the problem continues, proceed to programming checks.
Step 5: Inspect for visible damage
What to inspect
Look for loose wires, damaged rails, broken brackets, or obvious mechanical problems.
Why it matters
A reset cannot repair physical damage.
Expected result
No broken or loose components should be visible.
What to do next
Repair mechanical issues before attempting electronic troubleshooting.
Step 6: Determine whether a reset is actually needed
What to inspect
Review recent events, such as a power outage, new remote installation, accidental programming changes, or lightning activity.
Why it matters
Resetting unnecessarily may erase programmed remotes and require additional setup.
Expected result
You should have a reasonable understanding of whether the problem is related to programming, power, or hardware.
What to do next
If all previous checks are satisfactory and the opener still behaves abnormally, proceed with the manufacturer-recommended reset procedure, which will be covered
Quick Diagnosis Table
This quick reference helps match common symptoms with likely causes so you can narrow down the problem before beginning repairs.
| Symptom | Possible Cause | Recommended Solution |
|---|---|---|
| Opener has no power | Tripped breaker or unplugged unit | Restore electrical power |
| Wall button works but remote doesn’t | Dead battery or lost programming | Replace battery and reprogram remote |
| Door reverses while closing | Safety sensor issue | Clean and align sensors |
| Remote range is very short | Weak battery or signal interference | Replace battery and inspect for interference |
| Lights flash repeatedly | Sensor alignment or control fault | Check sensors first, then inspect control board |
| All remotes stopped working | Memory erased | Reprogram remotes after confirming reset is required |
| Door stops before fully opening | Incorrect travel limits | Inspect and adjust travel settings |
| Programming won’t save | Failing control board | Diagnose electronic components and consider replacement if necessary |
Also Read:
How to Fix Each Common Cause
Now that you’ve identified the likely source of the problem, it’s time to apply the correct repair. Start with the simplest solution before moving to more advanced repairs. In many cases, homeowners can restore normal operation without replacing expensive parts.
Reset the garage door opener after a power issue
If the opener stopped working after a power outage or electrical surge, a reset often restores normal communication between the control board and accessories.
How to do it:
- Unplug the garage door opener from the electrical outlet.
- Wait for 30 to 60 seconds to allow stored electrical charge to dissipate.
- Plug the opener back in.
- Allow the system to complete its startup sequence.
- Test the wall button first.
- Test each remote control.
Expected result:
The opener should respond normally if the problem was caused by a temporary electronic glitch.
Reprogram the remote controls
If the opener’s memory was erased, you’ll need to pair each remote again.
The exact steps vary by manufacturer, but the general process is similar:
- Locate the Learn or Program button on the opener.
- Press and release the button.
- Within about 30 seconds, press the desired remote button.
- Wait for the opener light to flash or click.
- Test the remote.
Repeat the process for every remote and wireless keypad connected to the system.
Replace weak remote batteries
A surprising number of service calls end with nothing more than replacing a coin-cell battery.
Replace the battery with the exact type recommended by the manufacturer. After installing the new battery:
- Test the operating distance.
- Verify every button works.
- Clean the battery contacts if corrosion is present.
If performance does not improve, the remote itself may be faulty.
Clean and align the safety sensors
Photo-eye sensors are one of the most common causes of garage door problems.
To inspect them:
- Remove dust using a microfiber cloth.
- Check that both lenses face each other directly.
- Tighten any loose mounting brackets.
- Inspect wiring for cuts or damage.
When properly aligned, both indicator lights should display their normal operating status.
Adjust travel limits
If the garage door stops too early or reverses unexpectedly, incorrect travel settings may be responsible.
Most modern openers include adjustment screws or electronic programming buttons for:
- Open travel
- Close travel
- Opening force
- Closing force
Make only small adjustments, testing the door after each change. Over-adjusting can create additional problems.
Inspect the control board
If the opener repeatedly loses programming or behaves unpredictably after resetting, inspect the control board.
Look for:
- Burn marks
- Corrosion
- Water damage
- Swollen electronic components
- Loose wire connections
A damaged control board usually requires replacement rather than repair.
Advanced Troubleshooting
If the opener still does not work after completing the basic troubleshooting process, the issue may involve less common electrical or mechanical failures. These problems require a more detailed diagnosis but can still be identified with careful inspection.
Check for the following advanced issues:
Radio frequency interference
Wireless devices can interfere with remote communication.
Possible sources include:
- LED light bulbs
- Wi-Fi equipment
- Security cameras
- Baby monitors
- Nearby radio transmitters
Turn nearby electronic devices off temporarily to determine whether interference is affecting the opener.
Damaged antenna
The opener’s antenna should hang freely beneath the motor housing.
Inspect it for:
- Cuts
- Kinks
- Loose connections
- Physical damage
A damaged antenna significantly reduces remote operating range.
Door balance problems
Disconnect the opener using the emergency release and manually lift the garage door halfway.
A properly balanced door should remain nearly in place.
If the door:
- Falls rapidly
- Feels unusually heavy
- Shoots upward
the spring system likely needs professional adjustment.
Mechanical binding
Watch the door while operating it manually.
Look for:
- Bent tracks
- Loose rollers
- Worn hinges
- Damaged cables
- Obstructions in the tracks
Mechanical resistance forces the opener to work harder and may trigger safety features that appear to be electronic failures.
Electrical wiring issues
Loose low-voltage wiring between the wall control, sensors, and opener can interrupt communication.
Inspect visible wiring for:
- Pinched insulation
- Loose terminals
- Staples driven through wires
- Rodent damage
Disconnect power before handling any electrical connections.
When Repair Is Not Worth It
Not every garage door opener is worth repairing. In some situations, replacement is more reliable, safer, and more cost-effective over the long term.
Replacement is often the better option when:
- The opener is more than 15–20 years old.
- Replacement parts are difficult to find.
- The motor has failed.
- Multiple electronic components are defective.
- Repair costs approach the price of a new opener.
- The opener lacks modern safety features.
- The unit repeatedly loses programming despite repairs.
New garage door openers offer several improvements, including:
- Battery backup options
- Smartphone control
- Better security with rolling-code technology
- Quieter belt-drive systems
- Improved obstacle detection
- LED lighting
- Easier programming
If you’re facing several repairs at once, upgrading to a new unit often provides better long-term value than repeatedly repairing an aging opener.
Preventive Maintenance Tips
Regular maintenance greatly reduces the likelihood of needing to reset your garage door opener unexpectedly. Spending just a few minutes every few months can extend the life of both the opener and the garage door system.
Good preventive maintenance includes:
- Test the safety reverse system monthly.
- Clean the photo-eye sensors regularly.
- Replace remote batteries every one to two years.
- Tighten loose mounting hardware.
- Inspect the power cord for wear.
- Lubricate rollers, hinges, and bearings with garage door lubricant.
- Keep tracks clean and free of debris.
- Listen for new noises during operation.
- Test the emergency release periodically.
- Protect the opener with a surge protector if power fluctuations are common.
Preventive maintenance also helps identify small problems before they become expensive repairs.
Common Mistakes to Avoid
Many garage door opener problems become worse because of simple troubleshooting mistakes. Avoiding these errors saves time and prevents accidental damage.
Common mistakes include:
- Holding the Learn button too long and accidentally erasing all programmed remotes.
- Assuming every problem requires a factory reset.
- Ignoring flashing diagnostic lights.
- Replacing expensive parts before checking batteries.
- Misaligning safety sensors during cleaning.
- Adjusting travel limits excessively.
- Lubricating the drive belt or chain when the manufacturer advises against it.
- Operating a door with broken springs.
- Opening the motor housing without disconnecting power.
- Attempting spring repairs without proper training.
A systematic diagnosis almost always produces better results than replacing parts at random.
Also Read:
When to Call a Professional
Many reset and programming problems are suitable for DIY repair, but certain situations require an experienced garage door technician.
Call a professional if:
- The torsion or extension springs are broken.
- Lift cables have come off the drums.
- The garage door has fallen off its tracks.
- The motor emits smoke or a burning smell.
- Electrical wiring inside the opener appears damaged.
- The control board repeatedly fails after replacement.
- The opener trips the circuit breaker.
- The garage door is severely unbalanced.
- Structural damage is visible.
- You are uncomfortable working around electrical equipment or heavy moving doors.
Professional diagnosis is also worthwhile when intermittent problems cannot be reproduced consistently, as specialized testing equipment may be needed.
Estimated Repair Costs
Repair costs vary depending on the opener model, local labor rates, and whether replacement parts are required. The table below provides typical estimates for common repairs.
| Repair | Estimated Cost | DIY or Professional |
|---|---|---|
| Reset and reprogram opener | $0–$50 | DIY |
| Replace remote battery | $3–$10 | DIY |
| Replace remote control | $25–$80 | DIY |
| Realign safety sensors | $0–$30 | DIY |
| Replace safety sensors | $40–$120 | DIY or Professional |
| Adjust travel and force settings | $0–$100 | DIY or Professional |
| Replace control board | $100–$250 | Professional |
| Replace motor assembly | $250–$500 | Professional |
| Install new garage door opener | $300–$800+ | Professional |
Frequently Asked Questions
1. How do I reset a garage door opener after a power outage?
Yes, you can usually reset a garage door opener after a power outage by unplugging it for about 30 to 60 seconds and then reconnecting the power. If the opener still doesn’t respond, test the wall control, inspect the safety sensors, and reprogram the remotes if their memory was erased during the interruption.
2. Will resetting a garage door opener erase all remotes?
Not always. A simple power reset normally keeps the programmed remotes intact. However, performing a factory reset or holding the Learn button too long typically clears the opener’s memory, requiring every remote and wireless keypad to be programmed again.
3. Why is my garage door opener blinking after I reset it?
A blinking opener light usually indicates another issue rather than a failed reset. Common causes include misaligned safety sensors, travel limit problems, or diagnostic error codes. Check the owner’s manual to identify the meaning of the flashing light pattern for your specific model.
4. Why does the wall button work but the remote doesn’t?
This usually indicates that the opener itself is functioning correctly. The most likely causes are a weak remote battery, lost programming, signal interference, or a defective remote control. Start by replacing the battery before attempting to reprogram the remote.
5. How often should I reset my garage door opener?
You should only reset the opener when troubleshooting requires it. Frequent resets are not part of normal maintenance and may indicate an underlying electrical, programming, or hardware problem that should be diagnosed instead of repeatedly resetting the system.
6. Can a surge damage my garage door opener?
Yes. Power surges caused by lightning or electrical fluctuations can damage the control board or corrupt stored programming. Using a quality surge protector can reduce the risk of electronic damage, especially in areas with frequent storms or unstable electrical service.
7. Is it safe to repair a garage door opener myself?
Basic tasks such as resetting the opener, replacing remote batteries, cleaning sensors, and reprogramming remotes are generally safe for homeowners. Repairs involving springs, lift cables, internal motor components, or electrical circuit boards should be handled by qualified professionals because they present significant safety risks.
8. Why does my garage door reverse before closing completely?
The most common cause is a problem with the safety sensor system. Dirty lenses, poor alignment, or damaged wiring can make the opener believe an obstacle is blocking the doorway. Incorrect travel limit settings or excessive resistance from the door can produce similar behavior.
9. Should I replace my garage door opener if it keeps losing programming?
Repeated loss of programming often indicates a failing control board rather than a simple software issue. If the opener is older and other components are also wearing out, replacing the entire unit may be a more reliable and cost-effective solution than continuing to repair it.
Final Thoughts
Knowing how to reset a garage door opener is an essential skill for homeowners because many common operating problems stem from temporary power interruptions, programming errors, or communication issues rather than major mechanical failures. By following a logical troubleshooting process, checking power, remotes, safety sensors, travel settings, and visible components before performing a reset, you can often restore normal operation quickly while avoiding unnecessary repairs.
Just as importantly, recognize the limits of DIY repair. Resetting and reprogramming are usually safe for homeowners, but broken springs, damaged lift cables, internal electrical faults, and major motor failures require professional service. Taking shortcuts with these repairs can lead to serious injury or additional damage.
Regular inspection, routine maintenance, clean safety sensors, fresh remote batteries, and prompt attention to unusual symptoms will help keep your garage door opener reliable for years. A careful, safety-first approach not only extends the life of the opener but also ensures your garage door continues to operate smoothly, securely, and dependably every day.

Engineer Ali Hasan is a garage door expert and the founder of FixFasty. With over 16 years of experience in mechanical systems and home maintenance, he provides practical, step-by-step guides on garage door installation, repairs, and maintenance, helping homeowners keep their garage doors safe, reliable, and long-lasting.