
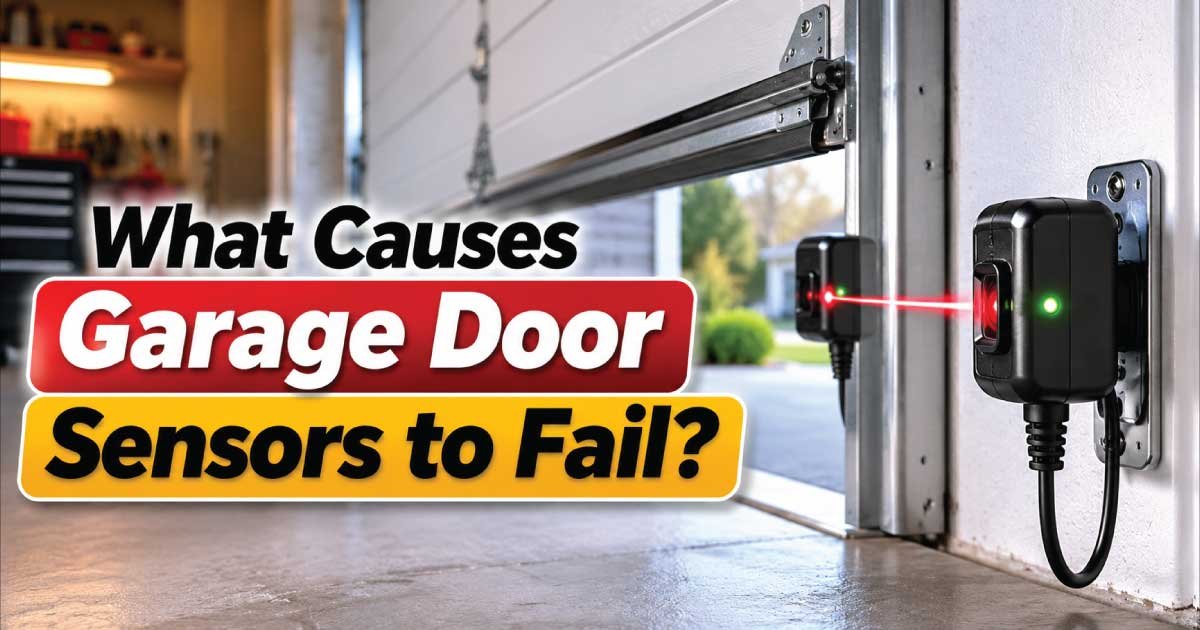
Garage door sensors are one of the most important safety features on a modern garage door system. They prevent the door from closing if a person, pet, or object is in its path. When these sensors stop working correctly, your garage door may refuse to close, reverse unexpectedly, or flash warning lights. While these problems can be frustrating, sensor failures are usually caused by issues that can be identified through a careful inspection.
Understanding what causes garage door sensors to fail helps you avoid unnecessary repairs and determine whether the problem is something you can safely fix yourself. In many cases, dirt, misalignment, damaged wiring, or power problems are responsible rather than a failed sensor itself.
This troubleshooting and repair guide explains how garage door sensors normally work, the most common warning signs of failure, the leading causes behind sensor problems, and the safest way to diagnose them. You’ll also learn which repairs are suitable for DIY homeowners, when professional repair is the better choice, and how to inspect your system without creating additional safety risks.
Common Signs and Symptoms
Garage door sensor problems often appear gradually before the system stops working completely. Recognizing the warning signs early can save time, prevent unnecessary parts replacement, and reduce the risk of damaging the garage door opener. Many homeowners mistake sensor issues for opener failures, but the symptoms usually point toward the safety sensor system itself.
Common symptoms include:
- The garage door closes partway and immediately reverses.
- The door will not close unless you hold the wall control button.
- The opener lights flash repeatedly after a failed closing attempt.
- One or both sensor indicator LEDs are off or blinking.
- The garage door opens normally but refuses to close.
- The door behaves inconsistently, working one day and failing the next.
- The sensors appear loose or out of alignment.
- Closing problems become worse during bright sunlight or after heavy rain.
- The opener displays an error code related to the safety sensors.
- The garage door stops unexpectedly even though nothing is blocking it.
Some symptoms only occur under certain conditions. For example, vibration from daily operation may slowly shift one sensor out of alignment, causing intermittent failures that become more frequent over time.
How the Appliance or System Normally Works
Understanding how garage door safety sensors function makes troubleshooting much easier. Rather than guessing which component has failed, you’ll know what each part is supposed to do and why a single fault can prevent the entire door from closing.
Most garage door systems use two photoelectric safety sensors mounted near the floor on opposite sides of the garage door opening.
One sensor sends an invisible infrared beam while the other receives it. As long as the receiving sensor detects the beam, the opener assumes the doorway is clear and allows the door to close normally.
If anything interrupts that beam—even a bicycle tire, child’s toy, pet, or person—the opener immediately stops closing and reverses direction. This safety feature is required on virtually all modern residential garage doors.
A typical sensor system includes:
- A transmitting sensor
- A receiving sensor
- Low-voltage wiring
- Mounting brackets
- LED status lights
- The garage door opener control board
When everything is working properly:
- Both sensors receive power.
- They remain precisely aligned.
- The infrared beam travels uninterrupted.
- The opener receives confirmation that the doorway is clear.
- The door closes safely.
Even a small problem with power, wiring, alignment, or the beam itself can interrupt this process and trigger a safety shutdown.
Most Common Reasons This Problem Happens
Garage door sensor failures are usually caused by a handful of common problems rather than defective electronics. A systematic diagnosis helps identify the actual cause before replacing expensive parts. The following issues account for most residential sensor failures.
Dirty or Obstructed Sensor Lenses
The sensor lenses sit only a few inches above the floor, making them magnets for dust, cobwebs, grass clippings, mud, leaves, and road salt. Even a thin layer of dirt can weaken the infrared beam enough to trigger a fault.
Why it happens
Garages collect dust quickly, especially if vehicles, lawn equipment, or woodworking tools are stored inside.
Symptoms
- Flashing sensor lights
- Door reverses unexpectedly
- Intermittent closing problems
How to identify it
Inspect both lenses closely using a flashlight. Dirt, spider webs, or moisture buildup are usually easy to spot.
Sensor Misalignment
Misalignment is one of the most common causes of garage door sensor failure. The sensors must face each other almost perfectly for the infrared beam to reach its destination.
Why it happens
Normal garage door vibration gradually loosens mounting brackets. Accidental bumps from bicycles, garbage bins, or vehicles can also shift a sensor.
Symptoms
- One indicator light blinks continuously
- Door refuses to close
- Problem appears suddenly after moving objects around the garage
How to identify it
Check whether both sensors are pointing directly at each other. Slightly loose brackets or uneven mounting heights often indicate alignment problems.
Damaged or Loose Wiring
Because garage door sensors operate on low-voltage wiring, damaged cables can interrupt communication with the opener.
Why it happens
Wire damage may result from:
- Rodents chewing insulation
- Staples driven too tightly
- Vibration loosening wire connections
- Accidental cuts during garage projects
- Aging insulation
Symptoms
- Sensor lights completely off
- Random operation
- Error codes from the opener
How to identify it
Inspect the wiring from each sensor back to the opener. Look for crushed insulation, exposed copper, disconnected terminals, or damaged wire clips.
Power Supply Problems
Sensors require consistent low-voltage power supplied by the garage door opener.
Why it happens
Power interruptions can result from:
- Failed opener transformer
- Loose electrical connections
- Blown internal fuse
- Faulty control board
Symptoms
- Neither sensor illuminates
- Entire opener behaves erratically
- Wall controls may also malfunction
How to identify it
If both sensors lose power simultaneously, the issue often originates inside the opener rather than the sensors themselves.
Direct Sunlight Interference
Bright sunlight can interfere with certain garage door sensors, especially when the afternoon sun shines directly into the receiving sensor.
Why it happens
Although modern sensors are designed to reject ambient light, extreme glare can temporarily overpower the infrared receiver.
Symptoms
- Door fails only during certain times of day
- Sensors work normally after sunset
- Intermittent flashing LEDs
How to identify it
Notice whether failures consistently occur when sunlight enters the garage opening from a particular angle.
Moisture and Water Damage
Garage door sensors are designed for typical outdoor conditions but are not waterproof.
Why it happens
Water intrusion may occur because of:
- Heavy rain
- Flooding
- Condensation
- Pressure washing
- Snow buildup
Symptoms
- Corrosion
- Flickering LEDs
- Random sensor failures
How to identify it
Inspect the sensor housing and wiring for rust, corrosion, water stains, or cracked plastic.
Physical Damage
Garage sensors are mounted in an area where they are easily struck.
Why it happens
Common accidents include:
- Vehicle bumpers
- Lawn equipment
- Trash cans
- Children’s toys
- Sports equipment
Symptoms
- Broken brackets
- Cracked sensor housing
- Loose wiring
- Visible impact marks
How to identify it
A careful visual inspection often reveals bent brackets or cracked plastic around the sensor body.
Aging Components
Like any electronic device, garage door sensors eventually wear out.
Why it happens
Years of temperature changes, humidity, vibration, and electrical stress slowly degrade internal components.
Symptoms
- Increasingly inconsistent operation
- Frequent false reversals
- No visible external damage
How to identify it
If the sensors are many years old and all other causes have been eliminated, aging electronics become a more likely explanation.
Also Read:
Safety Precautions Before Troubleshooting
Troubleshooting garage door sensors is generally safe because they operate on low voltage, but the garage door system itself contains powerful springs, moving parts, and electrical components. Following proper safety procedures reduces the risk of injury and prevents accidental damage while diagnosing the problem.
Before beginning any inspection:
- Disconnect the garage door opener from electrical power whenever inspecting wiring.
- Keep children and pets away from the work area.
- Never place hands beneath a partially open garage door.
- Avoid adjusting torsion or extension springs. These components store enough force to cause serious injury.
- Use a stable ladder if inspecting the opener or wiring overhead.
- Wear safety glasses when working around moving hardware.
- Avoid using water-based cleaners directly on sensor electronics.
- Replace damaged wiring only after confirming power is disconnected.
- Never bypass or permanently disable safety sensors to keep the door operating.
DIY repair is generally appropriate for cleaning sensors, checking alignment, tightening brackets, and performing visual inspections.
Professional repair is recommended when electrical testing, opener control board diagnosis, internal wiring replacement, or spring-related work is required.
Tools Required
Proper tools make troubleshooting faster and reduce the chance of overlooking a simple problem. Most homeowners already own the basic equipment needed for a careful inspection.
| Tool | Purpose |
|---|---|
| Microfiber cloth | Clean sensor lenses without scratching them |
| Soft brush | Remove cobwebs and debris |
| Flashlight | Inspect wiring and sensor LEDs |
| Screwdriver set | Tighten brackets and terminals |
| Adjustable wrench | Secure mounting hardware |
| Tape measure | Verify sensor height and alignment |
| Level | Check that sensors are mounted evenly |
| Safety glasses | Protect eyes during inspection |
| Step ladder | Reach opener and overhead wiring safely |
Step-by-Step Troubleshooting Guide
Following a logical troubleshooting sequence helps eliminate simple problems before assuming the sensors have failed. Complete each step before moving to the next to avoid replacing parts unnecessarily.
Inspect the sensor lenses.
Look for dirt, spider webs, condensation, or physical obstructions. Clean each lens gently with a dry microfiber cloth. A clear lens should restore normal beam transmission if contamination was the only problem.
Check the indicator lights.
Observe whether the LEDs are solid, blinking, or completely off. Their condition provides valuable clues about alignment, power, or communication issues. If both lights remain off, continue by inspecting the power supply and wiring.
Verify sensor alignment.
Confirm both sensors face one another at the same height. Tighten any loose brackets after making small adjustments. Solid indicator lights usually show that alignment has been restored.
Inspect the wiring.
Follow each low-voltage cable from the sensor to the opener. Look for cuts, loose terminals, rodent damage, or crushed insulation. Repair or replace damaged wiring before testing the system again.
Look for environmental interference.
Check whether direct sunlight, standing water, or reflective objects are affecting sensor performance. If the issue appears only during certain weather or lighting conditions, shielding the sensor or correcting drainage may solve the problem.
Test the garage door.
Restore power and operate the door several times. If it closes smoothly with solid sensor LEDs, the fault has likely been resolved. If problems continue despite completing these inspections, further repair or professional diagnosis may be necessary.
Also Read:
Quick Diagnosis Table
The table below summarizes common symptoms, their likely causes, and the most appropriate next step. It provides a quick reference when narrowing down the source of a garage door sensor problem.
| Symptom | Possible Cause | Recommended Solution |
|---|---|---|
| Door starts closing then reverses | Misaligned sensors | Realign and tighten sensor brackets |
| One sensor LED blinks | Beam not aligned | Adjust sensor position until LED remains solid |
| Both sensor LEDs are off | Power or wiring issue | Inspect wiring and opener power supply |
| Door closes only while holding wall button | Sensor circuit fault | Clean, align, and inspect sensors and wiring |
| Intermittent operation | Loose wiring or vibration | Tighten connections and secure brackets |
| Sensors work after cleaning | Dirty lenses | Clean regularly as preventive maintenance |
| Problem occurs only in bright sunlight | Sunlight interference | Shade or reposition the affected sensor |
| Visible cracks or broken bracket | Physical damage | Replace damaged sensor or mounting hardware |
| Corrosion around sensor | Moisture intrusion | Dry the area and replace water-damaged components if necessary |
| No obvious problem found | Aging sensor or opener issue | Continue with advanced diagnosis and repair methods in Part 2 |
How to Fix Each Common Cause
Now that you’ve identified the likely cause of the problem, the next step is choosing the right repair. Some garage door sensor issues can be fixed in minutes with basic tools, while others require replacement parts or professional service. Always disconnect power to the garage door opener before working on wiring or electrical components.
Clean Dirty Sensor Lenses
Dirty lenses are one of the easiest problems to fix and should always be your first step.
How to repair it:
- Unplug the garage door opener.
- Wipe both sensor lenses with a clean microfiber cloth.
- Remove cobwebs, insects, and dust around the brackets.
- Avoid abrasive cleaners or paper towels that could scratch the lens.
- Restore power and test the door several times.
Expected result:
The sensor LEDs should remain solid, and the garage door should close normally if dirt was blocking the infrared beam.
Realign the Sensors
Even a slight movement can interrupt the invisible beam between the sensors.
How to repair it:
- Loosen the mounting bracket slightly.
- Adjust the sensor until it points directly at the opposite sensor.
- Watch the indicator LED while making small adjustments.
- Tighten the bracket carefully without changing its position.
- Test the garage door multiple times.
Expected result:
A solid indicator light usually confirms proper alignment.
Repair Damaged Wiring
Loose or damaged wires prevent the opener from communicating with the sensors.
Safety note: Never repair wiring while the opener is connected to power.
How to repair it:
- Inspect the entire wire path.
- Tighten loose terminal screws.
- Replace badly damaged wire instead of wrapping it with excessive electrical tape.
- Secure wiring away from moving door components.
- Restore power and test operation.
If multiple wires are damaged or hidden inside walls, professional repair is usually the safer option.
Eliminate Sunlight Interference
Direct sunlight occasionally overwhelms the receiving sensor.
Possible solutions include:
- Installing a small shade over the sensor.
- Repositioning the sensor bracket slightly.
- Cleaning the lens to improve signal strength.
- Removing reflective objects nearby.
Test the garage door during the time of day when the problem normally occurs.
Replace Water-Damaged Sensors
Moisture damage is often permanent once corrosion reaches the internal electronics.
Signs replacement is necessary include:
- Rust inside the housing
- Cracked plastic
- Corroded terminals
- Persistent intermittent failures after drying
Install the replacement sensors according to the manufacturer’s instructions and verify alignment after installation.
Replace Physically Damaged Sensors
If the sensor housing is cracked or the mounting bracket is bent beyond repair, replacement is typically the most reliable solution.
Replace both sensors if:
- The manufacturer recommends replacing them as a matched pair.
- One sensor has failed after many years of service.
- Replacement parts are only sold as a complete kit.
Replace a Faulty Garage Door Opener Logic Board
If the sensors have power, are aligned, and pass every inspection but the opener still reports sensor errors, the control board may be defective.
Common signs include:
- Random error codes
- Multiple unrelated electrical problems
- Sensors testing good with a multimeter
- Wall controls behaving unpredictably
Logic board replacement should generally be performed by a qualified technician unless you have experience with appliance repair and electrical diagnosis.
Also Read:
Advanced Troubleshooting
Most sensor problems are solved by cleaning, alignment, or wiring repairs. However, persistent failures sometimes involve less obvious causes that require a more detailed diagnosis. These issues are less common but worth investigating before replacing expensive components.
Test Sensor Voltage
Using a digital multimeter, verify that the opener is supplying the correct low voltage to the sensors according to the manufacturer’s specifications.
If voltage is missing:
- The opener control board may have failed.
- Internal wiring may be damaged.
- A connector inside the opener could be loose.
Inspect Wire Continuity
Hidden wire breaks sometimes appear normal from the outside.
A continuity test can identify:
- Internal conductor breaks
- Rodent damage
- Corroded connections
- High-resistance wiring
Replace damaged sections rather than attempting temporary repairs.
Check for Loose Terminal Connections
Low-voltage terminals inside the opener can loosen over time due to vibration.
Inspect for:
- Loose screws
- Corrosion
- Burn marks
- Frayed wire ends
Reconnect wires securely before restoring power.
Review Diagnostic Error Codes
Many modern garage door openers include built-in diagnostics.
The owner’s manual may identify codes related to:
- Sensor alignment
- Sensor communication
- Wiring faults
- Control board failures
- Power supply problems
Checking these codes can significantly shorten the diagnosis process.
Test After Each Repair
Avoid making several repairs at once.
Instead:
- Complete one repair.
- Restore power.
- Test the door several times.
- Observe the sensor LEDs.
- Continue only if the problem remains.
This approach makes it much easier to identify which repair solved the issue.
Also Read:
When Repair Is Not Worth It
Garage door sensors are relatively inexpensive compared to the cost of repeated troubleshooting or unreliable operation. In some situations, replacement is the smarter investment.
Consider replacing the sensors or opener when:
- The sensors are more than 10–15 years old.
- Replacement parts are discontinued.
- Water damage has severely corroded internal components.
- Multiple repairs have failed to solve the problem.
- The opener control board and sensors are both failing.
- Repair costs approach the price of a new opener system.
If the garage door opener itself is outdated and lacks modern safety or security features, replacing the complete system may provide better long-term value.
Preventive Maintenance Tips
Regular maintenance helps prevent most garage door sensor problems before they interrupt daily use. A few minutes of inspection every few months can extend the life of the entire garage door system.
Helpful preventive maintenance includes:
- Clean both sensor lenses every few months.
- Check alignment whenever the garage door is serviced.
- Tighten loose mounting brackets.
- Inspect wiring for wear or rodent damage.
- Keep storage items away from the sensors.
- Remove cobwebs and debris around the doorway.
- Test the safety reversal system monthly.
- Avoid spraying water directly onto the sensors.
- Inspect for corrosion after severe weather.
- Address intermittent problems before they become permanent failures.
Preventive maintenance is much less expensive than emergency repairs or replacing damaged components.
Common Mistakes to Avoid
Many homeowners accidentally make troubleshooting more difficult by overlooking simple issues or attempting unsafe repairs.
Avoid these common mistakes:
- Replacing the sensors before checking alignment.
- Ignoring dirty lenses.
- Disconnecting wires without labeling them.
- Bypassing safety sensors to force the door closed.
- Adjusting garage door springs without proper training.
- Using abrasive cleaners on the sensor lenses.
- Assuming the opener is defective before inspecting the wiring.
- Overtightening brackets and shifting sensor alignment.
- Leaving damaged wiring exposed.
- Testing repairs only once instead of several operating cycles.
Working methodically almost always leads to a faster and less expensive repair.
When to Call a Professional
Many garage door sensor problems are suitable for DIY repair, but some situations require specialized tools, electrical testing, or experience with garage door systems.
Contact a professional if:
- The opener continues reporting sensor faults after basic troubleshooting.
- The control board appears defective.
- Wiring inside walls requires replacement.
- The garage door has damaged torsion or extension springs.
- The door is unusually heavy or difficult to lift manually.
- Electrical testing indicates an internal opener failure.
- You notice burning smells, melted wiring, or signs of overheating.
- The garage door behaves unpredictably after repairs.
Professional diagnosis can prevent unnecessary parts replacement and ensure the entire safety system operates correctly.
Estimated Repair Costs
| Repair | Estimated Cost | DIY or Professional |
|---|---|---|
| Clean sensor lenses | $0–$10 | DIY |
| Realign sensors | $0–$25 | DIY |
| Tighten mounting brackets | $0–$15 | DIY |
| Replace damaged wiring | $15–$100 | DIY or Professional |
| Replace one or both sensors | $30–$120 | DIY or Professional |
| Replace mounting brackets | $15–$50 | DIY |
| Repair opener wiring | $75–$200 | Professional |
| Replace opener logic board | $120–$300 | Professional |
| Replace complete garage door opener | $300–$800+ | Professional |
Actual costs vary depending on the garage door opener brand, local labor rates, and replacement part availability.
Final Thoughts
Understanding what causes garage door sensors to fail makes troubleshooting far less intimidating and helps you avoid replacing parts unnecessarily. In most cases, the problem comes down to dirty lenses, sensor misalignment, damaged wiring, moisture, physical impact, or power-related issues rather than a completely failed sensor. By following a logical inspection process, you can often identify the cause quickly and restore normal operation with simple maintenance.
Always prioritize safety before beginning any DIY repair. Disconnect power when working on wiring, avoid adjusting high-tension garage door springs, and never bypass the safety sensors to force the door closed. If troubleshooting points to an electrical issue inside the opener, a faulty logic board, or extensive wiring damage, professional repair is the safest and most reliable solution.
Regular inspection, cleaning, and preventive maintenance can significantly reduce future sensor failures while keeping your garage door operating safely and reliably. A little attention today can help prevent unexpected breakdowns, improve the lifespan of your garage door system, and ensure this critical safety feature continues protecting your family for years to come.

Engineer Ali Usman is a professional garage door expert and author at FixFasty, with over 10 years of hands-on experience in garage door systems and mechanical maintenance. He writes clear, step-by-step guides on garage door repairs, parts, and safety practices, helping homeowners fix problems correctly and maintain smooth, secure, and long-lasting garage door performance.