
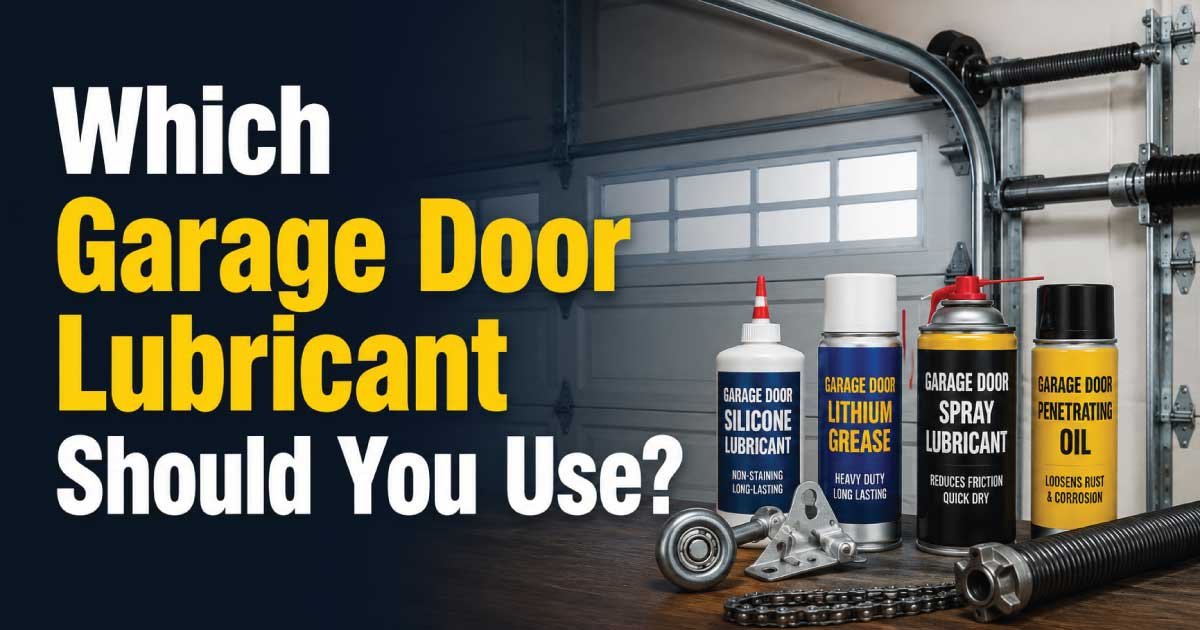
A noisy or slow-moving garage door is often a sign that it needs proper lubrication, but choosing the right product can be confusing. Many homeowners mistakenly use household oils, penetrating sprays, or grease that attracts dirt and creates bigger maintenance problems over time. The wrong lubricant can increase wear on rollers, hinges, springs, and tracks, leading to unnecessary repairs or even premature replacement of important components.
Knowing which garage door lubricant should you use is essential for keeping your garage door operating smoothly, quietly, and safely. Regular lubrication reduces friction, protects metal parts from rust, extends the life of moving components, and helps prevent expensive breakdowns. However, not every part of a garage door should be lubricated, and different door materials may require different products.
In this comprehensive repair guide, you’ll learn how garage door lubrication works, the warning signs that indicate maintenance is needed, the most common reasons doors become noisy or difficult to operate, essential safety tips before starting, the tools you’ll need, and a step-by-step troubleshooting process to identify lubrication-related problems before they become costly repairs.
Common Signs and Symptoms
A garage door rarely stops working without giving early warning signs. In many cases, poor lubrication causes gradual changes in performance that homeowners overlook until the door becomes difficult to operate. Recognizing these symptoms early allows you to perform simple preventive maintenance instead of dealing with damaged hardware later.
Common signs include:
- Loud squeaking or screeching during operation
- Grinding or scraping noises
- Jerky or uneven door movement
- Slower opening or closing speed
- Vibrating or shaking while moving
- Metal-on-metal rubbing sounds
- Rust forming on hinges, springs, or rollers
- Rollers sticking inside the tracks
- Increased strain on the garage door opener
- Door requiring more force to move manually
You may also notice that these symptoms become worse during seasonal weather changes. Cold temperatures can thicken old lubricants, while dust and humidity may contaminate worn-out products, increasing friction throughout the system.
Not every noisy garage door needs major repairs. In many cases, proper inspection, cleaning, and applying the correct garage door lubricant restore smooth operation within minutes.
How the Appliance or System Normally Works
Understanding how a garage door operates makes it much easier to identify where lubrication is needed and why using the correct product matters. Every moving component works together to lift hundreds of pounds safely while reducing wear through controlled movement.
A typical residential garage door consists of:
- Rollers that travel inside metal tracks
- Hinges connecting each door section
- Extension or torsion springs that counterbalance the door’s weight
- Bearing plates supporting rotating shafts
- Pulleys or cable drums depending on door design
- A garage door opener that supplies lifting force
- Cables that transfer spring tension to the door
When everything is properly maintained, these moving parts glide with minimal friction. Specialized garage door lubricants create a thin protective coating that reduces metal-to-metal contact without collecting excessive dirt.
It’s equally important to understand what should not be lubricated. Tracks generally should remain clean rather than coated with lubricant because oily residue attracts dust, sand, and debris. Over time, that buildup can actually make rollers stick and create additional noise.
Think of lubrication as preventive maintenance rather than a repair. A quality lubricant cannot fix bent tracks, broken rollers, stretched springs, or worn bearings, but it significantly slows normal wear and helps these parts last longer.
Most Common Reasons This Problem Happens
Garage door lubrication problems usually develop gradually instead of appearing overnight. Understanding the most common causes helps you diagnose the issue accurately and avoid replacing parts that are still in good condition.
Using the Wrong Lubricant
One of the most common mistakes is applying products that were never designed for garage doors.
Why it happens:
- Household oil seems convenient.
- Multi-purpose sprays are mistaken for lubricants.
- Heavy grease appears to provide better protection.
Symptoms:
- Sticky residue
- Dirt buildup
- Continued squeaking
- Rollers collecting grime
How to identify it:
Inspect hinges and rollers. Thick black residue or oily dirt indicates an unsuitable lubricant.
Lack of Regular Maintenance
Garage doors often receive little attention until they become noisy.
Why it happens:
- Maintenance schedules are forgotten.
- The door appears to function normally.
- Homeowners assume lubrication is unnecessary.
Symptoms:
- Gradually increasing noise
- Stiff hinges
- Dry-looking metal surfaces
- Rough operation
How to identify it:
If the moving joints appear dry or show signs of rust, lubrication has likely been neglected.
Dirt and Dust Contamination
Dust mixes with old lubricant and forms abrasive deposits that increase friction instead of reducing it.
Why it happens:
- Wind carries dirt into the garage.
- Lubricant attracts debris.
- Cleaning is skipped before reapplication.
Symptoms:
- Grinding noises
- Visible buildup
- Sticky rollers
- Sluggish movement
How to identify it:
Look closely around hinges, roller stems, and bearings for dark, gritty deposits.
Rust and Corrosion
Moisture is one of the biggest enemies of garage door hardware.
Why it happens:
- Humid climates
- Water entering the garage
- Condensation
- Lack of protective lubricant
Symptoms:
- Orange rust spots
- Rough movement
- Loud creaking
- Reduced flexibility
How to identify it:
Inspect springs, hinges, roller shafts, and bearing plates for visible corrosion.
Worn Rollers or Hinges
Sometimes lubrication isn’t enough because the hardware itself has reached the end of its service life.
Why it happens:
- Years of normal use
- Heavy doors
- Poor maintenance history
Symptoms:
- Persistent noise after lubrication
- Loose hinges
- Cracked rollers
- Wobbling movement
How to identify it:
Move the door manually with the opener disconnected. Excessive play or damaged components usually indicates replacement rather than additional lubrication.
Incorrect Lubrication Locations
Applying lubricant everywhere can actually create new problems.
Why it happens:
- Lack of maintenance knowledge
- Assuming every metal surface needs oil
Symptoms:
- Dirty tracks
- Roller slippage
- Increased debris accumulation
How to identify it:
If the tracks are oily while hinges remain dry, lubricant has been applied incorrectly.
Safety Precautions Before Troubleshooting
Garage door maintenance may appear simple, but the system contains heavy moving parts and high-tension springs capable of causing serious injuries. Taking a few safety precautions before beginning any inspection helps reduce unnecessary risks and ensures you can work confidently.
Follow these safety tips before troubleshooting:
- Disconnect power to the garage door opener.
- Close the garage door completely whenever possible.
- Keep children and pets away from the work area.
- Wear safety glasses to protect against dust and debris.
- Use work gloves when handling metal components.
- Position a sturdy ladder on a level surface.
- Never loosen torsion springs or spring brackets.
- Avoid placing fingers between door sections.
- Keep clothing and hair away from moving parts.
- Test the door manually before restoring power.
If you notice broken springs, frayed cables, bent tracks, or damaged mounting brackets during your inspection, stop immediately. These repairs involve stored mechanical energy and are best handled by a qualified garage door technician rather than as a DIY repair.
Tools Required
Having the proper tools makes garage door maintenance faster, safer, and more effective. Most homeowners already own many of these basic items.
| Tool | Purpose |
|---|---|
| Silicone-based or garage door lubricant | Lubricates moving metal parts |
| Clean microfiber cloth | Removes old lubricant and dirt |
| Soft brush | Cleans dust from hardware |
| Step ladder | Reaches upper hinges and springs safely |
| Safety glasses | Protects eyes from debris |
| Work gloves | Prevent cuts and improve grip |
| Mild household cleaner | Cleans dirty hardware before lubrication |
| Flashlight | Inspects hidden moving components |
Step-by-Step Troubleshooting Guide
A systematic inspection helps identify whether lubrication alone will solve the problem or if damaged parts require replacement. Working in a logical order also prevents missing hidden issues that contribute to noisy or unreliable operation.
Step 1: Listen to the Door During Operation
Inspect:
Operate the door through one full opening and closing cycle while listening carefully.
Why it matters:
Different sounds often point to different components.
Expected result:
You should identify whether noise comes from hinges, rollers, springs, or the opener.
What to do next:
Move to a closer visual inspection.
Step 2: Inspect Moving Hardware
Inspect:
Check rollers, hinges, bearings, springs, and brackets.
Why it matters:
Visible wear often explains recurring noise.
Expected result:
Locate dry, rusty, loose, or damaged components.
What to do next:
Clean dirty parts before applying lubricant.
Step 3: Remove Dirt and Old Lubricant
Inspect:
Wipe away accumulated grime around moving joints.
Why it matters:
Fresh lubricant works best on clean surfaces.
Expected result:
Metal parts should appear clean and move more freely.
What to do next:
Apply the recommended lubricant only where needed.
Step 4: Apply the Correct Garage Door Lubricant
Inspect:
Lubricate roller bearings, hinge pivot points, springs, bearing plates, and metal shafts according to the manufacturer’s guidance.
Why it matters:
Proper lubrication reduces friction without attracting excessive debris.
Expected result:
Moving parts should operate more quietly.
What to do next:
Cycle the door several times to distribute the lubricant evenly.
Step 5: Check for Remaining Noise
Inspect:
Operate the garage door again after lubrication.
Why it matters:
Persistent noises often indicate worn mechanical parts rather than a lubrication issue.
Expected result:
Noticeably smoother and quieter operation.
What to do next:
Identify any individual component that still produces noise.
Step 6: Inspect the Tracks
Inspect:
Look for dents, debris, loose fasteners, or misalignment.
Why it matters:
Many homeowners mistake track problems for lubrication issues.
Expected result:
Tracks should be clean, straight, and free of obstructions.
What to do next:
If tracks are damaged, repair or replacement may be necessary instead of additional lubrication.
Also Read:
Quick Diagnosis Table
This quick reference table helps narrow down common garage door problems based on the symptoms you observe. While several issues can produce similar warning signs, matching the symptom with its likely cause makes troubleshooting faster and prevents unnecessary repairs.
| Symptom | Possible Cause | Recommended Solution |
|---|---|---|
| Loud squeaking | Dry hinges or rollers | Clean and apply the correct garage door lubricant |
| Grinding noise | Dirt-contaminated hardware | Remove debris and relubricate moving parts |
| Jerky movement | Dirty rollers or worn bearings | Clean components and inspect for wear |
| Rust on hardware | Moisture exposure | Remove light rust and apply protective lubricant |
| Door still noisy after lubrication | Worn rollers or hinges | Inspect components for replacement |
| Sticky roller movement | Incorrect lubricant used | Clean residue and use a silicone- or garage-door-specific lubricant |
| Opener working harder than normal | Increased mechanical friction | Inspect, lubricate, and check door balance |
| Tracks coated with oil | Lubricant applied incorrectly | Clean tracks thoroughly and keep them dry |
How to Fix Each Common Cause
Now that you’ve identified the likely cause of the problem, it’s time to make the appropriate repair. In many cases, restoring smooth operation is as simple as cleaning and lubricating the right components. However, some problems require replacing worn parts instead of adding more lubricant. Always address the root cause rather than treating the symptoms.
Fix 1: Replace the Wrong Lubricant
Using the wrong product is one of the biggest reasons garage doors continue making noise after maintenance.
How to fix it:
- Disconnect power to the garage door opener.
- Wipe away as much old lubricant as possible with a clean microfiber cloth.
- Use a mild degreaser if heavy grease or sticky residue is present.
- Allow the hardware to dry completely.
- Operate the door several times to distribute the lubricant evenly.
- Apply a thin coat of a garage door-specific lubricant or a silicone-based lubricant to:
- Roller bearings
- Hinges
- Torsion springs
- Bearing plates
- Pivot points
Avoid using:
- Cooking oil
- Motor oil
- WD-40 as the primary lubricant (it is mainly a cleaner and water displacer)
- Heavy chassis grease
- Petroleum jelly
Fix 2: Clean Dirty Hardware
Dust mixed with old lubricant creates an abrasive paste that increases wear.
Repair steps:
- Brush loose dirt from hinges and rollers.
- Wipe every lubricated surface clean.
- Remove hardened buildup around bearings.
- Apply fresh lubricant only after cleaning.
If your garage is especially dusty, consider cleaning the hardware before every lubrication cycle.
Fix 3: Remove Light Rust
Surface rust doesn’t always require replacing the part.
Repair steps:
- Scrub light corrosion with a nylon brush or fine steel wool.
- Wipe away loose rust particles.
- Apply garage door lubricant to protect the cleaned surface.
- Cycle the door several times.
If corrosion has weakened springs, cables, or hinges, replacement is the safer option.
Fix 4: Replace Worn Rollers
Rollers eventually wear out regardless of lubrication.
Signs replacement is needed:
- Flat spots
- Cracked wheels
- Excessive wobble
- Broken bearings
- Loud clicking after lubrication
Many homeowners upgrade from steel rollers to quality nylon rollers with sealed bearings because they operate more quietly and require less maintenance.
Fix 5: Tighten Loose Hardware
Garage door vibration gradually loosens fasteners.
Inspect and tighten:
- Hinge bolts
- Roller brackets
- Track mounting bolts
- Opener mounting hardware
Do not overtighten bolts attached to moving hinges because they must pivot freely.
Fix 6: Clean the Tracks
Tracks guide the rollers but should not be lubricated.
Instead:
- Vacuum loose dirt.
- Wipe with a damp cloth.
- Remove hardened debris.
- Check for dents or bends.
A clean track provides smoother movement than an oily one.
Advanced Troubleshooting
Sometimes lubrication isn’t the real problem. If your garage door remains noisy or difficult to operate after proper maintenance, deeper mechanical issues may be responsible. Performing a more detailed diagnosis helps determine whether additional repairs are needed or if it’s time to contact a professional.
Check Door Balance
Disconnect the opener using the emergency release cord.
Lift the door manually until it reaches about halfway.
A properly balanced door should remain in place.
If it quickly falls or rises on its own, the spring tension is incorrect. This is not a DIY adjustment because torsion and extension springs store enough force to cause serious injury.
Inspect the Garage Door Opener
Sometimes the opener—not the door—is producing the noise.
Look for:
- Loose chain or belt
- Worn drive gear
- Loose mounting brackets
- Motor vibration
Consult the opener manufacturer’s maintenance recommendations before making adjustments.
Examine Bearings
Bearing plates allow the torsion shaft to rotate smoothly.
Signs of bearing failure include:
- Grinding noises
- Rough shaft rotation
- Metal dust
- Side-to-side movement
Bearings usually require replacement rather than additional lubrication once they begin failing.
Inspect Cables
Garage door cables should remain:
- Straight
- Properly wound
- Free of rust
- Free of broken strands
Never attempt to remove or replace lift cables while they are under spring tension.
Evaluate Spring Condition
A spring nearing the end of its life may produce:
- Loud popping
- Uneven movement
- Reduced lifting power
- Visible gaps in the spring
Springs should only be replaced by trained technicians using the proper tools and procedures.
Also Read:
When Repair Is Not Worth It
Although lubrication and minor repairs solve many garage door problems, there comes a point when replacing components—or even the entire door—is the better investment. Continuing to repair severely worn systems can become more expensive than upgrading to newer, safer equipment.
Replacement is often the smarter option when:
- Multiple rollers have failed.
- Hinges are badly worn throughout the door.
- Tracks are severely bent.
- Springs have reached the end of their service life.
- The door has extensive rust damage.
- Repair costs approach half the price of a replacement system.
- The door lacks modern safety features.
- Structural panels are cracked or warped.
If your garage door is more than 15–20 years old and requires frequent repairs, replacing the complete system may provide better reliability, improved insulation, quieter operation, and lower long-term maintenance costs.
Preventive Maintenance Tips
Regular maintenance is the easiest way to prevent noisy operation and extend the life of your garage door. A simple maintenance routine only takes a few minutes several times a year and can prevent many common problems before they develop.
Follow these preventive maintenance tips:
- Lubricate moving parts every 6–12 months, or more often in harsh climates.
- Clean hardware before applying fresh lubricant.
- Keep tracks clean and dry.
- Tighten loose bolts and brackets during inspections.
- Test the door balance periodically.
- Listen for new noises during operation.
- Inspect rollers for wear.
- Check hinges for cracks.
- Look for rust after rainy or humid weather.
- Test the opener’s auto-reverse safety feature monthly.
- Replace worn weather seals to reduce moisture and debris entering the garage.
Preventive maintenance is far less expensive than replacing damaged rollers, springs, bearings, or an overloaded garage door opener.
Common Mistakes to Avoid
Many garage door maintenance problems are caused by well-intentioned homeowners using incorrect methods. Avoiding these common mistakes will help protect your garage door and ensure your maintenance efforts are effective.
Common mistakes include:
- Using heavy grease instead of garage door lubricant.
- Spraying lubricant directly onto the tracks.
- Ignoring dirt before lubrication.
- Applying excessive amounts of lubricant.
- Forgetting to inspect rollers and hinges for wear.
- Attempting to adjust torsion springs without training.
- Ignoring unusual noises until major damage occurs.
- Using household oils that attract dust.
- Skipping regular inspections.
- Assuming lubrication fixes every garage door problem.
Proper diagnosis is just as important as proper lubrication.
When to Call a Professional
Many lubrication and maintenance tasks are suitable for homeowners, but some repairs involve significant safety risks. Knowing when to stop a DIY repair helps prevent injuries and protects your garage door from further damage.
Contact a qualified garage door technician if you notice:
- Broken torsion or extension springs
- Frayed or snapped lift cables
- Bent or severely damaged tracks
- Door falling rapidly when disconnected
- Door stuck halfway open
- Garage door opener motor overheating
- Persistent grinding after replacing worn rollers
- Structural damage to door panels
- Loose spring anchor brackets
- Repeated opener safety reversal without an obvious obstruction
Professional technicians have specialized tools for safely handling high-tension components that should never be disassembled by homeowners.
Also Read:
Estimated Repair Costs
The exact cost depends on your location, door size, and hardware quality, but the following estimates provide a reasonable guideline.
| Repair | Estimated Cost | DIY or Professional |
|---|---|---|
| Garage door lubrication | $10–$25 | DIY |
| Roller replacement | $75–$200 | DIY (some models) / Professional |
| Hinge replacement | $40–$150 | DIY |
| Bearing replacement | $100–$250 | Professional |
| Track adjustment | $125–$300 | Professional |
| Spring replacement | $200–$500 | Professional |
| Cable replacement | $150–$300 | Professional |
| Garage door opener repair | $150–$400 | Professional |
| Complete garage door replacement | $800–$3,500+ | Professional |
Final Thoughts
Choosing which garage door lubricant should you use is about more than simply stopping an annoying squeak. The right lubricant protects critical moving parts, minimizes friction, reduces wear, and helps your garage door operate safely and efficiently for years. Just as important, knowing where not to apply lubricant—such as the tracks—prevents dirt buildup and unnecessary maintenance problems.
Routine inspections, cleaning, and proper lubrication are among the simplest forms of preventive maintenance a homeowner can perform. By recognizing early warning signs, using a garage door-specific or high-quality silicone-based lubricant, and replacing worn components when necessary, you can avoid many costly repairs and extend the life of your entire garage door system.
Always prioritize safety during any DIY repair. While lubrication, cleaning, and basic inspections are well within the abilities of most homeowners, repairs involving springs, lift cables, or major structural components should be left to experienced professionals. With consistent maintenance and prompt attention to developing issues, your garage door will remain quieter, smoother, and more reliable throughout the year.

Engineer Ali Hasan is a garage door expert and the founder of FixFasty. With over 16 years of experience in mechanical systems and home maintenance, he provides practical, step-by-step guides on garage door installation, repairs, and maintenance, helping homeowners keep their garage doors safe, reliable, and long-lasting.